Where to Plug Modem Into Router: Step-by-Step Guide
Learn exactly where to plug your modem into your router, plus setup tips to optimize home networking and avoid common mistakes. Step-by-step instructions, safety tips, and troubleshooting included.

To connect the two devices, plug an Ethernet cable from the modem’s Ethernet port to the router’s WAN/Internet port. Power cycle both devices, wait for the lights to stabilize, then test your connection on a computer or mobile device. If you’re using a modem-router combo, follow the manual for bridge or bypass settings to avoid double NAT.
The Basics: what you’re connecting and why
When you’re setting up home internet, the essential relationship is simple: the modem receives the signal from your internet service provider and converts it into an internet-facing connection. The router then takes that signal and distributes it to all your devices via wired Ethernet ports and Wi‑Fi. If you’ve ever asked, “where to plug modem into router,” the answer is direct: use a single Ethernet link from the modem to the router’s WAN/Internet port. This wiring ensures the router can manage local traffic, assign IP addresses, and route packets efficiently. Understanding this flow helps you diagnose slowdowns, decide on appropriate security settings, and plan future expansions without guesswork. In this guide, Modem Answers helps homeowners and renters confidently wire these devices for stable, reliable home networking. We’ll cover typical setups, edge cases, and practical checks you can perform right away.
The signal flow: ISP → modem → router → devices
The internet signal travels from the provider into your modem, which translates it into an Ethernet-based feed. The router then takes that feed and creates a local network (LAN) with its own IP addressing scheme. Your devices connect to the router either through wired LAN ports or via Wi‑Fi. The critical takeaway is that your router sits between the modem and all other devices; this position lets you manage traffic, apply security rules, and implement features like guest networks and parental controls. If you ever wonder how the pieces fit together, remember that the router is your network supervisor, and the modem is the gateway to the wider internet.
The standard wired connection: what you’ll typically see
In most homes, you’ll locate a dedicated WAN or Internet port on the back of the router. It’s usually labeled “WAN,” “Internet,” or colored differently from the other ports. The modem has one or more Ethernet ports, and you’ll connect a single Ethernet cable from one of those ports to the router’s WAN port. After you make this connection, you’ll power cycle the devices: unplug and reinsert power after a short pause to ensure the router recognizes the modem’s signal. Once the lights settle, you should be able to reach a test page or an online resource to confirm connectivity. If you’re unsure about port labels, consult the router’s quick-start guide or the manufacturer’s support site for a diagram.
Special cases: bridging and gateway devices
Some households use a combined modem/router provided by the ISP, or you may own separate devices from different brands. When a single device acts as both modem and router, you might encounter double NAT if both devices try to route traffic. In many configurations, enabling bridge mode on the ISP device effectively passes the internet signal to your own router, letting it perform all routing duties. If you have a true gateway device, you’ll want to disable the router functions on the gateway or configure it as a bridge so your personal router can manage your home network. Always check the user manual or support articles for specific steps, as options and terminology vary across brands.
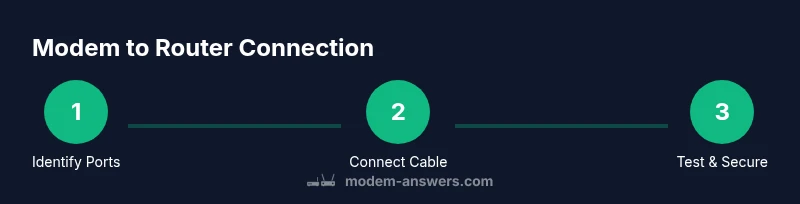
Step-by-step wiring guide (hardware orientation and checks)
Before you touch any cables, identify the ports: locate the modem’s Ethernet port (often labeled LAN) and the router’s WAN/Internet port. Use a high-quality Ethernet cable (Cat5e or better) to connect these two ports. After the physical connection, plug in the modem first and allow it to boot fully, then plug in the router. Wait for the router’s WAN/Internet indicator to stabilize before testing on a connected device. If your router broadcasts a default network name (SSID) and password, you can try connecting a device to test the connection. If you don’t obtain a page after several minutes, verify that the cables are seated firmly, check for LED indicators, and consider power cycling again. Keep a small notebook handy to record any settings you change in the router’s admin panel, such as SSID, password, or security mode.
Testing the connection and verifying performance
Once both devices are powered and connected, perform a quick test. Open a web browser and navigate to a known site to confirm basic access. Run a simple speed test to gauge download and upload speeds, which helps you confirm that the connection aligns with your ISP’s plan. If pages load slowly or pages stall, check for software updates on the router, ensure there are no misconfigurations, and verify that you aren’t experiencing interference on the Wi‑Fi network. If you still see issues, a factory reset of the router (after saving your settings) can help restore default behavior, and you can reconfigure from scratch. Modem Answers recommends keeping track of your network’s devices and software versions to maintain reliability over time.
Security, optimization, and ongoing maintenance
With a wired connection, you have a solid foundation for performance. To maximize safety and efficiency, enable WPA3 (or WPA2 if necessary) on the router’s wireless settings, create a strong admin password, and disable WPS if possible. Consider separating guest networks from your main network to reduce risk, and keep firmware up to date on both modem and router. If you notice your devices frequently reconnect or you suspect interference, adjust the router’s channel selection or enable band steering to optimize performance. Routine maintenance, such as periodic reboots and firmware checks, helps maintain a stable, fast network and reduces the chance of security vulnerabilities over time.
Tools & Materials
- Ethernet cable (Cat5e or better)(At least 1.5–3 meters for typical setups)
- Modem(Device provided by your ISP; ensure it’s powered and booted)
- Router(Any consumer router that fits your home size and features)
- Power adapters and outlets(Ensure outlets are accessible and surge-protected)
- Computer or smartphone(Used to test connectivity and access the router admin page)
Steps
Estimated time: 15-25 minutes
- 1
Power down and prep
Power off both the modem and the router. Unplug their power cords and confirm all indicators are off. This reduces the risk of hardware damage when you connect cables.
Tip: Having a clear workspace helps you avoid accidentally disconnecting the wrong cable. - 2
Identify ports
Locate the modem’s Ethernet port (LAN). Find the router’s WAN/Internet port, usually labeled or color-differentiated. Confirm both devices are nearby and you have a suitable Ethernet cable.
Tip: If labels aren’t clear, consult the device manual or manufacturer’s site for port diagrams. - 3
Make the primary connection
Insert one end of the Ethernet cable into the modem’s Ethernet port and the other end into the router’s WAN/Internet port. Ensure the connector clicks firmly in place.
Tip: Avoid using a secondary LAN port on the router for this connection; it must be the WAN port. - 4
Power on in sequence
Plug in the modem first and allow it to boot completely (lights stabilize). Then plug in the router and wait for it to boot and establish a connection with the modem.
Tip: If you see blinking lights or no connection, power cycle both devices again in the same order. - 5
Test connectivity
Connect a computer or phone to the router via Ethernet or Wi‑Fi and open a web page. If the page loads, your network is live. If not, revisit connections and LED indicators.
Tip: Testing via multiple devices helps confirm if the issue is device-specific or network-wide. - 6
Review router settings
Access the router admin page using its IP address (often 192.168.0.1 or 192.168.1.1). Check WAN status, confirm the network name is broadcast, and enable basic security settings.
Tip: Document your credentials and reset prompts before making changes, in case you need to revert. - 7
Optional optimization
Change default SSID to a unique name and set a strong password. Enable WPA3 (or WPA2 if unavailable) and consider guest networks for visitors.
Tip: Disable WPS to improve security; update firmware if available.
FAQ
Do I always need a separate router if I have a modem from my ISP?
No. Some modems are combined with routing capabilities enough for small households, but a separate router often provides better performance, control, and features. If your ISP device is a gateway, you can disable its routing functions or enable bridge mode to let your own router handle networking.
You can often avoid a separate router if your ISP device already includes routing; if not, a dedicated router offers more features. Bridge mode can be used when you want your router to handle routing.
Can I connect a modem directly to a computer?
Technically possible for a direct connection, but this bypasses the router’s features like Wi‑Fi, firewall, and DHCP. For stable home networks, connect the modem to a router and then to devices.
You could connect a modem straight to a computer, but you’d miss Wi‑Fi and security features. Use a router for a proper home network.
What is the difference between the modem’s port and the router’s WAN port?
The modem’s Ethernet port provides the internet signal from your ISP. The router’s WAN port accepts that signal to initialize a local network and distribute connectivity to other devices.
The modem gives you the internet feed; the router creates your home network from that feed.
What should I do if I have double NAT problems after setup?
Double NAT occurs when both devices perform routing functions. Enabling bridge mode on the ISP device or placing the network in passthrough mode on the router often resolves it.
Double NAT can slow things down. Use bridge or passthrough modes to fix it.
How can I verify the connection is using the correct WAN port?
Access the router’s status page and look for WAN/Internet section to confirm activity on the correct port. If unsure, check the device labels or consult the manual.
Check the router status page for WAN activity; ensure the port labeled Internet is being used.
What basic security steps should I take after wiring?
Change the default admin password, enable WPA3/WPA2 encryption, disable WPS, and keep firmware up to date. Consider a guest network for visitors.
Update firmware, set strong passwords, and enable secure encryption to protect your network.
Watch Video
Key Takeaways
- Connect modem to router via WAN port with solid Ethernet.
- Power cycle in the correct order to avoid NAT issues.
- Test connectivity on multiple devices to confirm reliability.
- Secure the network with updated firmware and strong credentials.