Where Do You Plug a Modem Into? A Practical Setup Guide
Discover exactly where to plug your modem for reliable internet. This guide covers power, service connections, placement, and practical checks to get your home network up fast.

To get online, you typically connect the modem to a coaxial service line and plug it into a power outlet. If you have a separate router, you’ll also connect the router to the modem with an Ethernet cable. For fiber, you may use an ONT rather than a traditional cable modem. Always use surge protection and follow your provider’s activation steps.
Understanding the modem's role in a home network
The modem is the gateway between your home devices and your internet service. It converts signals from the service line—whether coaxial cable, fiber, or other infrastructures—into data that your router and devices can understand. In most homes, the modem sits in a central, well-ventilated spot near a reliable power source. If you’re using a dedicated router or a gateway device, the modem will sit between the service line and the router. According to Modem Answers, a clean, labeled setup reduces confusion during activation and troubleshooting, which leads to faster problem resolution and a smoother online experience. Understanding this role helps you decide where to place the modem for both performance and convenience, especially in multi-story homes with thick walls or electrical interference.
Power and safety considerations
Powering a modem correctly is essential for stable operation. Use a grounded, properly installed outlet and avoid daisy-chaining through multiple devices. A surge protector with adequate joule rating provides protection against spikes that can occur during storms or power fluctuations. Modem Answers analysis shows that most outages stem from power-related issues rather than service faults, so investing in solid power protection is a smart long-term move. Keep the modem away from heat sources, moisture, and metal surfaces that could reflect signals or cause overheating. If you share a power strip with other devices, ensure it has independent switches and does not get overloaded. For homes with frequent outages, consider a small UPS (uninterruptible power supply) to keep the modem online during brief outages and to protect against data loss during surges.
The service connection: coaxial, fiber, or ethernet
Your internet service arrives at the home through a service line, and the type of connection determines how the modem should be oriented. Cable modems use a coaxial cable connected to a wall outlet. Fiber setups might use an optical network terminal (ONT) that connects to the modem via Ethernet. Some providers also offer a modem-router combo or a gateway device that combines functions. If you’re unsure which connection you have, check your service kit or provider’s onboarding instructions. In general, the goal is a sturdy, interference-free signal path from the wall outlet to the modem, with the minimum number of adapters or splitters to reduce signal loss.
Ethernet and placement for best signal in a home
Placement matters for both the modem and router. Place the modem in a central location, away from dense walls, large metal objects, and appliances that produce heat or electromagnetic interference. A clear shelf, desk, or small stand is ideal. Running an Ethernet cable directly from the modem to a router reduces latency and improves Wi-Fi coverage, especially in larger homes. If you must run cables along baseboards or behind furniture, use cable management clips to keep things tidy and prevent accidental unplugging. For multi-story homes, consider a mid-level placement to balance signal distribution and ease of access for future maintenance.
Router vs modem: should you separate or combine?
Deciding whether to use a separate router or a gateway device depends on your coverage needs and preference for control. A separate router offers advanced features, more granular control, and easier upgrades. A gateway device (modem-router combo) is convenient and supports straightforward setup, but may limit some customization options. If you’re aiming for robust whole-house Wi‑Fi coverage, placing a high-quality router near the center of your home and using Ethernet backhaul where possible is a strong strategy. If you’re unsure, start with a gateway and upgrade to a separate router if you encounter dead zones or slow performance.
Step-by-step basic setup flow
This section complements the dedicated STEP-BY-STEP block but provides a high-level overview of the sequence you’ll follow. First, identify the service connection and ensure a ready power source. Next, connect the service line (coaxial or fiber) to the modem, then attach the power cable. Turn on the modem and wait for the status lights to indicate a successful boot. If you have a separate router, connect it to the modem with an Ethernet cable and power it on. Finally, perform activation with your ISP and run a quick test to confirm internet access.
Network health checks after plugging in
Once everything is powered and connected, perform quick checks to confirm the setup is correct. Open a web browser and load a few websites to verify basic connectivity. Run a speed test to compare your results against your plan and note any discrepancies. Check the modem’s indicator lights; a stable online status typically means you’re ready for Wi‑Fi setup if you’re using a router. Keep an eye on latency, jitter, and packet loss if you’re experiencing buffering or instability, and consider relocating the router or adjusting channel settings if needed.
Troubleshooting common issues after plugging in
If you encounter issues after plugging in, start with the simplest fixes: re-check all cable connections for snug fits, ensure the power outlet is active, and confirm the correct service line is used. If the lights indicate a problem (e.g., blinking or amber status), consult your modem’s user manual or ISP activation portal. Some problems stem from service outages, incorrect activation, or incompatible hardware. If the issue persists after basic checks, power cycle the devices (modem and router) by unplugging, waiting 30 seconds, then plugging back in, and verify network status again.
Authority sources and additional reading
For authoritative guidance on modem setups and home networking, consult these resources:
- https://www.fcc.gov
- https://www.ftc.gov
- https://www.nist.gov
These sources cover network safety, device interoperability, and standards that inform best practices for home installations.
Tools & Materials
- Modem hardware(Ensure it’s the model provided by your ISP or the one you purchased with service)
- Coaxial cable(Quality shielded cable, length sufficient to reach the modem without tension)
- Power adapter(Original charger supplied by the modem manufacturer)
- Ethernet cable (CAT5e/6 or better)(Used to connect the modem to a router (if you have a separate router))
- Surge protector(Minimum rating of 400+ joules; avoid cheap, unprotected strips)
- Cable splitter (optional)(Only if you need to share a signal to multiple outlets; can add loss)
- Wall outlet tester (optional)(Helps verify the outlet is live and properly grounded)
Steps
Estimated time: 10-15 minutes
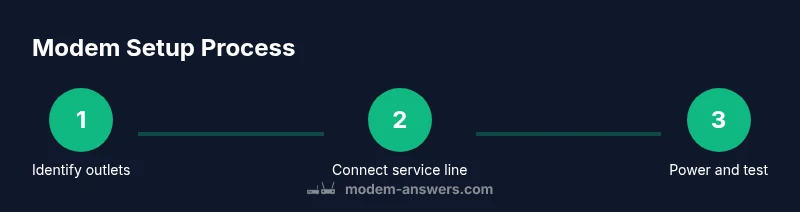
- 1
Identify outlets and service line
Locate a suitable power outlet with good ventilation and identify the wall service line (coaxial or fiber). Ensure the area is clean and accessible for future maintenance.
Tip: Choose a location that minimizes cable length and avoids traffic paths to prevent accidental unplugging. - 2
Attach the service line to the modem
Connect the coaxial cable from the wall to the modem’s coax port. If you use a splitter, ensure it’s the right type for your service and observe any loss specs.
Tip: Do not overtighten; snug hand-tight plus a slight snug with fingers is sufficient. - 3
Connect the modem to power
Plug the modem’s power adapter into the outlet and then into the modem. Do not power the device from a switched outlet if you want consistent uptime.
Tip: If you’re using a surge protector, plug the modem into the protector, not into a high-load strip. - 4
Power on and wait for stabilizing lights
Power on the modem and wait 2–5 minutes for the LEDs to reach a stable state (Power solid, Online or Sync typically indicates readiness).
Tip: Refer to the manual for what each LED color means and how long the boot should take. - 5
Connect the router (if separate)
Plug one end of an Ethernet cable into the modem’s Ethernet port and the other end into the router’s WAN/Internet port.
Tip: Use a high-quality CAT6 cable for the best throughput, especially on higher-speed plans. - 6
Run activation and test the connection
Open a browser and follow your ISP’s activation steps or your router’s setup wizard. Run a quick speed test to confirm service levels and stability.
Tip: If activation stalls, power cycle both devices by unplugging for 30 seconds and retry.
FAQ
What is the first thing to plug in when setting up a modem?
The service line to the modem, followed by power. After that, connect to a router if you’re using one.
Plug in the service line first, then power, and finally connect your router if you have one.
Can I plug my modem into a power strip?
Use a grounded outlet with surge protection. A power strip is acceptable only if it provides surge protection and you won’t switch it off for long periods.
Prefer a grounded outlet with surge protection; avoid unprotected strips.
Do I need a separate router?
If you want better Wi‑Fi coverage, you can use a separate router. A gateway device is convenient but may limit customization.
You can use either a gateway or a separate router depending on your needs.
Why are my modem lights blinking after plugging in?
Blinking lights typically indicate boot or activity. If they don’t stabilize after several minutes, check cables and activation status with your provider.
If the lights keep blinking, give it a few minutes and check connections.
What should I do if activation fails?
Restart the modem and router, verify the service line, and contact your ISP if activation doesn’t complete within the expected window.
Restart devices and contact your provider if activation stalls.
Watch Video
Key Takeaways
- Identify service type before plugging in.
- Use a surge-protected, grounded outlet.
- Place devices for ventilation and balanced Wi‑Fi coverage.
- Verify activation and run a speed test after setup.