How to Install a Modem: A Practical Step-by-Step Guide
A comprehensive, user-friendly guide to install a modem, activate service, and secure your home network. From prerequisites to troubleshooting, follow practical steps to get online quickly and safely.

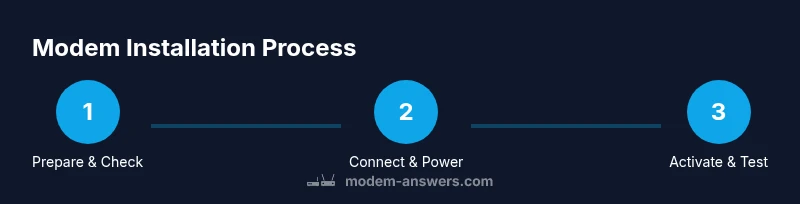
By the end of this guide you will have a fully installed modem ready to connect to your home network. You’ll learn how to power up the device, attach the coaxial or phone line, verify online status, and activate service with your provider. Gather the cables and account details first, then follow the step-by-step process to avoid common errors.
Before You Start: Prerequisites and Safety
Starting your modem installation with a clear plan reduces downtime and frustration. Verify your internet service is active and compatible with the modem model, and have your ISP account details handy. Ensure you’re working in a dry, stable area away from heat and moisture, with steady power. This is also a good moment to inspect the device for any shipping damage. According to Modem Answers, a prepared setup reduces activation delays and rework, so take a few minutes to map out placement and gather cables before you begin.
Confirm Service Status and Compatible Equipment
Make sure your ISP account is active and that the modem matches your service type (cable, DSL, or fiber). If you use PPPoE, have your credentials ready. Double-check that the coaxial or phone line outlets are functional and accessible. Misaligned hardware or inactive service are the top reasons for failed activations. With the right hardware and an active account, you’ll streamline the installation and avoid unexpected trips to the basement or attic for replacements.
Placement and Environment for Optimal Signal
Choose a central location, elevated if possible, with at least a few inches of clearance on all sides for airflow. Avoid placing the modem behind furniture, near thick walls, or close to microwaves and cordless phones, which can cause interference. A stable, elevated shelf typically yields better signal stability and easier cable management. Good placement also simplifies connecting a separate router if you plan to use one.
Unboxing and Inspecting Your Modem
Carefully open the box and verify all components are present: modem, power adapter, user guide, and any included cables. Look for cosmetic damage on ports and the casing. If you notice bent pins or cracked plastics, do not power the unit—contact the seller. A quick visual inspection helps prevent post-activation issues that could occur if a damaged port is used.
Connecting Cables: A Visual Guide
Connect the coaxial (or phone) line to the modem’s corresponding port, ensuring a snug fit without forcing the connector. Plug the power adapter into a grounded outlet and power on the modem. If you’re using a separate router, connect an Ethernet cable from the modem’s WAN/Internet port to the router’s WAN port. Keep cables neatly arranged to minimize tripping hazards and signal interference. Verify all connections are secure before proceeding.
Activation and Basic Configuration
Most modern modems auto-activate once the device powers up and is connected to the ISP network. If prompted, visit the activation page provided by your ISP or call their support line to complete activation. After activation, the modem should display a stable online status. If your service requires a PPPoE login, enter your credentials on the ISP activation page or on the modem’s admin interface.
Configuring Wi‑Fi Security and Admin Access
Access the modem’s admin page using a web browser and the default IP address shown in the manual. Change the default admin password to a strong, unique one. Set your Wi‑Fi network name (SSID) and a robust password, preferably using WPA3 when available. Consider enabling a guest network for visitors and disabling WPS to reduce security risks. Regularly review connected devices to keep your home network secure.
Post-Install Checks and Quick Troubleshooting
Test connectivity on multiple devices: laptop, smartphone, and a smart home device if present. If devices cannot connect, reboot the modem and router (if used), then re-check the cables. If activation stalls, confirm service status with your ISP and re-run activation. Keep a log of any error messages and screenshots of the admin interface for reference when contacting support. Consistent monitoring helps catch issues early.
Tools & Materials
- Coaxial or phone line cable(Coax for cable modems; ensure it’s the correct drop for your service)
- Power adapter(Check voltage and plug type for your country (e.g., 110-120V or 220-240V))
- Ethernet cable (RJ-45)(Useful if you connect a separate router or a computer directly)
- ISP account information(Credentials for PPPoE or activation details from your provider)
- Pen and notepad(For recording network names and passwords)
Steps
Estimated time: 45-60 minutes
- 1
Power down and prep the modem
Unplug any power cords and confirm the modem is off. Clear the area around the device and verify you have all required cables at hand.
Tip: Label each cable with a simple note to avoid confusion during re-assembly. - 2
Check service activation
Verify your ISP service is active and that you have the correct modem model for your plan. If PPPoE is used, have your credentials ready.
Tip: If activation isn’t automatic, note the activation URL or call your provider’s support line. - 3
Connect the line to the modem
Attach the coaxial or phone line to the modem’s respective port. Ensure a snug, not forced, connection.
Tip: Hand-tighten until it stops; avoid using tools that could damage the connector. - 4
Power up and boot
Plug in the power adapter and wait for the modem to complete its startup sequence. This can take 1–3 minutes.
Tip: Watch the status lights; a solid online indicator means the device is ready. - 5
Link to a router or device
If you have a separate router, connect an Ethernet cable from the modem’s WAN port to the router’s WAN port.
Tip: Keep wires tidy and away from heat sources to minimize interference. - 6
Activate the service
Follow your ISP’s activation steps if prompted, or visit the activation page they provide.
Tip: If there’s a hiccup, reboot the modem and retry activation after a few minutes. - 7
Configure Wi‑Fi basics
Open the admin page, set a unique SSID, and enable a strong WPA3/WPA2 password.
Tip: Avoid common names or personal identifiers in the network name. - 8
Test connectivity
Test internet access on multiple devices and run a quick speed test to verify performance.
Tip: Record results for future troubleshooting and service reviews. - 9
Secure and document
Document your network details and enable guest access if needed. Review connected devices regularly.
Tip: Set calendar reminders to update firmware and passwords periodically.
FAQ
Do I need a router to install a modem?
No. A modem can connect directly to a single computer via Ethernet, but most users pair it with a router to share internet across devices. A router also adds Wi‑Fi coverage and network management features.
You don’t strictly need a router, but a router helps you share internet across devices and manage your home network.
What if activation fails after setup?
Contact your ISP to confirm service status and device compatibility. You may need to re-run activation from their portal or provide your modem’s MAC address.
If activation fails, check service status with your provider and try activation again from their site.
Can I install a modem in a closet?
Yes, but ensure proper ventilation and avoid blocking vents. Use a shelf with space around the device and keep cables accessible.
You can install in a closet, just ensure airflow and easy access to cables.
How long does activation usually take?
Most activations complete within a few minutes, but some providers may require up to an hour. If it’s longer, contact the ISP.
Activation typically takes minutes, but sometimes it can take longer—check with your provider.
What cables are required for fiber-modem setups?
For fiber, a media converter or ONT is typically provided by the ISP. Your modem connects to it via Ethernet; no direct fiber cables are needed by the user.
Fiber setups usually involve a converter supplied by the provider; you’ll connect via Ethernet to the modem.
Should I enable guest Wi‑Fi?
Enabling a guest network isolates visitors from your main network, improving security. It’s a good practice on most home networks.
Guest Wi‑Fi helps keep your main network secure while allowing visitors access.
Watch Video
Key Takeaways
- Prepare a dedicated setup space before starting.
- Ensure service activation and correct hardware prior to wiring.
- Secure Wi‑Fi with a strong password and update admin credentials.
- Test across devices and document results for future reference.