How to Hook Up a Modem: A Complete Setup Guide
Learn how to hook up a modem with a step-by-step approach, essential tools, safe practices, and troubleshooting tips for reliable home internet in 2026.

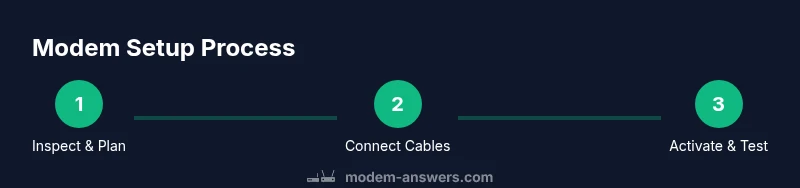
Goal: Learn how to hook up a modem quickly and correctly so you have reliable internet. This guide covers the basic wiring, activation readiness, and common pitfalls to avoid. You’ll complete the setup using the provided coaxial and Ethernet cables, a power source, and a device to configure the modem. According to Modem Answers, following a consistent sequence reduces activation delays and helps troubleshoot faster.
Why hooking up a modem correctly matters
Understanding how to hook up a modem properly matters because it directly affects reliability, latency, and your ability to troubleshoot. A correct setup reduces signal noise, prevents unnecessary reboots, and speeds up the activation process with your ISP. In this guide on how to hook up modem, you’ll learn the exact order and best-practice steps that minimize outages and frustration. According to Modem Answers, a disciplined setup improves consistency and makes Wi-Fi performance more predictable once you’re online.
Poor wiring or an improper power arrangement can lead to intermittent drops, slow speeds, and difficulty accessing the ISP activation page. By sticking to a fixed sequence—coax to modem, power to the outlet, then Ethernet to a router or computer—you create a repeatable template you can reuse if you move, upgrade, or replace equipment. This section outlines why these basics matter, the common mistakes to avoid, and how a clean, labeled cabling scheme supports future changes.
Key components and terminology you’ll encounter
Before you hook up a modem, it helps to know the core parts and terms you’ll see in manuals and activation portals:
- Coaxial cable: the primary connection from the street or wall outlet to the modem. A sturdy, properly threaded connection matters for signal quality.
- DOCSIS standard: the technology standard your modem supports (e.g., DOCSIS 3.0, 3.1). Your provider’s network will negotiate this during activation.
- Modem vs. gateway: a standalone modem connects to a router for Wi-Fi, while a gateway combines modem and router functions.
- Router: creates your home Wi-Fi network; if you have a gateway, you’ll configure Wi‑Fi in that device’s interface.
- Ethernet cable: used to connect the modem to a router or directly to a computer for initial configuration.
- Activation: the process by which your ISP authenticates the modem so you can access the internet.
Understanding these terms helps you avoid confusion and speeds up the actual hookup process. As you proceed, keep your provider’s activation instructions on hand for device-specific steps.
Step-by-step physical hookup overview
A solid, high-level plan for the physical hookup keeps you organized and less likely to miss a connection. Start by verifying you have a compatible modem, the correct coaxial and Ethernet cables, and a power source. The typical order is to connect the coaxial cable first, then power the modem, and finally connect a router or computer via Ethernet. This sequencing minimizes boot-up conflicts and makes activation smoother. If you’re using a gateway, you can treat it as both modem and router in one.
Always confirm that the coax port on the modem aligns with the outlet type in your home. Tighten connections without forcing them. After power is applied, observe the LED indicators: a solid power light plus a stable online or data light usually indicates basic readiness. If activation is required by your ISP, you’ll use the computer or mobile device to access the activation page or call support. This overview keeps you focused on the essential hardware steps and prepares you for configuration.
Placement and cable management for reliability
Where you place the modem affects signal quality, heat dissipation, and ease of maintenance. Place the device on a hard, stable surface in an open area with ample airflow; avoid enclosed cabinets that trap heat. Keep the coax, Ethernet, and power cables neatly routed and labeled to reduce accidental disconnections during cleaning or moving furniture. Do not route cables near heat sources or power strips that could introduce interference. If you’re running multiple devices, position the router away from thick walls or metal obstacles that can block Wi‑Fi signals. A clean, organized setup not only looks better but also lessens troubleshooting time when problems arise.
Activation and initial configuration tips
Activation usually requires connecting the modem to the ISP network and then configuring basic settings. Start by powering on the modem and router (if you have a separate router). Use a laptop or phone to access the modem’s configuration page or the activation portal provided by your ISP. Expect a short waiting period while the device negotiates a fixed IP address and validates service credentials. If you’re set up with a router, connect the router’s WAN/Internet port to the modem’s Ethernet port. Update any firmware if prompted and enable essential features like a strong Wi-Fi password and up-to-date encryption.
During activation, ensure you have your account details ready and understand whether you need to register the device with your provider. If activation stalls, a quick power cycle (restart modem, then router) often resolves the issue. Once online, test a few websites and run a basic speed test to confirm baseline performance and adjust settings as needed.
Troubleshooting common issues and quick fixes
Most modem problems fall into a few key categories. If you see no power or a blinking power light, reseat the power connection and try a different outlet. If there’s no online light or you can’t reach the activation portal, double-check coax connections and ensure the cable is not damaged. If devices connected to your network don’t obtain an IP address, restart the modem and router, and confirm the router is correctly configured to distribute IPs (DHCP enabled). ForWi‑Fi issues, verify the network name (SSID) and password you entered; change channels or reduce interference from nearby networks if performance is poor. When persistent issues occur, contact your ISP to confirm service status and device compatibility. Regularly updating firmware helps prevent known bugs and maintains compatibility with new standards.
Next steps: securing Wi‑Fi and optimizing speed
With basic connectivity established, you can focus on security and performance. Change the default Wi‑Fi name (SSID) and strong password, enable WPA3 if available, and consider hiding the network name if you want extra privacy. Keep your router firmware up to date and enable automatic updates if your device supports them. Place the router in a central, elevated position for better coverage, and consider a mesh system if you have a large home. Finally, run periodic speed tests to verify you’re getting the service you’re paying for and adjust QoS settings if your provider offers them.
Authority references and references you can trust
For additional guidance on home networking and device setup, consult these reputable sources:
- https://www.fcc.gov
- https://www.consumer.ftc.gov/articles/home-network-security
- https://www.cnet.com/how-to/
Tools & Materials
- Coaxial cable(Have extra length; 6-12 feet recommended for flexibility.)
- Ethernet cable (Cat5e or better)(At least 6 feet; choose shielded if possible in noisy environments.)
- Power adapter(Use the original adapter; match voltage and amperage.)
- Router (optional if you have a gateway)(Only needed if you’re creating a separate Wi‑Fi network.)
- Laptop or smartphone(To access activation pages and configure settings.)
- ISP account information(Have login details ready if activation requires portal authentication.)
- Surge protector(Protects equipment from power surges and outages.)
Steps
Estimated time: 30-60 minutes
- 1
Inspect equipment and space
Unpack devices and inspect for damage. Confirm you have all cables and the correct power adapter. Prepare a clean workspace with room to breathe for both modem and router.
Tip: Label cables with tape or markers to avoid mix-ups during reassembly. - 2
Attach the coaxial cable
Screw the coax from the wall outlet into the modem’s coax port. Do not overtighten; ensure a snug, finger-tight connection to avoid signal loss.
Tip: If you hear a crackling sound, re-seat the connector and check for any kinks in the cable. - 3
Connect power and power up
Plug the modem’s power adapter into a surge-protected outlet and connect to the modem. Wait for the power LED to illuminate steadily before proceeding.
Tip: If the device doesn’t power on, try a different outlet or replace the adapter. - 4
Connect Ethernet to router or PC
Plug one end of the Ethernet cable into the modem’s Ethernet port and the other end into the router’s WAN/Internet port (or directly to a computer for testing).
Tip: Use a fresh Ethernet cable if you’re experiencing connectivity issues. - 5
Power cycle and initial test
Power cycle the modem first, then the router (if used). Give the devices a few minutes to boot and stabilize, watching the status LEDs.
Tip: If the online light remains off, wait longer and consider a reboot from the provider’s portal. - 6
Activate with your ISP
Open a browser on a connected device and follow the activation prompts, or call the ISP’s activation line. Have your account and device details ready.
Tip: If the portal doesn’t load, retry after a few minutes or check service status. - 7
Verify connectivity
Test a few websites and perform a basic speed test to confirm service is active and meeting plan expectations.
Tip: If speeds are dramatically lower, verify cables, router placement, and channel interference. - 8
Secure Wi‑Fi and update firmware
Set a unique SSID and strong password; enable WPA3 if available. Check for firmware updates and enable auto-update if offered.
Tip: Document your network credentials in a secure place.
FAQ
Do I need a router to hook up a modem?
Not always. If you only need a wired connection for a single device, you can connect directly to the modem. For Wi‑Fi coverage, use a router or a gateway with built‑in Wi‑Fi.
You can go wired-only or add a router for Wi‑Fi—your choice depends on your coverage needs.
What do the modem lights mean?
Power, online, and data lights indicate status. A solid power light with an online light typically means you’re ready, while blinking or off lights signal variations in activity or potential connectivity issues.
Check the lights: solid power and online usually mean you’re connected; blinking or off lights mean you may need to troubleshoot.
What if activation fails?
Double‑check all cable connections, ensure you’re using the correct portal for activation, and verify service status with your ISP. If needed, restart devices and try again.
Make sure all cables are secure, then try activation again or contact your provider if it still fails.
Is it safe to place the modem near a microwave?
Avoid placing modems near microwaves or other strong heat sources; keep it in a ventilated area to prevent overheating.
Don’t put the modem next to heat-producing appliances; give it room to vent.
How long does activation take?
Activation usually completes within a few minutes to an hour, depending on the provider and device. If it lasts longer, contact your ISP.
Activation can take a short while; if it’s taking too long, call your provider to check status.
Key Takeaways
- Plan the hookup order and gather cables before starting.
- Confirm activation through the ISP portal or support line.
- Test connection and Wi‑Fi after setup to verify performance.
- Secure Wi‑Fi and keep firmware up to date for safety.