How to Install a Modem at Home: Complete Step Guide
Learn how to install a modem at home with a practical, step-by-step approach. Plan, connect, activate, and optimize placement for reliable internet and secure Wi-Fi in your space.

This guide explains how to install modem in home and get your network up quickly. You’ll learn what you need, safety steps, and a clear, step-by-step plan to activate, place, and optimize a modem for reliable internet. Follow the plan to reduce signal dead zones and simplify activation.
How to install modem in home: Planning and Preparation
If you’re setting up home internet from scratch, the first step is planning. This guide shows how to install modem in home with a practical, homeowner-friendly approach. According to Modem Answers, careful planning improves reliability and reduces troubleshooting time. Start by identifying your service type (cable, DSL, fiber) and confirming the required line connections. Sketch a simple map of where the modem and potential router will sit, noting outlets, furniture, and potential sources of interference. A thoughtful layout helps you pick a central, ventilated spot that minimizes dead zones and keeps power cords tidy. As you plan, gather the necessary equipment and ensure you have permission to install in shared spaces if you rent.
Check your service type and equipment readiness
Before connecting anything, verify your service type and confirm what the provider supplied. If you’re moving a service from another location, take note of the modem model, activation method, and any required credentials. Prepare the essential cables and power supply, and check for any compatibility notes from your provider. This stage ensures you don’t reach the activation step only to find an incompatible device or missing line. Modem Answers analysis shows that validating compatibility early reduces rework and speeds up setup.
Positioning for best signal and airflow
Placement matters for both performance and heat dissipation. Place the modem in a central, elevated location away from desks where metal objects or mirrors could cause reflections or interference. Keep it at least a few inches from walls and other electronics to strengthen the signal. If you plan to use a separate router, place the router at an optimal spot to maximize coverage, often away from walls and corners, but still within range of the modem’s Ethernet or bridge connection.
Activation, provisioning, and initial testing
Activation steps vary by provider but typically involve contacting the service, registering the device, or plugging the modem into the network and powering it up. Expect a few minutes for the device to boot and obtain a signal from your ISP. After activation, test the connection with a wired device first, then test Wi-Fi on multiple endpoints. This process confirms that the modem is functioning and that the network is broadcasting as expected.
Safety and electrical considerations
Always use a properly rated power outlet and avoid daisy-chaining through power strips that could trip or overheat. Do not obstruct vents, and never place the modem in enclosed spaces without airflow. If you have a surge protector, ensure it is in good condition and that it supports your modem’s power requirements. If you notice a burning smell, unusual heat, or smoke, power down immediately and consult a professional.
Security, privacy, and ongoing maintenance
Change default admin credentials and set a strong network password to protect your home network. Keep firmware up to date, enabling automatic updates when possible. Regularly check connected devices and review your network settings to minimize exposure. Modem Answers recommends periodic speed tests and security audits to maintain optimal performance and safety over time.
Troubleshooting quick fixes and common issues
If lights indicate abnormal status, start with basic checks: ensure power is steady, cables are firmly connected, and the service line is active. Reboot the modem and router if needed, and re-run activation if prompted. For slow speeds, verify active clients, check for interference, and test with a wired connection to isolate issues. If problems persist, contact your provider with model details and timestamps of the issue.
Tools & Materials
- Modem(Ensure it matches your service provider’s compatibility requirements)
- Power outlet(A dedicated outlet away from heat sources)
- Coaxial/Phone line or Ethernet cable(Provider-specific connection type; have extras on hand)
- Router (optional if using a separate device)(Used to extend Wi-Fi coverage or create a mesh network)
- Surge protector or UPS (optional but recommended)(Protects from power spikes and outages)
- Device for activation (phone/PC or mobile device)(Needed to complete ISP provisioning)
Steps
Estimated time: 30-45 minutes
- 1
Prepare equipment and space
Gather the modem, cables, power supply, and activation device. Clear a central, vented area for installation to minimize signal loss and ensure airflow.
Tip: Lay out cables so they don’t create tripping hazards; use cable clips if needed. - 2
Connect the service line to the modem
Attach the provider’s line (coaxial, fiber ONT, or Ethernet) to the corresponding port on the modem. Ensure a snug fit to avoid connection drops.
Tip: If you’re unsure which port to use, refer to the modem’s manual or your provider’s setup guide. - 3
Power up and let the modem boot
Plug the modem into a power outlet and wait 2–5 minutes for the lights to stabilize. Avoid removing power during boot.
Tip: If the lights indicate an error, power cycle after 30 seconds. - 4
Connect a test device
Use a computer or phone to connect via Ethernet first to verify a wired connection before testing Wi-Fi.
Tip: Run a basic browser test or speed test to confirm activity. - 5
Activate with your ISP
Follow your provider’s activation steps, which may involve calling support, using an app, or visiting a portal.
Tip: Have your account number and modem serial handy to speed the process. - 6
Configure Wi-Fi and test coverage
If using a separate router, set up your SSID and password, then test signal strength in common areas.
Tip: Change the default password; enable WPA3 if supported. - 7
Run post-install checks
Test multiple devices, check for dead spots, and note any odd behavior or outages.
Tip: Document the network name and password for household members.
FAQ
Do I need a separate router when installing a modem at home?
Not always. Many modems include built-in routing, but you may want a separate router for better Wi‑Fi coverage or advanced features. If you do use a separate router, connect it to the modem and configure the SSID and security settings.
Most people don’t need a separate router, but for larger homes or advanced features, a separate router helps with coverage. Connect it to the modem and set up your Wi-Fi.
What should I do if activation takes longer than expected?
Check that the modem is properly connected and powered, and confirm you have the correct account information. If the issue persists, contact your provider’s support with your modem's model and serial number for quicker provisioning.
If activation is slow, verify connections and account details, then call support with your modem's model and serial number.
Why are my Wi‑Fi speeds uneven across rooms?
This can result from placement, interference, or distance. Move the modem or router to a central, elevated spot away from walls, and consider a mesh system if coverage gaps persist.
If some rooms have slow Wi-Fi, try central placement and maybe a mesh system to boost coverage.
How often should I update modem firmware?
Enable automatic updates if available and periodically check the device’s admin panel for new firmware. Regular updates improve security and performance.
Turn on automatic updates and check the settings panel for new firmware to stay secure.
What safety steps should I follow during installation?
Always power down before unplugging or reconnecting cables, use proper outlets, and avoid heat sources. If you notice damage or unusual smells, stop and seek help.
Power down before handling cables and keep the area safe and ventilated; seek help if you see damage.
Watch Video
Key Takeaways
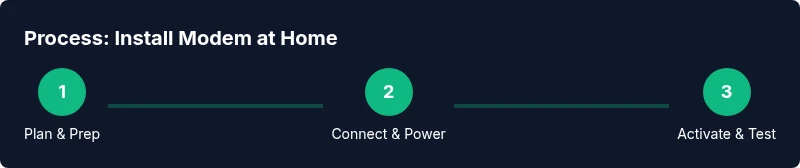
- Plan the setup in advance and map the space.
- Connect the service line securely and boot the modem.
- Activate with your ISP and test wired then wireless performance.
- Prioritize security by changing defaults and updating firmware.