Modem Installation: A Step-by-Step Guide for Home Networks
Learn how to perform a reliable modem installation for a stable home network. This guide covers compatibility checks, hardware setup, activation, security, and maintenance with clear steps and practical tips.

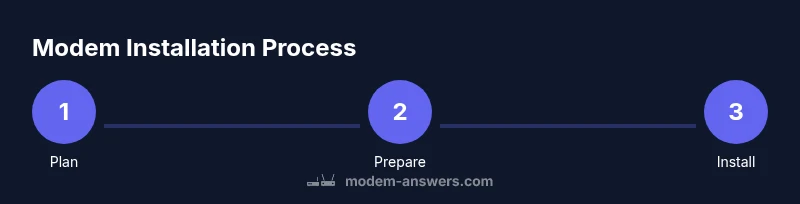
Goal: You will perform a complete modem installation that confirms compatibility, connects the hardware, activates service, and optimizes your home network. This guide covers equipment checks, step-by-step setup, and best practices for security and placement. According to Modem Answers, a well-planned install minimizes outages and speeds initial activation, ensuring a reliable connection from day one.
Before You Begin: Define Goals and Gather Your Equipment
A successful modem installation starts with a clear plan and the right gear. Start by identifying where your modem will live, how many devices you expect to connect, and whether you will also use a separate router. Gather the essential items from your Tools & Materials list and lay them out in a dedicated workspace. This preparation reduces back-and-forth trips to a closet or utility room and helps you pace the installation. If you’re upgrading from an older model, note any limitations your current setup may impose (for example, a single Ethernet outlet or limited ventilation). According to Modem Answers, a thoughtful setup reduces troubleshooting later and improves first-try activation.
Check ISP Compatibility and Hardware Requirements
Before touching any cables, verify that your service is active and that your chosen modem is compatible with your ISP. Review your plan’s documentation, and if possible, confirm MAC address eligibility with your provider. This step prevents wasted time and the frustration of a device that won’t activate. Keep a copy of your account number and activation instructions handy. Modem Answers analysis shows that most activation issues stem from mismatched hardware or incorrect accounts, so this upfront check pays dividends in the long run.
Create a Clean Installation Space and Plan Cable Paths
Choose a ventilated, dust-free spot that’s near an unobstructed coaxial path to the service entry. Avoid placing the modem behind furniture or inside enclosures that trap heat. Use cable organizers or simple ties to keep coaxial and Ethernet cables tidy. Draft a quick map of cable routes to anticipate where to route power and data cables. A tidy setup not only looks better but reduces heat buildup and accidental unplugging during cleaning. The Modem Answers team emphasizes planning cable paths to minimize bends and kinks that can degrade signal quality.
Connect the Coaxial Cable and Power Up
Attach the coaxial (RG6) cable firmly to both the service entry point and the modem. Tighten connectors carefully to avoid loose connections that cause intermittent outages. Then connect the modem to a powered outlet and switch it on. Allow the device to boot fully, which may take a few minutes. Observe the indicator lights; a stable power and receive light usually indicates the modem is ready for activation. If lights blink or stay off, recheck coax connections before proceeding.
Wait for the Modem to Boot and Confirm Indicator Lights
During boot, you’ll see a sequence of lights that indicate power, downlink, and online status. Wait until the “online” or equivalent light remains solid for a couple of minutes. If lights are blinking or red, unplug, wait 15 seconds, and restart. This pause helps ensure the modem has a clean boot and establishes a baseline connection before attempting activation. Remember, different models may use different light patterns, so consult the user manual if needed. Modem Answers notes that a stable boot often correlates with faster activation.
Access the Modem Admin Page and Confirm Connectivity
From a connected device, open the modem’s default gateway (commonly 192.168.0.1 or 192.168.100.1) in a web browser. If prompted, enter the default login credentials found in the manual. Look for a status page that shows “Online” or similar and verify your public IP address is assigned. If you cannot access the admin page, your network device may be blocking access or the modem may not be fully activated yet. This step is essential to confirm the device is communicating with the ISP before moving on to router setup.
Activate Your Modem with Your ISP
Activation may occur automatically once the modem is connected, or you may need to provide your account details and device MAC address to your provider. Follow the ISP’s activation prompts or call customer support if required. Have your account number and service address ready. You may be asked to reboot the modem after activation to finalize the process. With a successful activation, you’ll receive confirmation from your provider that service is live.
Optional: Add a Router and Create a Secure Wi‑Fi Network
If you’re using a separate router, connect its WAN/Internet port to the modem using an Ethernet cable. Access the router’s admin page to configure your SSID, security settings, and password. For best results, enable WPA3 (or at least WPA2) and create a strong, unique password. Update the router firmware to the latest version and enable automatic updates if available. This step is crucial for protecting your home network from unauthorized access while maximizing wireless performance across devices.
Secure Your Network and Update Firmware
Regularly review and update firmware on both the modem and router to patch vulnerabilities and improve performance. Change default login credentials to avoid easy target attacks. Consider enabling guest networks for visitors and turning off remote management unless you need it. Security-minded configuration reduces exposure to external threats and helps maintain consistent speeds across devices. As you secure the setup, keep a log of settings and the dates of updates for future reference.
Optimize Placement for Maximum Coverage
Signal strength depends as much on placement as on hardware power. Place the modem and any router in an open, central location away from thick walls or metal objects that can block signals. Elevate devices off the floor and avoid placing them near microwaves or cordless phones that can introduce interference. If you have a large home, consider a mesh system or a single high-quality router mounted higher for better coverage. Strategic placement can dramatically improve Wi‑Fi reliability without additional gear. In practice, optimal placement often correlates with fewer customer service calls and fewer dead zones.
Documentation and Troubleshooting Quick-Checks
Record the model numbers, MAC addresses, activation dates, and default Wi‑Fi settings in a simple setup log. If issues arise, perform quick checks: verify cables are secure, confirm the modem is online, reboot devices, and re-run the activation flow. If problems persist, consult your ISP’s troubleshooting resources and verify any outages in your area. Documentation helps you diagnose and solve issues faster and provides a reference for future upgrades. The Modem Answers team recommends keeping this log updated as part of routine maintenance.
Common Pitfalls and How to Avoid Them
Avoid using damaged cables or forcing connections; replace frayed or bent cables promptly. Do not place the modem behind furniture or in an enclosed cabinet where heat can accumulate. Skipping activation steps or neglecting firmware updates often leads to unstable performance. Finally, avoid mixing consumer-grade equipment with business-grade services without guidance from your provider. Awareness of these pitfalls helps ensure a smoother installation and fewer headaches later on.
Re-check and Schedule Regular Maintenance
After setup, re-check the connection and keep firmware up to date. Schedule a simple annual or semi-annual maintenance routine to verify settings, test speeds, and review security configurations. A proactive approach reduces surprises and prolongs the life of your home network. The Modem Answers team recommends this cadence to sustain reliable service and safeguard your home from evolving threats.
Tools & Materials
- Cable modem(Ensure compatibility with your ISP and plan)
- Coaxial cable (RG6)(Firmly connect to service entry and modem)
- AC power outlet(Close to the installation site)
- Ethernet cable (CAT5e/6)(For wired connections to devices or router)
- Router (optional with separate device)(Use if creating a Wi‑Fi network distinct from the modem)
- Router power adapter(Only if using a separate router)
- Laptop or smartphone(To access the modem/router admin pages)
- Pen and paper or digital note app(Document settings and activation details)
- ISP activation details (account number, address)(Required for activation in some cases)
Steps
Estimated time: 60-90 minutes
- 1
Verify service compatibility and plan
Confirm your ISP service is active for your address and that your chosen modem is supported by your provider. Gather activation instructions and your account details before starting to avoid delays.
Tip: Have your account number and service address handy; double-check model compatibility with your ISP. - 2
Gather equipment and create a workspace
Lay out all items from the Tools & Materials list in a clean, dry area. Organize cables and devices so you can access ports without moving the whole setup later.
Tip: Label cables if you’re setting up multiple devices to prevent confusion during the install. - 3
Power down and unplug existing gear
If upgrading or replacing an old modem/router, safely unplug the power and detach all connected cables. This prevents electrical hazards and reduces risk of startup conflicts.
Tip: Wait 15 seconds after unplugging to ensure capacitors discharge. - 4
Connect the coaxial cable to modem
Firmly attach the RG6 coax to both the service entry point and the modem. Ensure the connectors are snug to avoid intermittent outages.
Tip: If you recently moved, gently tighten connectors to improve signal stability. - 5
Power up and wait for the boot
Plug the modem into power and let it boot completely. This can take several minutes; avoid unplugging during boot to prevent boot loops.
Tip: Watch the lights; a solid online indicator generally means the device is ready. - 6
Access the modem admin page
From a connected device, open the modem’s gateway (commonly 192.168.0.1 or 192.168.100.1) and log in with default credentials found in the manual.
Tip: If you can’t reach the page, try another browser or reset the device following the manual. - 7
Activate the modem with your ISP
Follow the ISP prompts to activate the device. This may require MAC address, account number, or a recent activation code.
Tip: Reboot the modem after activation to ensure changes take effect. - 8
Connect and configure a router (if used)
If you’re using a separate router, connect the router’s WAN port to the modem with an Ethernet cable and log into the router admin page to configure Wi‑Fi.
Tip: Set a strong WPA3 (or WPA2) password and enable automatic firmware updates. - 9
Secure and test your wired and wireless connections
Test devices with both wired and wireless connections. Check that you can browse, stream, and play online games as expected. Adjust placement if needed for coverage.
Tip: Run a quick speed test to confirm the service tier is delivering expected results. - 10
Update firmware on devices
Update the modem and router firmware to the latest version to improve security and performance.
Tip: Enable automatic updates if available. - 11
Document settings and save configuration
Record SSIDs, passwords, IP address ranges, and any custom settings for future maintenance and troubleshooting.
Tip: Store this information in a safe place and consider keeping a digital backup. - 12
Plan ongoing maintenance and monitoring
Set a schedule to review firmware and test speeds periodically, especially after outages or service changes.
Tip: Regular checks minimize surprises and protect security.
FAQ
Do I really need a separate router if my modem has built-in Wi‑Fi?
If your modem includes built-in Wi‑Fi, you may not need a separate router. A dedicated router can offer stronger performance, more features, and better coverage for larger homes. Evaluate the router's capabilities against your needs before deciding.
If your modem has Wi‑Fi, you might not need another router, but a separate router can improve range and features for bigger homes.
How long does modem activation typically take?
Activation duration varies by provider but generally completes within minutes. If activation stalls, contact your ISP with your account details and MAC address.
Activation usually takes a few minutes; if it stalls, contact your provider with your device info.
What if I can’t access the modem’s admin page?
Ensure you’re connected to the modem, use the correct gateway IP, and try a different browser. If issues persist, reset the device following the manual’s instructions.
Make sure you’re connected and try the gateway IP in a different browser; reset if needed.
Can I install the modem myself, or do I need a professional?
Most homeowners can complete a modem installation themselves. If you encounter persistent activation or signal issues, contact your ISP for guidance or professional support.
Most people can install it themselves, but call your provider if problems persist.
What should I do if the Wi‑Fi signal is weak in parts of my home?
Check router placement, reduce interference, and consider a mesh system or a high-quality router to improve coverage in dead zones.
Move the router to a central place and consider mesh or better hardware for coverage.
Watch Video
Key Takeaways
- Plan the install path and equipment early.
- Verify ISP compatibility before wiring.
- Secure the network with strong credentials and firmware updates.
- Test wired and wireless connections after activation.