Setting Up a New Xfinity Modem: Step-by-Step Guide
A complete, homeowner-friendly guide to activating, configuring, and securing a new Xfinity modem for reliable home internet and Wi‑Fi performance.

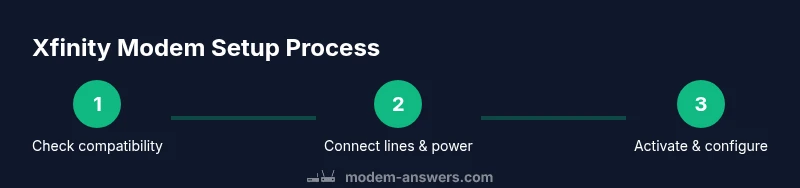
This guide helps homeowners master setting up a new xfinity modem, activate service, connect devices, and secure Wi‑Fi. You’ll need your Xfinity account, a compatible modem/gateway, a coax or fiber line, and a power outlet to begin. The steps below cover activation basics, network naming, security, and troubleshooting to avoid common setup hiccups.
Compatibility and account readiness
Before you start, verify that your plan supports the modem you intend to use. If you’re bringing a third‑party device, confirm compatibility with Xfinity’s DOCSIS standard (typically DOCSIS 3.1 for cable) or fiber requirements, and ensure your service address is active on the account. According to Modem Answers, starting with compatibility checks saves time and reduces later troubleshooting during setting up a new xfinity modem. Be prepared with your Xfinity login, account number, and any activation PIN you might need. This upfront step sets expectations and helps you avoid wasted trips or calls during activation, especially if you’re migrating from a different ISP.
Unboxing and inspecting the modem
Carefully remove the modem from its packaging and check for all listed parts: the gateway/modem unit, power adapter, coaxial or fiber cable, and any included booklets. Look for cosmetic damage, loose ports, or missing components. If you notice issues, contact the seller or manufacturer before attempting setup. Inspecting the device early prevents delays during activation and ensures you have everything needed for a smooth start. Keep the box and manuals handy in case you need to reference model numbers or warranty information later.
Placing the modem for optimal signal
Position the modem in an open space away from thick walls, large metal appliances, and heavy electronics that could interfere with signal. Elevate it slightly if possible and ensure adequate ventilation to avoid overheating. A central location on a shelf or desk often yields the best coverage for multiple devices around the home. Remember: placement can impact both wired performance and Wi‑Fi reach, so plan the layout before you power up.
Connecting physical lines and power
Connect the coaxial cable or fiber line from your service entry to the modem carefully, ensuring a snug, finger‑tight fit without overtightening. Plug the power adapter into a surge‑protected outlet and then into the modem. Wait for the device to boot fully; indicator lights typically cycle and settle to steady statuses. If you see a blinking light that doesn’t stabilize, recheck connections and consult the activation wizard for troubleshooting prompts.
Activating your service: self-activation vs. agent-assisted
Most users can activate online via the Xfinity activation portal, following prompts to verify account details and the connected hardware. If self‑activation stalls, you may need to contact Xfinity support for a remote provisioning session or to confirm service availability at your address. Having your account PIN handy speeds up the process. Modem Answers analysis (2026) notes that activation delays are commonly due to wiring or missed prompts, so follow each screen carefully and don’t skip steps.
Accessing the Xfinity setup portal
On a computer or mobile device connected to the modem’s temporary network, open a browser and navigate to the activation portal at xfinity.com/activate or use the on‑screen prompts from the modem’s lights. The wizard will guide you through the steps to register the device, confirm service, and complete activation. If the portal prompts you to register a new device in your account, enter the required details exactly as shown and double‑check your address. If you’re using a separate router, you’ll configure bridge mode after activation.
Configuring Wi‑Fi network name and security
During setup, you’ll be prompted to set a Wi‑Fi network name (SSID) and a secure password. Choose a non‑personal SSID to protect privacy, and use a strong, unique password with a mix of letters, numbers, and symbols. If you have a smart home setup, consider creating a dedicated guest network for visitors and IoT devices. Write down your SSID and password in a safe place for quick future reference.
Advanced settings: bridging, guest networks, and parental controls
If you own a separate router, enable bridge mode on the Xfinity modem to pass the public IP to your primary router. This reduces double‑NAT issues and improves performance for some configurations. Consider enabling a guest network for visitors and configuring parental controls if needed for households with children. Review firmware updates and automatic security patches in the administration panel to keep devices protected.
Final validation and ongoing maintenance
Run a few speed tests from devices around the home to confirm performance meets expectations. Check signal strength in areas with weak coverage and reposition the modem if needed. Regularly verify that firmware is up to date and review security settings (passwords, WPA3 if available). Keeping notes of settings also helps with future resets or when adding new devices.
Quick-start checklist for new Xfinity modem
- Confirm compatibility with your plan
- Unbox and inspect, then place for optimal signal
- Connect coax/fiber and power; boot device
- Activate via xfinity.com/activate or app wizard
- Set Wi‑Fi name and strong password
- Enable bridge mode only if using a separate router
- Test speeds and monitor performance for 24–48 hours
Tools & Materials
- Xfinity-approved modem/gateway(Ensure DOCSIS 3.1 or higher for cable; fiber ONT supported devices for fiber plans.)
- Coaxial cable or fiber optic line(Connect from service entry to the modem; avoid damaged cables.)
- Power adapter(Use the included adapter; avoid third‑party power supplies.)
- Ethernet cable (optional for setup)**(Useful for wired initial configuration or troubleshooting.)
- Pen and paper or digital note tool(Record SSID, password, and activation steps.)
- Xfinity account access(Needed for activation and verification during setup.)
- Surge protector or UPS (optional)(Protects against power surges and outages.)
- Separate router (optional if using bridge mode)(For those using a secondary router or mesh system.)
Steps
Estimated time: 45-60 minutes
- 1
Prepare your account and equipment
Gather your Xfinity login, the modem, coax or fiber line, and a powered outlet. Make sure your service address is active on the account and that you’re using a compatible device. This upfront preparation prevents stops later in activation and ensures you follow the correct steps from the start.
Tip: Have a written quick reference with your model, MAC/serial number, and activation PIN if needed. - 2
Unbox and inspect the modem
Carefully remove the device and verify all components are present. Check for any shipping damage to ports or the case. If anything is missing or damaged, contact the seller or manufacturer before proceeding.
Tip: Keep packaging until the setup is complete in case you need to reference model details. - 3
Choose an optimal placement
Place the modem in a central, elevated spot away from obstructions. Ensure it has good ventilation and isn’t tucked behind furniture. Proper placement improves both wired performance and Wi‑Fi coverage.
Tip: Avoid placing directly on the floor or inside a cabinet with poor airflow. - 4
Connect the coax/fiber and power
Attach the coaxial cable or fiber line to the modem, then plug in the power adapter. Wait for the device to boot; indicator lights should settle after ~2–3 minutes. Loose connections are a common cause of slow activation.
Tip: Finger‑tighten connections and avoid overtightening coax fittings. - 5
Activate the service
Open a browser on a device connected to the modem and go to the activation page (xfinity.com/activate). Follow prompts to verify your account and the connected hardware. If prompted, enter any activation PIN or account details.
Tip: If self‑activation stalls, try a different device or network and retry. - 6
Access the setup portal
Complete activation prompts and navigate to your modem’s admin panel to configure basic settings. You’ll typically see the Wi‑Fi settings screen first, where you can rename SSID and set a strong password.
Tip: Use a unique, non‑personal SSID for privacy. - 7
Configure Wi‑Fi security
Set WPA3 (or WPA2 if WPA3 isn’t available) and a long, complex password. Consider enabling a guest network for visitors and keeping IoT devices on a separate network when possible.
Tip: Record your credentials in a safe place. - 8
Consider bridge mode if needed
If you’re using a separate router, enable bridge mode on the modem so the primary router handles the network. This avoids double‑NAT issues and can improve performance for some setups.
Tip: Only enable bridge mode if you’re sure you’ll use a separate router. - 9
Run speed tests and verify
Test speeds on multiple devices and check for consistent performance across rooms. If speeds are lower than expected, check cable quality, channel settings, and router placement.
Tip: Use multiple devices for a representative test sample. - 10
Finalize and document
Save your network details, update firmware if prompted, and create a quick setup diary (include model, software version, and notable settings). This makes future changes easier.
Tip: Keep your notes accessible for future reference. - 11
Plan for ongoing maintenance
Schedule periodic checks for firmware updates and review security settings every few months. A simple maintenance routine can prevent many future issues.
Tip: Turn on automatic firmware updates if available. - 12
Backup plan for troubleshooting
If problems persist, use the official support channels or community forums for your model. Having your account and device details handy speeds up support calls.
Tip: Document any error messages or lights to share with support.
FAQ
What equipment do I need to set up a new Xfinity modem?
Essential items include a compatible Xfinity modem/gateway, a coaxial or fiber line, a power adapter, and access to your Xfinity account. Ethernet is optional for wired configuration or troubleshooting. Having pen and paper to note down the SSID and password helps during setup.
You’ll need a compatible modem, a coax or fiber line, power, and access to your Xfinity account. Ethernet is handy for wired setup.
How long does activation take usually?
Activation times vary, but most setups complete within 10–30 minutes if all connections are secure and prompts are followed. If activation stalls, retry, check connections, or contact Xfinity support.
Activation usually takes about 10 to 30 minutes if everything is connected and prompts are followed.
Can I use my own modem with Xfinity?
Xfinity supports commonly used third‑party modems that are compatible with your plan. Check your plan’s compatibility, and use Xfinity’s activation portal to register the device. If it’s not compatible, you may need to rent or replace with an approved model.
Yes, you can use your own modem if it’s compatible, and you’ll activate it through Xfinity.
What should I do if activation fails?
If activation fails, verify coax/fiber connections, ensure the device is supported, and retry the activation flow. If problems persist, contact Xfinity support for remote provisioning or troubleshooting.
If activation fails, check connections and try again, or contact Xfinity support for help.
Do I need to change Wi‑Fi settings right away?
Yes. After activation, immediately set a unique Wi‑Fi name and a strong password. If you have multiple devices, configure guest networks for visitors and IoT devices to improve security.
Yes—set your Wi‑Fi name and a strong password as soon as you can.
How do I troubleshoot no internet after setup?
First, check the modem lights and confirm all cables are secure. Reboot the modem and router, then run a speed test. If issues persist, verify service status with your provider and consult the activation guide.
Check cables and lights, reboot, and test speeds. If still down, verify service status and retry activation.
Watch Video
Key Takeaways
- Plan compatibility and activation before wiring.
- Secure Wi‑Fi with strong credentials and guest access.
- Keep account login handy for activation prompts.
- Test speeds in multiple rooms after setup.
- Use bridge mode only with a separate router.