How to Connect to a New Modem: Step-by-Step Guide
Learn how to connect to a new modem with clear, actionable steps for wired and wireless setups. Modem Answers provides practical guidance to login, configure Wi‑Fi, and troubleshoot connectivity across devices in your home.

By following these steps, you’ll successfully connect to a new modem and get your home network up and running. You’ll need your modem, a device to configure it, and your ISP account details. This guide uses a simple, repeatable sequence so you can troubleshoot and verify connectivity on every device.
Preparing for the connection
Before you begin the process of how to connect to new modem, gather the essentials and create a clean workspace. Having a stable power source, a device to configure the modem (laptop, tablet, or smartphone), and your internet account information on hand will reduce friction. This guide assumes you are setting up a standard home modem provided by a typical ISP and using a wired or wireless setup. If you have a mixed network, plan to update settings for both wired and wireless clients. In many homes, the first step is to locate the coax or telephone line from your provider and confirm the service is active. If you’re moving from an old gateway, you may need to reset the device to factory defaults so the new modem can establish a clean management plane. Keep notes of any existing network names or passwords in case you need to replicate them later.
Understanding your new modem's basics
A new modem (often a standalone device or gateway) combines a modem and router in one unit. Understanding the basics helps you avoid common pitfalls when you connect to new hardware. Look for LED indicators that show power, online status, and data activity. The admin interface (for configuring settings) is usually accessed via a browser or a mobile app, and the exact address is listed on the device label or in the manual. You may need to log in with a default username and password, then create a new, strong admin credential. Remember that firmware updates can improve performance and security, so plan to check for updates during initial setup. If you’re replacing a device, you might need to note existing network names so your devices can reconnect quickly.
Choosing the right connection method
Your choice between wired and wireless connections affects speed, reliability, and ease of use. A wired Ethernet connection provides the most stable link for a computer or gaming console and is ideal during initial setup when you need a rock-solid connection to the admin page. For everyday devices, a strong Wi‑Fi signal offers convenience but may require optimizing placement or selecting the right channel. If your home has thick walls or multiple floors, consider a modern Wi‑Fi 6/6E router or mesh system to improve coverage. In any case, document your network name (SSID) and password so you can quickly reconnect devices later. All setup paths should ultimately converge on a secure, consistently accessible network.
Step-by-step workflow overview
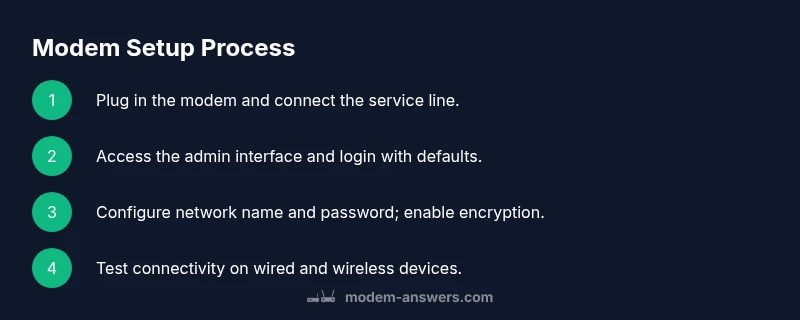
This section outlines the logical flow behind the setup process so you understand why each action is performed. Start with a physical connection (coax or line), then power the device, and finally access the admin interface to configure settings. If you plan to use wired connections for initial configuration, connect a computer to the modem via Ethernet. After you log in, run the setup wizard or manually configure your network name and password. Finish by testing connectivity on multiple devices and enabling security features. A methodical approach reduces back-and-forth and minimizes the chance of misconfigured settings.
Verifying connection and troubleshooting common issues
After completing the setup steps, verify that you can access the internet on at least one wired device and one wireless device. If the internet does not appear, recheck the coax/line, reboot the modem, and ensure the admin login is correct. Common issues include incorrect Wi‑Fi credentials, misconfigured IP settings, or an outage from your provider. If you suspect a service problem, contact your ISP for line checks. Maintaining a simple network map of devices and their IP addresses can help you identify issues quickly during future troubleshooting.
Configuring Wi‑Fi and network names safely
Secure Wi‑Fi configuration is essential for household safety. Create a unique SSID for your network and avoid using personal information in the name. Choose a modern encryption standard (WPA3 if available, or WPA2 at minimum) and set a strong passphrase that you don’t reuse across sites. Disable features you don’t need (WPS, UPnP) if you don’t rely on them, and keep the firmware up to date. Also consider setting a separate guest network to protect home devices from visitors’ devices. Document the network details safely for future reference.
Advanced tips for stable performance
Once the basics are in place, you can optimize performance with a few best practices. Regularly check for firmware updates and apply them when available. Place your router away from thick walls and interference from microwaves or cordless phones to maximize signal quality. If you experience dropouts, run a basic speed test from multiple rooms and consider upgrading to a newer modem that supports your current provider’s DOCSIS standard. For households with many devices, consider a mesh system or a high-quality router that supports multiple simultaneous streams.
Common mistakes to avoid
Avoid using an old password, writing credentials in obvious places, or sharing your admin account. Refrain from leaving default SSIDs and passwords unchanged on new devices. Do not skip firmware updates or ignore service outages flagged by your provider. Always test connectivity after changes and document your network details. Rushing the setup can lead to misconfigurations that are hard to diagnose later.
Next steps after connecting
With the modem connected, take a moment to run a few post-setup checks. Test with a streaming device, a computer, and a mobile phone to ensure consistent coverage. Create a backup of your configuration settings in case you need to restore later. Schedule periodic reminders to check for firmware updates and review your network security settings. Keeping documentation handy helps you move quickly if you ever need to replace the device again.
Tools & Materials
- Coaxial or service line from provider(Ensure the line is active and securely connected to the modem.)
- Modem and power adapter(Original power adapter supplied with the device; have it plugged into a surge protector.)
- Ethernet cable (Cat5e or better)(Used for a wired setup and direct admin access if needed.)
- Laptop/phone/tablet for setup(A web browser or the modem’s companion app for configuration.)
- ISP account details(Username and password if your service requires them; note your service address if asked during provisioning.)
- Notepad with network names and passwords(Helpful for documenting SSIDs and passwords for future reference.)
- Pen and paper or digital note app(To record steps, settings, and any changes.)
Steps
Estimated time: 20-40 minutes
- 1
Unbox and inspect the modem
Unpack the modem and check all ports. Confirm you have the power adapter, coax/line connector, and any included cables. This initial check prevents surprises during setup and ensures you have all essentials before proceeding.
Tip: Take a quick photo of the rear ports for reference. - 2
Connect the service line
Attach the coaxial cable from the wall to the modem’s coax port. If you rely on a fiber or DSL connection, connect the appropriate line as directed by your provider’s instructions.
Tip: Ensure the connection is snug to avoid intermittent signals. - 3
Power up and boot
Plug in the modem and allow it to boot fully. This may take 1-3 minutes; wait until the status lights indicate online activity.
Tip: Do not unplug or move the device during boot. - 4
Access the admin interface
On a connected device, open a browser and enter the modem’s default address shown on the label or in the manual. If prompted, log in with the default credentials.
Tip: If you can’t find the address, check the manual or manufacturer support site. - 5
Run the setup wizard or manual config
Follow the on-screen wizard to set up the internet connection and create your Wi‑Fi network name and password. If using a manual approach, enter the WAN/Internet settings as instructed by your ISP.
Tip: Save changes before leaving the page. - 6
Update firmware and secure the admin account
Check for firmware updates and apply them. Create a strong admin password and enable encryption for your Wi‑Fi network.
Tip: Use a unique password and avoid common phrases. - 7
Configure Wi‑Fi name and password
Create a clear, unique SSID and a strong passphrase. Consider a guest network for visitors and disable unnecessary features like WPS if not needed.
Tip: Do not reuse your main network password for guest networks. - 8
Test connectivity on multiple devices
Connect a wired device and a wireless device to verify internet access. If issues arise, re-check cables, login credentials, and reboot as needed.
Tip: Document successful device connections for future reference. - 9
Finalize and back up settings
Save the configuration, back up the settings if the interface offers it, and note down the network details. This ensures you can recover quickly if you replace the modem again.
Tip: Store the backup in a safe, accessible location.
FAQ
What do I do if I can’t access the modem’s admin page?
First, ensure you’re connected to the modem’s network, preferably with a wired connection. If you still can’t access the admin page, try a factory reset from the device’s reset button and then reattempt login with the default credentials. If the problem persists, contact your ISP for provisioning support.
If you can’t reach the admin page, connect via Ethernet and try a factory reset, then re-login with the default credentials or call your provider for help.
Should I reboot after changing settings?
Yes. After saving any new settings, reboot or power cycle the modem to ensure changes take effect. This is a common step to apply configurations like new Wi‑Fi names or passwords.
Yes. Reboot after saving changes to apply them properly.
Can I set up the modem without Wi‑Fi?
Absolutely. You can perform the initial setup using a wired Ethernet connection to a computer. This makes it easier to access the admin page and configure settings before enabling Wi‑Fi.
You can set it up with a wired connection first, then enable Wi‑Fi later.
What if I forgot the admin password?
Use the device’s reset button to restore factory settings, then create a new admin password during the re-login. Note that this will erase custom settings.
If you forgot the admin password, reset the modem and set up again with a new password.
How long does typical setup take?
Most people complete basic setup in 15–40 minutes, depending on whether you opt for a quick wizard or manual configuration. Provider provisioning can add time if there are outages.
Most setups take under an hour, depending on provider steps.
Is it safe to reuse my old SSID?
You can reuse the same SSID, but it’s safer to create a new network name and a fresh password to avoid conflicts with devices that remembered the old network.
You can reuse the name, but consider a fresh password and a new name for security.
Watch Video
Key Takeaways
- Plan the setup and gather essentials first
- Use a wired connection for initial configuration if possible
- Choose strong, unique Wi-Fi credentials and enable encryption
- Test connectivity on multiple devices to confirm coverage
- Back up your modem configuration for quick recovery