How to Set Up a Modem: Step-by-Step Guide for Home Internet
Learn step-by-step how to set up a modem, connect cables, configure Wi-Fi, secure your network, and test the connection for reliable home internet.

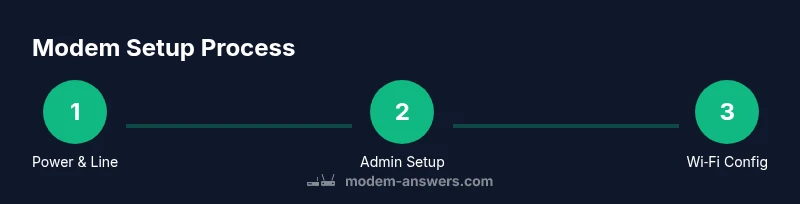
To set up a modem, connect the power, attach the coax or fiber line, and plug in your computer or phone via Ethernet. Access the modem’s admin page at its default IP, follow the guided setup to detect your internet connection, create a network name (SSID) and password, then test with a connected device and enable security features. If you have a separate router, connect it to the modem's Ethernet port and configure accordingly.
Why accurate modem setup matters
A correct modem setup forms the backbone of your home internet. It influences connection stability, speed, and the reliability of smart devices. According to Modem Answers, many homeowners underestimate the impact of proper placement and initial configuration. This guide explains why starting with the modem in the right place and with current firmware matters, and what success looks like: a stable line, predictable speeds, and a secure home network. We'll outline the common steps and terminology so you can approach this task confidently, whether you rent or own, and regardless of your ISP. The goal is a straightforward, replicable process you can repeat when you move or upgrade service. Expect practical guidance, not jargon, and a clear sequence you can follow today.
Equipment overview: modem, router, gateway
Modem basics: The device that translates your service signal from the provider into a digital internet connection. A separate router creates the Wi-Fi network, while a gateway combines both roles. Many homes use a standalone modem with a separate router; others use a modem-router combo. Understanding which device you have helps you configure the right settings. In this guide, we distinguish between the components and explain how to connect them. Key terms include WAN/Internet port, LAN ports, SSID, and WPA3 security. We'll also discuss cable types (Coax for cable internet, fiber, or DSL line) and what to expect from LED indicators. By recognizing these elements, you’ll avoid confusion during setup and troubleshooting.
Pre-setup checklist and safety
Before touching cables, gather materials, put the modem in a central, elevated location, away from heat and moisture, and ensure you have the service active. Power down devices as described by your provider, and have a clean workspace. Check that your coax or fiber line is undamaged and that you have an Ethernet cable long enough to reach your computer. If you're renting your modem from the ISP, confirm the model and any required activation steps. This section gives you a clear preflight checklist to prevent rework after you start.
Physical installation: cable connections and placement
Install the modem by connecting the service line first (coax or fiber). Then plug the power adapter and wait for the devices to boot. Place the modem on a stable surface with adequate airflow, avoid enclosed cabinets, and keep it away from other electronics that could cause interference. Add a computer or smartphone with an Ethernet cable connected to the modem for initial testing. The LED indicators should show a steady online state, which signals readiness for configuration.
Accessing the modem admin interface securely
Open a browser on a device connected to the modem and navigate to the default gateway IP (often 192.168.0.1 or 192.168.1.1). Enter the default username and password from the manual; change these credentials immediately for security. If your ISP uses a cloud-based management portal, follow on-screen prompts instead of local login. Create a backup of current settings before making changes, in case you need to revert. Keep in mind that many modern modems require a login verification step via a mobile app.
WAN and Internet connection configuration basics
Most modems support automatic connection via DHCP, which assigns an IP address from your provider. If your service uses PPPoE or static IP, you’ll need to enter the credentials supplied by your ISP. This guide focuses on the common dynamic setup, but we cover what to do if a login is required. After saving settings, run a quick test by loading a web page and checking status in the admin page. If you fail to connect, double-check the service status and cable connections before contacting support.
Wi-Fi setup and security essentials
Set a strong network name (SSID) that is easy to recognize but not tied to your personal information, and create a strong password using a mix of letters, numbers, and symbols. Enable WPA3 if available; if not, WPA2 is acceptable. Disable WPS and guest network by default or configure a guest network with restricted access. Save changes and reboot the router if prompted. After setup, test the network on multiple devices to ensure coverage and performance across rooms.
Advanced options: using a separate router or mesh and guest networks
If you prefer more control or home coverage, connect a separate router to the modem’s LAN port and configure it to handle Wi‑Fi settings. A mesh system can extend coverage for large homes; ensure the main node is near the modem for best backhaul. For guests, enable a dedicated guest network with limited bandwidth and access. These configurations give you improved performance and security without disrupting your primary network.
Tools & Materials
- Modem(Ensure compatibility with your ISP and that it supports the service type (cable, DSL, fiber).)
- Power adapter(Original adapter if possible; have a backup cable handy.)
- Coaxial or fiber service line(From wall outlet to modem; inspect for damage.)
- Ethernet cable(At least 6–10 feet recommended for testing.)
- Router (optional)(Use if you plan to deploy a separate router or mesh system.)
- Computer or smartphone(Needed to access the modem admin page.)
- Pen and notepad (optional)(To record settings and credentials.)
Steps
Estimated time: 60-90 minutes
- 1
Verify service and gather materials
Confirm your ISP active service and collect all required gear. Check your modem model, power adapter, cables, and a device for configuration. Having everything at hand prevents mid-task interruptions.
Tip: Double-check the ISP activation status and modem model before starting. - 2
Connect power and service line
Plug the modem into power and attach the service line (coax or fiber) securely. Avoid forcing connectors; a snug fit ensures a proper signal and boot.
Tip: Ensure the wall outlet is functional by testing a simple device first. - 3
Power on and wait for boot
Turn on the modem and wait 2–5 minutes for LEDs to stabilize. Do not unplug or move it during boot to prevent configuration errors.
Tip: If the LED stays red or off, power cycle after a minute and re-check connections. - 4
Test initial connectivity with a device
Connect a computer or smartphone via Ethernet to test a basic connection. Load a webpage to confirm traffic is flowing before proceeding to settings.
Tip: Use a wired test to rule out Wi‑Fi issues during configuration. - 5
Access the admin interface
Open a browser and enter the default gateway IP (commonly 192.168.0.1 or 192.168.1.1). Log in with the default credentials and prepare to change them.
Tip: Change the default password immediately after first login. - 6
Run the setup wizard / configure WAN
Follow the on-screen setup wizard or manually configure WAN/DHCP settings as required by your ISP. Save changes and allow the modem to reboot if prompted.
Tip: If PPPoE or static IP is required, enter the credentials exactly as provided by your ISP. - 7
Configure Wi‑Fi (SSID and password)
Create an easily identifiable SSID and a strong password. Select WPA3 if available; otherwise, use WPA2. Decide whether to enable a guest network.
Tip: Avoid personal identifiers in SSID; use a neutral name for privacy. - 8
Decide on router usage and finalize
If using a separate router or mesh, connect it to the modem’s LAN port and complete its setup. Test Wi‑Fi across multiple devices and locations.
Tip: Document the settings for future maintenance or re-setup.
FAQ
Do I need a separate router if my modem has built-in Wi-Fi?
Not always. If your home is small, the built‑in Wi‑Fi works. For larger homes or extra features, a separate router can improve coverage and control.
If your modem has built‑in Wi‑Fi, you can start there. For bigger homes or advanced features, add a separate router.
What is the difference between DHCP and PPPoE, and which should I use?
DHCP automatically assigns an IP address. PPPoE requires credentials from your ISP. Use DHCP unless your provider specifies PPPoE.
DHCP is automatic; PPPoE uses login credentials. Use DHCP unless your provider requires PPPoE.
How can I improve Wi‑Fi signal after setup?
Place the router in a central location, choose the best channel, and ensure firmware is up to date. Use both 2.4 GHz and 5 GHz bands if possible.
Put your Wi‑Fi router in a central spot, pick a good channel, and keep firmware updated.
Why is my internet not working after setup?
Check power, cables, and WAN status. Reboot the modem if needed, and verify service status with your ISP before requesting support.
Check power and cables, then reboot. If it still fails, contact your ISP for status checks.
How often should I update modem firmware?
Check for updates monthly or when the device notifies you. Apply updates to improve stability and security.
Check for updates monthly or when you see a notification.
Watch Video
Key Takeaways
- Power on/state the line and test before configuration.
- Secure the admin interface with a strong password.
- Decide between separate router or gateway Wi‑Fi for coverage.
- Test Wi‑Fi on multiple devices and locations.
- Keep firmware updated and back up settings.