How to Set Up a Modem: A Complete Step-by-Step Guide
Learn how to set up your modem from start to finish with clear, practical steps. This guide covers hardware, configuration, Wi-Fi, security, and troubleshooting for a reliable home network.

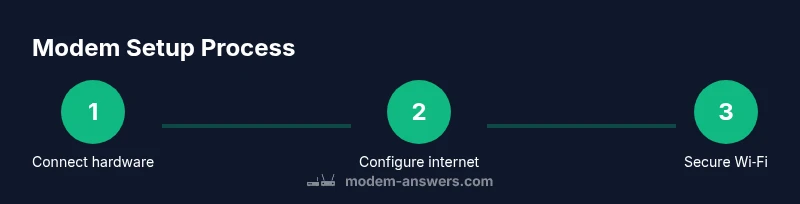
You will set up your modem by connecting the coaxial input, powering the device, and then configuring the administrative settings to enable Internet access and Wi‑Fi. This guide walks you through a 8–step process, including checking your provider requirements, choosing a safe Wi‑Fi name and password, and verifying the connection. No special tools beyond a computer or phone are needed.
Why a Clear Modem Setup Matters
A solid modem setup is the foundation of a reliable home network. When you understand how a modem integrates with your ISP, your router, and your devices, you reduce downtime and improve performance. According to Modem Answers, most homeowners benefit from a calm, methodical, step-by-step approach rather than guessing and retrying. This block explains what a modem does, why you’re configuring it, and how a thoughtful setup leads to fewer disconnects, smoother streaming, and faster speed tests across devices.
- A modem translates the signal from your provider into a form your devices can use.
- Your home network relies on the modem to hand out IP addresses and route traffic.
- A well-planned setup reduces troubleshooting time and improves security from day one.
Prep: Define Your Network and Gather Essentials
Before you touch the modem, gather what you’ll need and decide how you want your home network laid out. You typically have two options: a single device that acts as both modem and router, or a separate modem and dedicated router. Having a planned layout helps you position equipment for best coverage and minimal interference. The Modem Answers team recommends writing down your provider’s account details, the expected connection method (DHCP or PPPoE), and the desired SSID and password. This prep minimizes backtracking and speeds up the setup process.
Key prep items include:
- The active modem from your Internet Service Provider (ISP).
- A power adapter with the correct rating for the modem.
- A coaxial cable or the appropriate line from your wall outlet.
- An Ethernet cable for initial configuration (optional but helpful).
- A computer or phone to access the modem’s admin page.
Step 1: Connect the Coaxial Cable and Power Up
Physically connect the coaxial line from the wall to the modem’s coax input. Secure the connector gently but firmly to avoid signal loss. Then plug the power adapter into a nearby outlet and connect it to the modem’s power port. While the device powers on, you may notice a sequence of lights that indicate boot progress. Give the modem a full minute to boot and stabilize before moving to the next step. A clean boot ensures the device reads the latest configuration from your ISP and avoids partial initializations that cause errors later.
Tip: Place the modem on a raised, open surface to improve ventilation and signal distribution. Avoid enclosed boxes or shelves that trap heat.
Step 2: Connect a Computer to the Modem (for Admin Access)
To configure most modems, you’ll need to access the device’s administrative interface. Connect a laptop or phone to the modem using an Ethernet cable or the closest Wi‑Fi network (usually published on a label on the device). Open a web browser and enter the default gateway address shown on the modem label (often something like 192.168.0.1 or 192.168.100.1). If prompted, log in with the default credentials printed on the device. This step is where you’ll manage Internet settings, Wi‑Fi, and firmware updates.
Pro tip: If you can’t reach the admin page, temporarily disable your device’s VPN or firewall and retry. Always note the default credentials before you change them.
Step 3: Set Up the Internet Connection (DHCP vs PPPoE)
Your ISP may require DHCP (automatic IP assignment) or PPPoE (username/password). If your service uses DHCP, the modem should obtain an IP address automatically after you save the settings. For PPPoE, enter your ISP-provided username and password exactly as given. If you’re unsure, check the provider’s setup guide or contact support. After applying changes, the modem should establish a link with the ISP, and status indicators should reflect a successful online state.
If you don’t see a connection after changes, reboot the modem and recheck the credentials. Small typos can break the authentication handshake.
Step 4: Configure the Local Network (Wi‑Fi SSID and Security)
Now that Internet access is established, configure your home Wi‑Fi. Create a unique SSID (the network name) and a strong passphrase. For security, select WPA2 or WPA3 as your encryption method if supported by the device. Avoid broadcast names that reveal personal information. Consider enabling “Guest Network” if your home has visitors who require Internet access but shouldn’t access your main devices.
Save changes and reconnect your devices to the new Wi‑Fi network using the new password. Record the SSID and password in a safe place in case you need to reconnect later.
Step 5: Optional: Separate Router Mode vs Bridge Mode
If you already own a dedicated router, you may choose bridge mode to turn off the modem’s routing features and let the router manage the network. This avoids double NAT issues and can improve performance for gaming or streaming. Conversely, if you don’t own a router, leave the modem in router mode so it provides wireless access and firewall protections.
If you switch to bridge mode, you’ll need to configure your router’s WAN settings. Consult your router’s user guide for exact steps and ensure you disable the modem’s Wi‑Fi if you’re using an external AP.
Step 6: Update Firmware and Verify Connectivity
Firmware updates fix bugs, improve security, and can enhance performance. In the admin interface, check for firmware updates and apply them if available. After updating, verify that you have Internet connectivity on multiple devices and test both wired and wireless connections. It’s also wise to recheck the Wi‑Fi settings after an update, since some firmwares reset to defaults.
Remember to schedule updates during periods of low activity to minimize disruption. If a firmware update fails, reboot the modem and attempt again. If issues persist, contact support with your device’s model and version information.
Step 7: Optimize Placement and Signal Coverage
Positioning the modem for best coverage is often as important as the configuration itself. Place it high off the floor, away from metal objects and devices that generate interference (microwaves, cordless phones). Centralize the unit to reduce dead zones and avoid walls that block signals. If your home is large, consider an additional access point or mesh system to extend coverage without overloading a single device.
Additionally, avoid power strips that can cause heat buildup or EMI (electromagnetic interference). A clean, elevated location usually yields stronger, more stable Wi‑Fi signals across rooms.
Step 8: Basic Troubleshooting and What to Do Next
If you’re not getting Internet after setup, run through a quick checklist: confirm the modem is online, verify the LED indicators, check the coax connection, and test with a wired device. Reboot both the modem and the router if used. If the problem persists, call your ISP to confirm service status and authentication on your account. Keep a record of any changes you made and the times they occurred to help support resolve issues quickly.
For recurring problems, document device models, firmware versions, and error messages. This information can speed up remote diagnostics and avoid repeated steps.
Quick Validation: How to Confirm a Healthy Modem Setup
A healthy modem setup shows stable Internet across multiple devices and a reliable Wi‑Fi network. Use a quick speed test from a wired laptop and check multiple locations around the home to verify coverage. If results vary significantly, try relocating the modem, adjusting channel settings, or adding a mesh extender. Regular maintenance, such as periodic reboots and firmware checks, keeps your network secure and responsive.
Final Note: Keeping Your Network Secure and Up-to-Date
Ongoing security and reliability require periodic attention. Keep firmware current, use strong Wi‑Fi credentials, and monitor connected devices for unfamiliar activity. The Modem Answers team emphasizes routine checks and documented changes to simplify future troubleshooting and to preserve your home network’s health over time.
Tools & Materials
- Modem device(Your provided or purchased modem.)
- Coaxial cable / wall line(Ensure firm, clean connections.)
- Power adapter(Right rating for the device (usually 12V or as labeled).)
- Ethernet cable (Cat5e/Cat6)(Helpful for initial setup via wired connection.)
- Laptop or smartphone(Access the modem admin page.)
- Web browser(Chrome/Edge/Firefox recommended.)
- ISP account details(Username/password for PPPoE if required.)
Steps
Estimated time: 60-90 minutes
- 1
Identify and gather required items
Collect the modem, coax line, power supply, and a device to configure. Confirm ISP requirements and note any credentials.
Tip: Having everything ready prevents mid-setup back-and-forth. - 2
Attach the coaxial cable and power the modem
Firmly connect the coax from the wall to the modem, then plug in the power. Wait for the lights to indicate boot completion.
Tip: Avoid unplugging during boot to prevent corrupt initialization. - 3
Access the admin interface
Use a computer on the same network to navigate to the gateway address shown on the device label and log in with default credentials.
Tip: If you can't access the page, try a wired connection and disable VPN. - 4
Configure Internet settings
Set the connection type (DHCP or PPPoE) according to your ISP. Enter credentials if required and save.
Tip: Double-check spelling of PPPoE credentials to avoid authentication errors. - 5
Set up the local wireless network
Create an SSID, strong passphrase, and select WPA2/WPA3 security. Enable guest network if needed.
Tip: Use a unique, non-identifying SSID for privacy. - 6
Optional: enable bridge or router mode
Decide whether to run as the sole router or in bridge mode if you have a separate router.
Tip: Bridge mode prevents double NAT; ensure your router handles DHCP if enabled. - 7
Update firmware
Check for and apply firmware updates from the admin page. Reboot if required.
Tip: Firmware updates can improve security and stability. - 8
Test and place for best coverage
Test wired and wireless connections at multiple rooms. Relocate the modem if needed for optimal signal.
Tip: Elevate the modem and avoid obstructions to maximize range.
FAQ
What is the first thing I should do when my modem arrives?
Unbox, locate the coaxial input and power port, and gather the tools listed in the setup plan. Then connect the coax and power, and wait for the lights to show a stable boot.
Start by unboxing, then connect the coaxial line and power. Wait for a stable boot before moving on to configuration.
Do I need a separate router?
Not always. Some modems include built‑in routing and Wi‑Fi. If you already own a router, you can set the modem to bridge mode to avoid double NAT.
A separate router isn’t required if you’re happy with the built‑in Wi‑Fi, but you can use one if you need more control or coverage.
What credentials are needed for PPPoE?
PPPoE requires a username and password provided by your ISP. Enter them in the modem’s Internet settings and save.
PPPoE needs your ISP username and password; you’ll enter them in the modem settings.
How can I improve Wi‑Fi coverage?
Place the modem high and central, away from walls that block signals. If coverage is still weak, consider a mesh system or a second access point.
Boost coverage by moving the modem higher and central; add a mesh system if needed.
How do I know my modem is secure?
Use WPA2 or WPA3, change the default admin password, and keep firmware updated. Regularly review connected devices for unknown activity.
Secure your network with strong encryption, change admin passwords, and keep firmware updated.
What if the internet stops after setup?
Reboot both the modem and any connected router, verify the status lights, and confirm the service is active with your ISP.
If the internet stops, reboot devices and check service status with your provider.
Watch Video
Key Takeaways
- Plan network layout before you start
- Use unique SSID and strong security
- Keep firmware up to date for security
- Test both wired and wireless connections
- Document changes for future reference