How to Start a Modem: A Simple Home Setup Guide for Everyone
Learn how to start a modem with a clear, step-by-step approach—from wiring and power to configuring your network and testing connectivity. Ideal for homeowners and renters seeking reliable, easy-to-follow guidance.

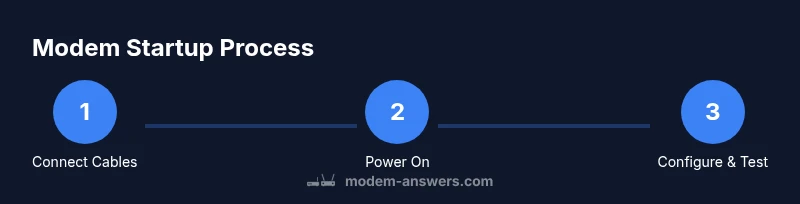
To start a modem, connect the power and service line, then power it on and wait for the lights to indicate online. Access the admin panel via the gateway address shown on the device label and run the setup wizard to configure your network name (SSID) and password. Test with a few devices to confirm connectivity.
Understanding What It Means to Start a Modem
Starting a modem is the first step toward a reliable home network. The modem sits at the gateway between your internet service and your home devices, translating the provider signal into data your router and gadgets can use. When you start a modem correctly, you establish a stable path for browsing, streaming, and work. According to Modem Answers, starting a modem properly sets the foundation for your home network, and the Modem Answers analysis shows that the biggest gains come from a clean startup plus a secure, consistent setup. In most homes, a standard startup takes just a few minutes, but a slow or skipped configuration can lead to flaky Wi-Fi and unhappy streaming. In this section we’ll outline why the process matters, what you’ll do, and how to recognize when everything is online and functioning as expected.
Safety and Prep Before You Begin
Before you touch the modem, gather the essentials and review safety basics. Confirm your service type (coax for cable, DSL for phone lines, or fiber in some cases) so you use the correct port. Unplug power if you’re changing hardware, and keep liquids away. Use a surge-protected power strip to guard against spikes. If you’re in a multi-device apartment or home, plan for where to place the modem and, if possible, a separate router. Modem Answers recommends preparing these steps ahead of time to avoid re-work. This preparation reduces the risk of damaging ports, misconnecting cables, or forgetting to have your login information handy. Reading your service provider’s guide can help you navigate any model-specific quirks and ensures you don’t skip firmware updates during the first power-up. The goal is a clean start with everything within reach, so you’re not scrambling in the middle of the setup.
What You Need Before You Start
While you can perform a basic modem start with the bare minimum, having the right tools makes the process faster and safer. Gather the modem, its power adapter, the service line (coax, DSL, or fiber ONT if provided), an Ethernet cable for a wired test, and a phone or computer for the admin page. If you intend to use Wi-Fi, have a second router or a modem-router combo ready. A clean, dry workspace and a stable table height improve cable management. Keep the login credentials for the admin page handy, and consider having a notepad to log the network name and password after you finish. In some homes you’ll bridge or set up a guest network later, so plan accordingly. With these materials in place, you’ll move into the startup sequence smoothly and avoid common disruptions. This block reinforces practical, real-world steps advised by Modem Answers.
The Startup Sequence: What Happens When You Power On
When you power on the modem, it goes through a boot sequence and begins negotiating with your provider’s network. The modem obtains its own address on the local network and then establishes a channel for your router to distribute signals to devices. This handshake can take about a minute or two, depending on the model and service type. You’ll typically see power and online indicators once the device has successfully connected. If you notice unusual blinking or no lights, don’t assume instant success—this is a sign to pause, recheck connections, or perform a quick reset as a last resort. Understanding this sequence helps you identify where a problem occurs, saving time during troubleshooting.
Configuring Your Network: SSID, Security, and Passwords
After the modem is online, configure your network settings. Use the setup wizard to create a unique network name (SSID) and a strong password. Choose the strongest available security standard (prefer WPA3 if offered, otherwise WPA2). Disable features you don’t need, such as WPS, to reduce risk. If you have multiple devices, consider creating a guest network for visitors to protect your main network and its devices. Document the SSID and password in a safe place. Strong configuration minimizes unauthorized access and improves performance, especially when many devices are connected simultaneously.
Testing and Verifying Connection Across Devices
With the network configured, test connectivity on several devices—phone, laptop, and a smart home hub. Run a quick speed test to verify your download/upload speeds match what your provider promises and check latency for online gaming or video calls. If speeds are significantly lower than expected, verify if wired connections show better performance or if interference is affecting wireless performance. Try relocating the router or adjusting channel settings, and ensure firmware is up to date for both modem and router. Consistent testing helps confirm a healthy start to your home network.
Troubleshooting Quick Fixes If Things Go Wrong
If you encounter issues, start with the basics: power cycle the modem and router, verify cables are firmly connected, and ensure the admin page settings reflect your service. If there’s still no internet, contact your provider to confirm service status or account issues. A factory reset is a last resort and will require reconfiguring your network from scratch. Keep a note of your login details and the configured SSID, as you will need them after a reset. Modem Answers recommends using the steps above as a quick-reference checklist to minimize downtime and frustration.
Long-Term Reliability: Firmware, Placement, and Maintenance
Regular firmware updates improve security and performance. Place the modem and router in a central, elevated location away from walls and metal objects to maximize signal coverage. Maintain orderly cable management to prevent accidental pulls. Schedule periodic rechecks of firmware, test speeds, and review security settings to keep your home network resilient. If you rely on a separate router, periodic checks between devices can prevent bottlenecks and ensure smooth operation across all connected equipment.
Tools & Materials
- Coaxial or DSL service line(Ensure you have the correct line type for your provider (coax for cable, DSL for phone lines).)
- Modem power adapter(Use the adapter that shipped with the modem or a compatible replacement.)
- Ethernet cable(For wired testing and setup verification.)
- Router (optional if not using a modem-router combo)(Needed for Wi-Fi distribution if your modem does not include built-in Wi-Fi.)
- Computer or smartphone(Used to access the modem admin page and run setup wizards.)
- Surge protector(Recommended to protect the modem from power spikes.)
Steps
Estimated time: 15-30 minutes
- 1
Connect power and service line
Plug the power adapter into the modem and connect the service line (coax or DSL) to the appropriate port. Ensure all connections are snug and not cross-connected. This creates the physical path for the internet signal to reach the device.
Tip: Verify you’re using the correct service line for your provider before plugging in. - 2
Power on and wait for boot
Turn on the modem and allow it to boot. Wait for the indicator lights to show an online status. If lights flicker or stay off for more than a couple of minutes, pause and recheck connections.
Tip: Avoid unplugging during boot to prevent boot-loop issues. - 3
Access the admin page
Open a web browser and navigate to the gateway address printed on the device label to reach the modem’s admin page. If you can’t locate it, reference the model’s manual or provider site for the correct address.
Tip: If you’re unsure of the address, try a different browser or a fresh browser profile. - 4
Run the setup wizard
Follow the wizard to configure network name and security. Select WPA3 if available, otherwise WPA2, and set a strong password. This step often automatically creates a default guest network if offered.
Tip: Use a unique SSID and a long, complex password. - 5
Test wired and wireless connectivity
Connect a device via Ethernet and another via Wi-Fi to test both paths. Run a quick speed test to verify results and check latency on real-time apps.
Tip: If wired is faster, use Ethernet for devices needing stability. - 6
Document and finish
Save the final settings and note down the SSID, password, and admin credentials. Confirm firmware update prompts and apply them if available.
Tip: Keep credentials in a secure, accessible place.
FAQ
What does it mean to start a modem?
Starting a modem means powering it up, establishing the data pathway from your provider, and configuring the initial network settings to enable internet access for your devices.
Starting a modem means powering it up, connecting it to the service line, and running the initial setup so your devices can connect to the internet.
Do I need a router after starting a modem?
If you want Wi-Fi or multiple devices, you’ll typically use a router or a modem-router combo. If your modem has built-in Wi-Fi, you may not need a separate router.
Yes, for Wi-Fi you usually need a router or a modem-router combo; otherwise a standalone router is fine with your modem.
What if I can’t access the modem admin page?
Double-check the gateway address printed on the modem’s label, ensure cables are connected, and try another browser. If problems persist, a factory reset may be needed after confirming with your provider.
Make sure you’re using the correct gateway address and try a different browser; contact support if you still can’t reach the admin page.
How long does setup take?
Basic setup usually takes 10 to 20 minutes, depending on your provider and hardware. More time may be needed for security tweaks or adding a guest network.
Most setups take about 10 to 20 minutes unless you’re doing extra security tweaks.
What is bridge mode and when should I use it?
Bridge mode disables the modem’s routing functions so a separate router can manage your network. Use it only if you have a dedicated router and specific network needs.
Bridge mode turns off the modem’s routing; use it if you have a separate router you want to control the network with.
What should I do after setup?
Test all essential devices, set security preferences, consider a guest network for visitors, and monitor performance for stability. Schedule firmware checks to keep things current.
Test your devices and secure the network after setup, and keep firmware updated.
Watch Video
Key Takeaways
- Start by safely connecting power and service lines.
- Access the admin page via the device label gateway address.
- Configure a strong SSID and security in the wizard.
- Test both wired and wireless connections for reliability.
- Document credentials and monitor firmware for best performance.