How to Get an Xfinity Modem Out of Bridge Mode: A Step-by-Step Guide
Learn how to safely remove an Xfinity modem from bridge mode with a clear, step-by-step guide. This educational article covers verification, disabling bridge mode, reboot sequences, and troubleshooting for a healthy home network.

Goal: exit bridge mode on your Xfinity modem so it acts as a standard gateway again. You’ll need admin access, a supported browser, and your Xfinity login. This guide walks you through verifying current bridge mode, disabling it, rebooting devices, and confirming the network is healthy after the change.
Understanding Bridge Mode and Why You Might Want to Exit
According to Modem Answers, bridge mode is designed to bypass the router functionality of a modem to let a separate device handle routing. Homeowners and renters often enable bridge mode to use their own router or a mesh network. However, keeping the Xfinity gateway in bridge mode can complicate troubleshooting, complicate IP addressing, and create double-NAT situations that hinder certain apps or gaming. Exiting bridge mode simplifies network management, ensures devices receive consistent DHCP addressing, and improves compatibility with smart home hardware. This section will help wean out common misconceptions and set realistic expectations: exiting bridge mode does not rupture your internet service; it simply hands routing duties back to a device you control directly. The Modem Answers team emphasizes planning before you change settings to avoid surprises during the reboot process.
Before you begin, acknowledge that the exact menus may slightly vary by firmware version. If you’re using a mixed environment (modem + separate router, or a gateway with a built-in router), ensure you have the credentials for both devices. This preparation reduces risk and speeds up the process. In most homes, disabling bridge mode restores NAT and firewall controls to the gateway or your primary router, which fosters straightforward port forwarding, parental controls, and device management. By following the steps below, you’ll minimize downtime and maintain a reliable local network.
What You’ll Need Before You Start
To safely exit bridge mode, gather everything you need so you don’t interrupt the process. Having the right tools in hand reduces back-and-forth and potential missteps. Here’s a concise checklist:
- Access to the Xfinity modem/router admin interface via a computer or mobile device
- An up-to-date web browser (Chrome, Edge, Safari, or Firefox) on the device above
- Your Xfinity account credentials (username and password) or a connected admin PIN if required
- An Ethernet cable (Cat5e or better) in case you prefer a wired connection for stability
- A quiet, distraction-free environment to follow the steps without interruptions
If you’re using a separate router behind the Xfinity gateway, you’ll want to have its admin login handy as well so you can adjust settings after bridge mode is disabled. The goal is to achieve a clean, single NAT environment with the gateway serving DHCP and firewall duties as expected.
Verifying Current Bridge Mode Status
Begin by confirming whether your Xfinity device is actually in bridge mode. This saves you from applying changes in error and ensures you understand the current topology of your home network. The quickest way to check is through the gateway’s admin interface. Look for a status indicator labeled Bridge Mode, Passive mode, or Router mode. If Bridge Mode is shown as enabled, you’re currently in the bridged configuration. If it’s disabled, the gateway is already operating with standard router/NAT functionality, and you can proceed with caution but without needing to flip any switches.
Pro tip: If your home network includes a separate router, bridging status might be hidden behind a parent device or a secondary UI. In that case, check both the modem’s interface and the router’s WAN settings to confirm which device is currently acting as the router. Documentation from Modem Answers suggests documenting the current state before making changes so you can revert if something doesn’t go as planned.
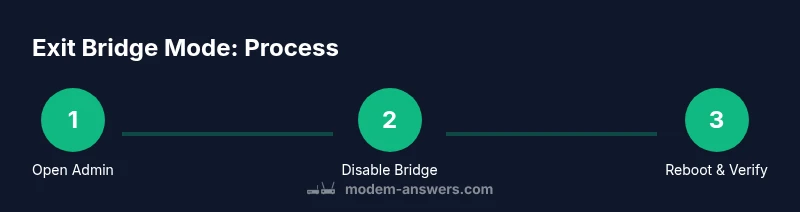
Step-by-Step: Disable Bridge Mode
This section outlines a clear plan to disable bridge mode. While the STEP-BY-STEP block provides explicit actions, this section prepares you for the precise sequence and potential variations you may encounter. The general flow is to access the admin interface, locate bridge mode settings, disable the feature, apply changes, and reboot. If you have a separate router, ensure it is configured to obtain an IP address from the gateway after the change. Always verify that the gateway is performing routing duties rather than acting as a bridge.
After you finish this section, you’ll be ready to move to the reboot phase and then run connectivity tests to ensure everything works as expected.
Network Reconfiguration After Exit
Disabling bridge mode changes how IP addressing, NAT, and firewall rules are applied in your home network. The gateway will typically start issuing private IP addresses to connected devices via DHCP, and it will apply its own firewall rules to protect your LAN. If you own a separate router, you may need to put it back into standard router mode or adjust its WAN settings since the gateway will now handle NAT.
In addition, update any port forwards or UPnP settings that were previously configured in bridge mode. If you relied on your router for firewall rules or parental controls, re-check these features in the gateway or router admin interface after the change. The goal is to restore a typical home network topology with a single point of management for most devices.
Reboot Sequence and Connectivity Tests
A careful reboot sequence helps ensure the new configuration takes effect across devices. Start by powering down all connected devices, then power up the gateway, and finally reconnect the router (if you use one) and client devices. A common order is: modem/gateway first, then the router, then computers, phones, and IoT devices. After powering up, test core functions: internet access, DNS resolution, and device reachability on local networks.
To verify success, run simple tests such as loading web pages, pinging a local device, and checking that devices obtain IP addresses from the gateway’s DHCP server. If problems occur, re-check the bridge mode setting and confirm you didn’t inadvertently reset the device during the process. The goal is a stable, single NAT environment with functional firewall rules.
Troubleshooting Common Pitfalls and How to Avoid Them
Several pitfalls can trip up the exit from bridge mode. Double NAT, misconfigured DHCP, or leaving the router in cascaded mode can cause connectivity issues. If your devices still show two gateways or you can’t reach the internet, revisit the gateway’s WAN/DHCP settings and ensure the bridging feature is off. Some users find that a hard reset is not necessary and can complicate reconfiguration; use a gentle reboot unless you explicitly need a factory reset for resolving a corrupted configuration.
Another frequent mistake is disconnecting the router before the gateway applies new settings. If you must disconnect, do so only after you have successfully disabled bridge mode in the gateway’s UI. Finally, document the exact changes you made so you can revert them if needed.
Safety Considerations and Best Practices
Whenever you’re modifying network equipment, follow best practices to protect your devices and information. Use a wired connection when possible to minimize misclicks, back up any credential information, and avoid deleting critical settings. If your home includes VOIP services or security cameras that rely on the gateway, double-check that those features remain accessible after the change. If you’re unsure, pause and consult with support to prevent service interruptions.
Best practices include keeping firmware up to date, using strong admin passwords, and testing network performance after changes. If you rely on custom DNS or parental controls, reconfigure them on the gateway to ensure continued coverage. Modem Answers emphasizes careful planning and testing to avoid unintended downtime.
Practical Steps for Double-Checking After Exit
After exiting bridge mode, perform a structured verification routine to ensure everything is functioning properly. Check that all wired and wireless devices can obtain an IP address, connect to the internet, and access local network resources such as printers or NAS devices. Confirm that NAT is functioning as expected by performing a simple port-forward test if you require external access to a service inside your network. If you notice any anomalies, re-open the gateway's settings and review relevant sections, including NAT, DHCP, and firewall rules. A small, deliberate test suite helps catch issues early and avoids user frustration.
Next Steps: Maintaining a Reliable Home Network
With bridge mode disabled, maintenance becomes a routine task rather than a crisis. Schedule periodic checks of firmware, review security settings, and monitor network performance using basic speed tests and device health indicators. Keep a simple log of changes for future reference, especially if you own multiple networking devices. Consider documenting your network topology so you know which device handles routing and where to adjust settings if problems arise. By staying proactive, you’ll reduce downtime and keep your home network running smoothly for all devices and applications.
Tools & Materials
- Computer or mobile device with browser access(Chrome, Edge, Safari, or Firefox recommended)
- Xfinity account credentials(Username and password; or login PIN if prompted)
- Ethernet cable (Cat5e or better)(For a wired admin connection)
- Access to the Xfinity modem/gateway admin interface(Typically at http://10.0.0.1 or http://10.0.0.1/xfinitygateway)
- Secondary router (optional)(If you’re using your own router behind the gateway)
- Notepad or digital tool to document changes(Record current bridge mode status before changes)
Steps
Estimated time: 30-45 minutes
- 1
Access the gateway admin interface
Open your browser and navigate to the gateway’s admin page. Log in with your Xfinity credentials. If you’re asked for a PIN, use the one you received or generated during setup. This is the primary control point for disabling bridge mode.
Tip: Use a wired connection for stability during login and changes. - 2
Locate Bridge Mode settings
In the gateway UI, find the Bridge Mode or Network Mode section, often under Advanced/Router settings. If you don’t see Bridge Mode, the device may already be in standard router mode or your firmware uses a different naming convention.
Tip: If you can’t locate it, consult the help section or search for 'Bridge Mode' in the UI’s search field. - 3
Disable Bridge Mode
Toggle Bridge Mode to off or select Router mode. Confirm that the change is applied, then save the settings. Some interfaces require a confirmation step or a 'Apply' button to finalize the change.
Tip: Avoid toggling multiple related settings at once to prevent unintended configurations. - 4
Apply changes and reboot if prompted
If the device asks you to reboot, allow it. A reboot ensures new routing rules take effect. Do not unplug the device during reboot, as this can corrupt settings.
Tip: If a reboot is not prompted, perform a manual reboot after saving changes. - 5
Power-cycle the gateway and connected devices
Power down the gateway first, then your router (if applicable), and finally your client devices. Wait 2–3 minutes between devices for full reinitialization. This reduces the chance of stale DHCP leases.
Tip: Keep a small log of the order and timing of reboots. - 6
Verify DHCP and NAT behavior
Check that devices obtain IP addresses from the gateway’s DHCP server. Confirm that NAT is active and your local network devices can communicate with the internet. If you use a separate router, ensure it’s no longer performing NAT in a bridged setup.
Tip: Run an IP address check on a couple of devices to confirm consistent addressing. - 7
Test core connectivity
Open websites, stream a video, and perform a speed test to ensure basic connectivity. Confirm access to local devices like printers or NAS shares. A successful test indicates a healthy transition.
Tip: Test during peak and off-peak hours if possible to assess performance under load. - 8
Document changes
Record the final Bridge Mode status, the exact UI path you used, and any changes to port forwards or firewall rules. Documentation helps future troubleshooting and reverts if needed.
Tip: Store the notes with your network equipment manuals for quick reference.
FAQ
Can I exit bridge mode without using the Xfinity app or web portal?
In most cases you’ll need access to the gateway’s admin interface via a web portal or app. Locate the Bridge Mode setting there and disable it. If you cannot access the UI, contact Xfinity support for help obtaining remote access or alternative methods.
You usually need access to the gateway’s admin interface to turn off Bridge Mode. If you can’t reach the UI, reach out to Xfinity support for assistance.
What if I can’t find Bridge Mode in the gateway UI?
Some firmware versions hide Bridge Mode behind a different label or require a different menu path. Check Router settings, Advanced options, or WAN/Internet settings. If still missing, the device might already be in router mode or a factory reset may be required.
If you don’t see Bridge Mode, look in related sections like Router or WAN settings; if necessary, consult Xfinity support.
Will exiting bridge mode affect my internet speed or VOIP services?
Exiting bridge mode typically restores standard NAT and firewall controls, which can improve stability and compatibility. It should not inherently slow your connection, but any misconfigurations could affect devices or VOIP services that rely on port forwarding.
Generally, you won’t lose speed, but misconfigurations can affect some services if ports aren’t properly forwarded.
Do I need to notify my provider after exiting bridge mode?
Usually no; exiting bridge mode is a local network configuration. However, if you run into persistent issues after changes, contact your provider for guidance or if you suspect service impacts.
No notification is typically required, but reach out to support if problems persist.
How can I verify the double NAT issue is resolved?
Double NAT occurs when two devices perform NAT. After exiting bridge mode, verify that only one device (the gateway) performs NAT. Check routes and DHCP behavior on both devices and run a traceroute to a public server to see the NAT path.
Check that only one device is providing NAT and run a test to confirm routing is clean.
What should I do if Bridge Mode re-engages after a restart?
If bridge mode returns after a restart, ensure you didn’t accidentally trigger a factory reset or misconfigured settings. Reopen the gateway UI and re-verify the Bridge Mode setting, apply, and reboot again. If it persists, contact Xfinity support.
If it relocks, re-check the setting and reboot; persistent issues may require support.
Watch Video
Key Takeaways
- Verify bridge mode status before changes
- Disable Bridge Mode via the gateway interface
- Follow the correct reboot sequence for all devices
- Test for double NAT and DHCP health after exit
- Document changes and monitor performance