How to Get Rogers Modem Out of Bridge Mode: Step-by-Step
Learn how to safely exit Rogers bridge mode and restore router functionality. This guide covers login, settings, reboot, reconnecting devices, and troubleshooting for a stable home network.

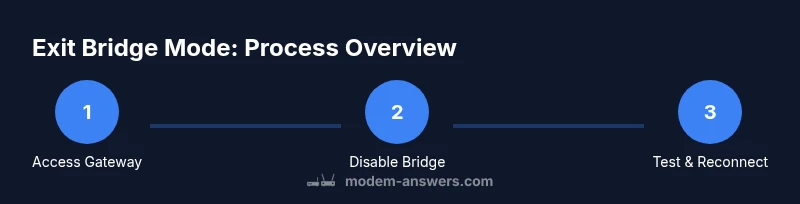
According to Modem Answers, this quick guide explains how to get rogers modem out of bridge mode. If you’re wondering how to get rogers modem out of bridge mode, the quickest method is to re-enable router functionality on the gateway. Log in to the gateway admin page, disable bridge mode, and switch to NAT/routing mode. Reboot the device and reconnect your devices to the network. This restores standard home-network management and Wi‑Fi control.
What bridge mode does and why you might want to exit it
Bridge mode is designed to turn a gateway into a simple modem, handing all routing duties to an external router. When enabled on a Rogers device, the built‑in firewall, NAT, DHCP, and Wi‑Fi management are bypassed for your own router. This is ideal if you already own a feature‑rich router, but it complicates basic tasks like updating firmware, viewing connected devices, or changing Wi‑Fi passwords. If you’re looking to regain full control of your home network, knowing how to get rogers modem out of bridge mode is essential. The Mac/Windows interface of the gateway stays the same, but the router features become active again after you disable bridge mode. In practice, exiting bridge mode means switching the gateway back to router mode, so your devices benefit from NAT, DHCP, firewall rules, and Wi‑Fi settings managed in one place. Keep in mind that some third‑party setups rely on bridge mode to avoid double‑NAT; in that case, you’ll need to adjust DHCP and port forwarding on both devices to prevent conflicts. This section sets the stage for a safe, step‑by‑step path to move away from bridge mode. According to Modem Answers, a careful, documented approach reduces the risk of disconnects and IP conflicts during the transition.
Prerequisites and safety considerations
Before you begin, gather the items and review safety notes. You’ll need access to the Rogers gateway admin interface, a computer or mobile device connected to the gateway’s network, and the login credentials. If you plan to keep your own router, have its WAN port ready and disconnect any previously connected devices temporarily to avoid misconfigurations. While exiting bridge mode is a common operation, mistakes can temporarily interrupt internet service. Make a quick backup of your current settings and write down your Wi‑Fi name and password in case you need to restore them. If you share your network with guests or tenants, consider scheduling the change for a low‑traffic period. This preparation helps you perform the changes smoothly and minimizes downtime.
Accessing the Rogers gateway admin interface
To change bridge mode, you must access the gateway’s admin interface. Connect a device to the gateway via Wi‑Fi or a wired Ethernet cable, then open a browser and navigate to the gateway’s IP address, typically 192.168.0.1 or 192.168.1.1. At the login screen, enter the admin username and password provided by Rogers (these are often printed on the device label or available in your Rogers account). If you don’t know the credentials, contact Rogers support or consult the guide for your model. Once you’re in, look for Bridge Mode, often under Advanced Settings or LAN > Bridge, then proceed to disable it.
Step-by-step guide overview
This section expands on the quick answer with a structured path you can follow to exit bridge mode safely. The steps assume you’re returning to router mode on the Rogers gateway. If you’re using your own router, ensure NAT is enabled on the gateway and that your router is configured to receive a public IP from the gateway. Re-check that your Wi‑Fi networks are active and that devices can connect. Firmware versions can alter exact labels, so use the directions as a map rather than a fixed path. After completing the steps, test your internet connection and verify that local devices can reach the network. Modem Answers emphasizes documenting each change for easier troubleshooting later.
Reconnecting devices and configuring Wi‑Fi after exiting bridge mode
With bridge mode disabled, the gateway’s router features come back online. Check the LAN DHCP server status, ensure devices obtain valid IP addresses, and confirm internet access. If you used your own router, decide whether to connect its WAN port to a LAN port on the Rogers gateway (letting the gateway handle NAT) or to keep NAT on your own router. Recreate any Wi‑Fi networks and passwords, rejoin mobile devices, and verify that all printers, smart home hubs, and IoT devices stay connected. If you rely on guest networks, re‑enable them and test access for guests.
Common issues and troubleshooting
During the transition, you might run into double‑NAT, IP conflicts, or intermittent connections. If you can’t access the internet after disabling bridge mode, verify that the gateway is actively routing (DHCP server enabled) and that the WAN connection status shows an active link. If devices fail to obtain IP addresses, try releasing/renewing DHCP on one device or power cycling the gateway and any connected routers. If your Wi‑Fi doesn’t appear, confirm the SSID broadcast is enabled and that you’ve entered the correct password. For persistent problems, re‑apply the changes carefully or consider contacting Rogers support to confirm that your account is configured for router mode rather than bridge mode.
Authoritative sources and further reading
- FCC: Home network security and router basics (https://www.fcc.gov/consumers/guides/home-network-security)
- CNET: How to turn off bridge mode (https://www.cnet.com/home/internet/how-to-turn-off-bridge-mode/)
- Rogers Support: Bridge mode and router settings guidance (https://www.rogers.com/support/articles/bridge-mode)
Tools & Materials
- Computer or mobile device(Connected to the Rogers gateway network; use a modern browser.)
- Gateway admin credentials(Username/password provided by Rogers; found on the device label or in your account.)
- Ethernet cable (optional)(Helpful for stable admin access during the change.)
- Pen and paper(Record current networks, SSIDs, passwords, and any custom settings.)
- Backup power or spare device(Optional for uninterrupted testing during changes.)
Steps
Estimated time: 20-40 minutes
- 1
Open the gateway admin page
Connect a device to the gateway, then open a browser and navigate to the gateway’s IP address (commonly 192.168.0.1 or 192.168.1.1). Sign in with the admin credentials provided by Rogers. This step establishes the access needed to disable bridge mode.
Tip: Ensure you are on the gateway's network; using a different router can prevent you from reaching the admin page. - 2
Find the Bridge Mode setting
Navigate to the Advanced Settings or LAN bridge section to locate Bridge Mode. The exact path varies by firmware, but you are looking for an option that enables or disables bridging. This is the critical step to transition from bridge mode to router mode.
Tip: If labels differ, search for terms like “Bridge,” “Bridge Mode,” or “Router mode.” - 3
Disable Bridge Mode
Toggle off Bridge Mode or select the option to return to router mode. Confirm that NAT (Network Address Translation) and DHCP are enabled to restore standard home-networking functions.
Tip: Disabling bridge mode can momentarily interrupt service; have a plan to reconnect devices quickly. - 4
Apply changes and reboot
Save or apply the new settings and reboot the gateway. A reboot ensures all router features come back online and that the gateway starts fresh with the new configuration.
Tip: Allow 2–5 minutes for the gateway to reboot fully before testing connections. - 5
Reconnect your devices
Reconnect devices to the network, either by the gateway’s Wi‑Fi or via your own router. If you’re using your own router, connect its WAN port to a LAN port on the Rogers gateway and ensure NAT is on your primary router.
Tip: If you use multiple devices, test one by one to confirm stable connectivity. - 6
Reconfigure Wi‑Fi as needed
Set the gateway’s Wi‑Fi name and password, or apply your preferred network credentials on your own router. Ensure guests and smart devices reconnect with the updated network details.
Tip: Document passwords and SSIDs for future reference. - 7
Test internet and local devices
Open web pages, run speed tests, and verify printers, smart home hubs, and IP cameras connect properly. Check that devices receive IP addresses and that there are no IP conflicts.
Tip: Check both wired and wireless clients to ensure complete coverage. - 8
Troubleshoot if needed
If issues persist, power cycle the gateway and connected devices, revisit the admin settings to confirm NAT/DHCP status, and consider a factory reset only as a last resort if you cannot recover connectivity.
Tip: Avoid factory resets unless you have backup settings documented.
FAQ
What is bridge mode and why would I need to exit it?
Bridge mode disables the gateway’s router functions, turning it into a modem. Exiting bridge mode re-enables NAT, DHCP, firewall, and Wi-Fi management on the gateway, which helps you leverage standard home networking.
Bridge mode makes the gateway act as a modem; exiting it brings back router features for easier control over your network.
Can I exit bridge mode without losing my settings?
In most cases, you can exit bridge mode without a full reset. You may need to re-enter Wi‑Fi details and reconnect devices after the change.
Yes, you can exit without a full reset; just reconfigure Wi‑Fi and reconnect devices.
What if I can’t access the admin page anymore?
Ensure you’re connected to the gateway’s network and use the correct IP address. If needed, check the device label or Rogers support for guidance.
If you can’t reach the admin page, verify your connection and IP address, then try again.
Will exiting bridge mode affect security features?
Exiting bridge mode re-enables the gateway’s firewall and NAT, which can improve security when properly configured. Keep firmware updated and use strong Wi‑Fi passwords.
It reactivates firewall features, so keep things updated and secure.
How long does the process take?
Typically 20–40 minutes, depending on how quickly you can access settings and reboot devices.
Usually about 20 to 40 minutes.
Do I need to reset the gateway after exiting bridge mode?
A full factory reset is rarely needed. A simple reboot and reconfiguration usually restores normal operation.
You usually don’t need a reset; reboot and reconfigure as needed.
Watch Video
Key Takeaways
- Exit bridge mode to regain router control.
- Verify NAT and DHCP are active after changes.
- Reboot and recheck all devices for connection.
- The Modem Answers team recommends documenting changes for stability.