How to Put Modem in Bridge Mode
Learn how to put your modem in bridge mode to simplify your home network, reduce double NAT, and empower your own router with clear, safe steps and practical tips.

Bridge mode turns your gateway into a simple modem, letting your own router handle routing, NAT, and Wi-Fi. This guide shows how to put modem in bridge mode, what to check first, and a safe, step-by-step process to test connectivity. It also covers potential pitfalls and rollback options.
Bridge mode: what it is and why you might want it
Bridge mode is a configuration that allows you to delegate routing to your own router. If you're wondering how to put modem in bridge mode, this article covers when it's beneficial, what to check before starting, and a safe, repeatable process. When a gateway performs routing duties, it can create double NAT, complicate port forwarding, and hinder advanced features like QoS or guest networks. By enabling bridge mode, you effectively turn the gateway into a simple modem and let your preferred router handle DHCP, NAT, firewall, and wireless management. This approach can improve performance and simplify network management, especially in homes with multiple devices, gaming consoles, or smart-home hubs. However, not every ISP gateway supports bridge mode, and some providers require additional steps. The Modem Answers team recommends verifying compatibility and having a rollback plan before you change any settings.
According to Modem Answers, many households see noticeable improvements in local network performance after bridging, especially when a capable router is in place. Always verify model-specific steps and keep notes of your current configuration so you can revert if needed. This article provides a practical, human-friendly path to safely enable bridge mode while preserving essential connectivity.
Remember: the exact labels and menus vary by device, so consult your model’s manual and Modem Answers resources for model-specific instructions.
Key considerations before enabling bridge mode
Bridge mode changes how traffic flows through your home network. Before you flip the switch, understand that NAT, DHCP, and Wi-Fi management may move entirely to your router. If you rely on the gateway for VoIP, smart-home hubs, or ISP-provided Wi-Fi features, bridging could disrupt those functions until you reconfigure. Ensure your router supports the connection type your ISP expects (often Ethernet WAN) and has up-to-date firmware. Check whether your ISP requires a specific login or activation step after bridging. Create a rollback plan in case you need to revert quickly. Finally, note that some providers bind services to the gateway and bridge mode may not be allowed on all plans. Modem Answers analysis shows that planning ahead reduces downtime and confusion during the transition.
Planning and prerequisites for a smooth transition
To ensure a smooth bridge mode transition, gather the essentials: a compatible separate router, a computer or phone to access admin interfaces, and a stable Ethernet connection. Record the gateway’s current IP addresses and DHCP settings, so you can compare after bridging. Verify you can reach your modem’s admin page, and find the bridge or IP passthrough option. Decide how you will manage Wi-Fi after bridging: either disable Wi-Fi on the gateway or leave it on if your router is set to take over management. Prepare to unplug devices during the switch so you can observe the change without residual connections interfering. Finally, confirm you have your router’s WAN settings handy, including whether you need DHCP or PPPoE credentials from your ISP. With these prerequisites, the bridging process becomes a planned upgrade rather than an improvisation.
How bridge mode interacts with routers and networks
Bridge mode affects the boundary between your ISP gateway and your own router. When you enable bridging, the gateway stops routing traffic and essentially becomes a pass-through device. Your own router then handles DHCP, NAT, firewall, and wireless networks. This can eliminate double NAT, improve gaming latency, and allow more advanced features like QoS, VPNs, and guest networks. However, compatibility matters: some gateways require you to disable their Wi-Fi entirely, and a few ISPs enforce specific settings that may complicate bridging. In practice, you will connect your router to the gateway’s LAN port, power cycle both devices, and configure the router to obtain an IP address automatically. If PPPoE is required by the ISP for the new connection, you will need those credentials on your router. Understanding these interactions helps you design a stable, secure home network.
Testing, validation, and rollback options
After enabling bridge mode and reconnecting your router, test basic connectivity by visiting a few websites and running a quick speed test. Check your router’s status page to confirm your public IP is assigned to the router, not the gateway. Verify that devices on the new network receive IP addresses from your router and that port forwarding works as intended. If you encounter issues, verify that the gateway is truly bridged (not still performing NAT) and confirm the router is obtaining an IP from the gateway’s passthrough path. Rolling back is simply reversing the steps: disable bridge mode on the gateway, reboot both devices, and re-enable the gateway’s original routing settings. Keep notes of changes in case you need to revert again.
Security, privacy, and best practices
Bridge mode itself improves security surface by consolidating firewall duties within your own router, but you still need to secure both devices. Update firmware on both the gateway (if best effort) and the router, enable strong WPA3 on your Wi-Fi, and disable any unnecessary services exposed by the gateway. Consider using a separate guest network on your router to isolate smart devices. Regularly review device logs and monitor for unusual activity. Finally, keep a documented backup of your router’s configuration so you can restore settings quickly after any updates or changes.
Tools & Materials
- A computer or mobile device(To access the modem/router admin interface via a web browser)
- Ethernet cable (Cat5e or better)(For a stable wired connection during setup)
- Current login credentials for the modem's admin interface(Often found on the device label; change defaults for security)
- A second router with WAN/LAN port(This will handle routing after bridging)
- ISP account details (if required for PPPoE or VLAN settings)(Some ISPs require credentials or specific VLAN tagging)
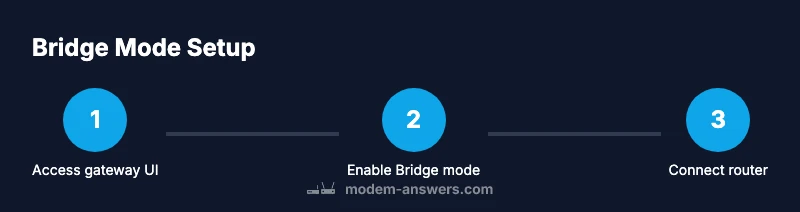
Steps
Estimated time: 25-45 minutes
- 1
Access the modem's admin interface
Connect to the gateway and log in using a wired or stable Wi-Fi connection. Enter the gateway's IP address (commonly 192.168.0.1 or 192.168.1.1) in a browser and provide the admin credentials. If you cannot locate the login, check the device label or your provider's portal.
Tip: Have your admin username and password ready; default credentials may be on the device label. - 2
Find the bridge mode setting
Navigate to the Advanced or WAN settings and look for Bridge, IP Passthrough, or Passthrough mode. The exact label depends on the model, so consult the manual if needed. Do not enable Bridge mode from the router UI; you must do this on the gateway.
Tip: If the option is not visible, contact your ISP or consult Modem Answers resources for model-specific guidance. - 3
Configure bridge mode and disable gateway routing
Enable bridge mode or passthrough and disable NAT/DHCP on the gateway if the option exists. Save changes and prepare for a restart. Some devices require you to select a specific passthrough method (MAC, VLAN, or fixed IP).
Tip: If you cannot find a way to disable DHCP, bridge mode may be implemented differently; refer to the device manual. - 4
Apply changes and reboot the devices
Apply the bridge mode setting and allow the gateway to reboot. This can take 5–10 minutes. Do not power off devices during the reboot to avoid partial configuration states.
Tip: Note the new status from the gateway; you should not rely on the gateway for routing after bridging. - 5
Connect your router to the gateway
Plug the router's WAN/Internet port into a LAN port on the gateway. Power cycle the router if it was connected during the bridge process. Ensure the router is the primary DHCP server for the home network.
Tip: Label the connection to avoid switching back accidentally; use a fixed LAN port on the gateway if available. - 6
Configure the router for WAN access
In the router settings, set WAN to DHCP (or obtain IP automatically) unless your ISP requires PPPoE with credentials. Enter any required ISP details on the router only, not the gateway. Save settings and reboot the router.
Tip: Double-check that you are using the router's WAN port for the uplink to the gateway, not a LAN port. - 7
Test connectivity and validate bridge mode
From a connected device, verify you have internet access and check the router's status page for a public IP. Run basic tests (web browsing, speed test) and confirm NAT is managed by your router. If issues arise, review the bridge state and re-check cabling.
Tip: If you still see NAT on the gateway, re-check bridging state and consider a factory reset as a last resort.
FAQ
What is bridge mode and why would I use it?
Bridge mode disables the gateway's routing functions, turning it into a passthrough device. This allows your own router to manage NAT, DHCP, firewall, and Wi-Fi. It is useful when you want more control over features and performance.
Bridge mode disables the gateway's routing so your own router handles NAT and Wi-Fi. This gives you more control and often improves performance.
Will enabling bridge mode disable Wi-Fi on my gateway?
In many setups bridge mode also disables the gateway's Wi-Fi to prevent interference. Some gateways allow Wi-Fi to stay on; if so, be prepared to manage Wi-Fi only from your own router.
Usually the gateway’s Wi-Fi is turned off when you bridge the modem, but some devices still broadcast. Use your router for Wi-Fi.
Do I need to contact my ISP to enable bridge mode?
Not always, but some ISPs lock certain features or require activation steps. If you cannot enable bridging yourself, contact customer support for assistance.
Sometimes you can bridge it yourself; other times your ISP needs to enable or verify the change.
What should I do if I lose internet after bridging?
First verify that the gateway is in bridge mode and your router is obtaining a WAN IP. Reboot both devices and recheck connections. If needed, revert the bridge mode changes and retry with caution.
If you lose internet, reboot both devices and confirm the bridge is active. Revert if problems persist.
How can I revert bridge mode if I need to?
To revert, disable bridge mode on the gateway, reboot devices, and restore the gateway’s original routing settings. Confirm that your router still manages DHCP and NAT after reverting.
To revert, turn off bridge mode and restore the gateway's normal routing. Then reboot both devices.
Will devices on my network need new IP addresses after bridging?
Your router assigns private IP addresses to devices on your home network. The public IP address will be assigned to your router by the gateway passthrough. DHCP remains handled by your router.
Yes, devices will get addresses from your router. The public IP comes from the gateway to your router.
Watch Video
Key Takeaways
- Plan ahead with the right gear and credentials.
- Bridge mode transfers routing to your router, eliminating double NAT.
- Test public IP on the router and verify DHCP from the router.
- Follow a rollback plan in case bridging causes issues.
- Secure both devices with updated firmware and strong Wi-Fi security.