How to Connect a Landline to a Modem
Learn how to connect a landline to your modem with clear, step-by-step instructions, safety tips, and troubleshooting for reliable home phone setup.

To connect a landline to a modem, verify your device supports a phone port or an ATA adapter, then connect with the proper RJ-11 cables and settings. This guide outlines the exact steps, safety checks, and testing procedures. According to Modem Answers, a correctly wired VoIP setup can streamline home phone and internet service while reducing outages.
What it means to connect landline to modem
Connecting a landline to a modem is about integrating your traditional telephone service with your internet-enabled hardware so calls can be handled by your broadband connection or by a VoIP system. The central idea is that the modem (or gateway) either provides a built-in telephone port (RJ-11) or works with an ATA adapter to convert analog signals into digital packets. When done correctly, this setup simplifies wiring, reduces equipment clutter, and often improves reliability of both voice and data services. In practice, you’ll be looking to route the landline through the device that handles your internet traffic, so that your phone line shares the same network path as your online activity while preserving call quality. For homeowners and renters, this often means confirming that your current modem supports voice or that you have a compliant VoIP adapter. This is where the phrase how to connect landline to modem becomes a practical project rather than a mystery. Our team at Modem Answers has found that a well-planned configuration minimizes feedback, cross-talk, and outages, especially in households with multiple devices and smart home components.
Compatibility and service considerations
Not every modem or gateway will support a landline natively. The first question to answer is whether your service plan includes VoIP-enabled voice service over your broadband line. If yes, you’ll typically have one of the following:
- A modem with a built-in telephone port (RJ-11) that can connect directly to a landline handset or a small office phone system.
- A separate ATA adapter (analog telephony adapter) that converts traditional phone signals into digital packets that ride over your internet connection.
If your modem lacks a phone port and you do not have an ATA, you may still connect landline service by relying on your provider’s voice gateway or by requesting a VoIP-enabled modem/router from your ISP. In some setups, voice may be provisioned through the gateway’s SIP settings, so understanding your provider’s requirements (credentials, server, and dialing plan) is essential. In short, the best approach depends on your equipment and your service’s voice technology. Modem Answers analysis shows that most households benefit from confirming compatibility before purchasing or changing hardware.
Hardware, cables, and environment
Before making connections, you’ll need a few reliable components and a clean workspace. The right cables and devices ensure you don’t introduce noise or mis-wiring that can degrade call quality. At minimum, you should have a VoIP-capable modem or gateway, an appropriate landline cord (RJ-11), and a way to access the modem’s configuration interface. The environment matters too: keep the modem in an open, dry area with enough space around ventilation grills; avoid wrapping cords around heavy objects that can cause wear. A quiet room or closet with moderate temperature helps prevent interference. If you’re using an ATA adapter, position it close to the modem to minimize cable length and potential signal loss. Finally, plan for a short test call when you finish the physical wiring so you can confirm audio clarity and stability.
Step-by-step approach for using a VoIP-enabled modem
If your modem has a built-in telephone port:
- Power down and unplug the modem for safety. This reduces the risk of short circuits or port damage during wiring. Then locate the RJ-11 port labeled 'Phone' or 'VOICE'.
- Plug one end of the RJ-11 landline cord into the wall jack and the other end into the modem’s phone port. Avoid using adapters here unless your setup explicitly requires them, as adapters can introduce impedance mismatch and degrade signal quality.
- Power on the modem and monitor the indicator lights. A steady light on the Phone or VoIP indicator generally signals readiness. If your modem has LED diagnostics, consult the manual to interpret any blinking patterns.
- If your service requires provisioning, log in to the modem’s admin interface from a connected computer or smartphone. Navigate to Voice or Telephony settings and enable the feature if it’s disabled by default. Save changes and reboot if prompted.
- Perform a basic test by dialing a familiar number and listening for clear audio without crackling or drops. If issues appear, recheck connections and reboot the device. If the problem persists, contact your provider.
- Document the settings and the wiring layout. A labeled cable map helps future maintenance and troubleshooting. If you don’t have a built-in voice port, proceed to the ATA adapter steps below.
- If you have multiple phones or a small PBX system, consider wiring the handsets through a distribution block or using a VoIP-compatible phone system that supports SIP and has priority on the network. This often yields better scalability and call quality over time.
Advanced configuration: modem settings and SIP credentials
Some providers require you to configure SIP credentials, server addresses, or specific port numbers for voice. In the admin UI, you’ll typically find sections labeled Telephony, Voice, SIP, or VoIP. You may need to enter:
- SIP server address or domain
- SIP user ID or username
- SIP password
- Telephone number (or extension)
If your service uses a factory-provisioned profile, you might skip manual entry altogether. Always save changes and reboot to apply.
Security matters here: use a strong administrator password for the modem, disable remote administration if you don’t need it, and ensure your Wi‑Fi network is secured to prevent unauthorized use that could impact call quality or incur charges. If you run into issues with credentials, contact your service provider for the exact SIP settings and provisioning steps. Involving them early can prevent misconfiguration and service interruptions. Modem Answers emphasizes validating each field with the provider’s documentation to avoid common mistakes.
Testing the line and common issues
After wiring and configuration, testing is essential. Place a call to a known working number and assess voice quality, latency, and disconnects. If you detect hiss, crackling, or echo, try these steps:
- Re-seat cables and verify that the correct ports are used (phone port vs. data port).
- Reboot the modem and any attached ATA devices in proper order (modem first, then ATA, then phones).
- Check for firmware updates for the modem or gateway, as updates can improve VoIP reliability.
- If you have QoS settings, consider prioritizing voice traffic to minimize jitter during peak hours.
If testing reveals continued problems, reach out to your ISP’s VoIP support with the exact model, firmware version, and any error messages. In some cases, issues may stem from external network congestion or provider-side provisioning rather than the local wiring.
Maintenance, best practices, and long-term care
Keep your setup up-to-date by monitoring firmware releases from the device manufacturer and your ISP. Regularly back up or document configuration settings, especially if you customize SIP credentials. Periodically test the line and keep a spare RJ-11 cable on hand in case of wear or damage. Consider labeling each port and cable to simplify future upgrades or troubleshooting. Finally, ensure that your home network remains stable—since voice packets share the same path as data, a sudden surge in network usage can impact call quality. By staying proactive with checks, updates, and documentation, you’ll maintain reliable landline service through your modem for years to come.
Tools & Materials
- Modem with integrated VoIP/telephone port(Check compatibility with your service provider and confirm the port is clearly labeled)
- RJ-11 landline cord(Standard phone cable, 6-12 feet recommended)
- RJ-11 to RJ-11 extension cable (optional)(Use if the modem is far from the wall jack)
- Computer or smartphone for admin UI access(Needed to configure voice settings if required by your provider)
- VoIP ATA adapter (optional)(Needed only if your modem lacks a native phone port and your provider supports ATA-based solutions)
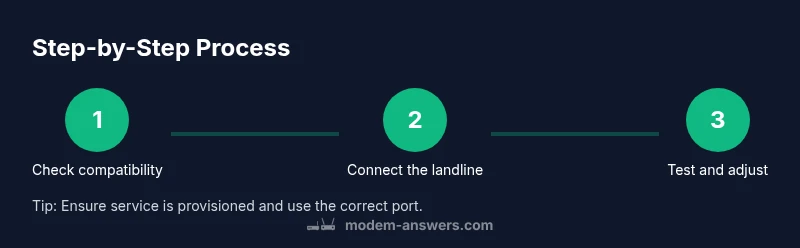
Steps
Estimated time: 20-35 minutes
- 1
Verify equipment and service compatibility
Confirm your service supports VoIP and that your modem or gateway provides a phone port (RJ-11) or that you have an ATA adapter. If provisioning is required, collect any SIP credentials or server details from your provider before wiring.
Tip: Having the provider’s exact VoIP settings on hand saves time and prevents misconfigurations. - 2
Power down and locate ports
Power down the modem and locate the correct phoneline port. Identify the wall jack that will feed the line into the modem and ensure you are using a standard RJ-11 cable. Avoid using data ports for voice unless your provider specifies otherwise.
Tip: Label the ports to avoid future mistakes after changes. - 3
Connect the landline to the modem
Plug the RJ-11 cord into the wall jack and the other end into the modem’s voice port. If your setup requires an ATA adapter, connect the landline to the ATA input and connect the ATA to the modem’s data port as per the adapter instructions.
Tip: Do not force cables into wrong ports; miswiring can damage equipment. - 4
Power up and access the admin UI
Power on the modem and open the admin interface from a connected device. Navigate to Telephony/VoIP settings and enable voice features if disabled. Save changes and reboot if prompted.
Tip: Keep a browser bookmark for quick access to the admin page. - 5
Enter SIP credentials if required
If your provider requires them, enter SIP server, user ID, password, and any dialing rules. Some services provision these automatically; skip this step if your device shows a ready status.
Tip: Double-check credentials against the provider’s documented values to avoid service outages. - 6
Test the dial tone and call quality
Make a test call to verify dial tone and audio clarity. Listen for hiss, echo, or cutouts and adjust settings or wiring as needed.
Tip: Test at different times of day to catch network variability. - 7
Document settings and perform a final check
Record the final wiring map and the exact settings used. Reboot devices if changes were made and perform one final call test to ensure stability.
Tip: Store notes with the date of the last firmware update for future reference.
FAQ
Do all modems support landlines?
No. Only VoIP-enabled modems or gateways with a telephone port (RJ-11) support landlines. If your device lacks a phone port, you may need an ATA adapter or a provider-supplied voice gateway.
Not all modems support landlines; check for a phone port or consider an ATA adapter.
What is an ATA adapter and when do I need it?
An analog telephony adapter converts traditional phone signals into digital packets so VoIP can carry voice over the data network. Use it when your modem lacks a built-in phone port or when your provider requires an ATA-based setup.
An ATA converts analog phone signals for VoIP; needed if your device lacks a phone port.
Why is there no dial tone after setup?
Possible causes include incomplete provisioning, incorrect port wiring, or VLAN/QoS settings interfering with voice traffic. Re-check connections, re-provision settings, and reboot devices. If unresolved, contact your provider.
No dial tone can mean provisioning or wiring issues; re-check settings and consider provider support.
Is it safe to test with a regular phone?
Yes, as long as you’re using an RJ-11 connection to the correct phone port. Avoid trying to connect to data ports or USB ports not designed for voice.
Yes, use a proper RJ-11 connection to a voice port.
How do I improve call quality if problems persist?
Prioritize voice traffic with QoS settings, ensure firmware is up to date, and keep cables short and well-seated. If the issue continues, consult provider support.
Prioritize voice traffic and update firmware; if needed, contact support.
What paperwork should I keep?
Document wiring maps, SIP credentials, and the firmware version of the modem. This helps with future upgrades, troubleshooting, and service calls.
Keep a wiring map and credentials handy for future setups.
Watch Video
Key Takeaways
- Verify equipment compatibility before wiring.
- Use the correct RJ-11 ports to avoid issues.
- Document settings for easy future maintenance.
- Test dial tone after wiring to confirm success.
- Keep firmware updated for reliability.