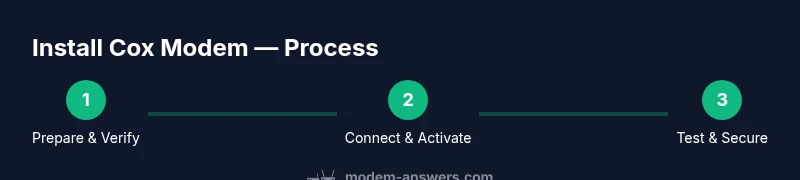
Cox Install New Modem: A Practical Step-by-Step Guide
Learn how to install a Cox-approved modem with a clear, actionable process. This guide covers compatibility, activation, bridge mode, and speed testing for a reliable home network.

By following this guide, you will successfully install a Cox-approved modem, verify compatibility, activate service, and optimize your home network. You’ll need a compatible DOCSIS modem, a coaxial cable, an Ethernet cable, and access to your Cox account. The steps cover connection, activation, possible bridge mode, and speed testing to ensure reliable performance.
Cox Install New Modem: A Practical Overview
Installing a Cox modem in your home is a straightforward project when you have the right steps. This guide covers what you need, how to connect—coaxial cable, power, and ethernet—and how to activate your service without surprises. According to Modem Answers, starting with a compatible device helps avoid activation delays and ensures you get the speeds your plan promises. The process is similar whether you’re upgrading an aging modem or starting fresh with a new Cox install. Confidence comes from knowing what to expect: compatibility checks, correct cabling, activation through Cox, and a quick speed test after you’re online. The goal is a stable, secure network with a clean setup that minimizes interference and downtime. We’ll walk through the prerequisites and then dive into the hands-on steps, including how to set up bridge mode if you plan to use your own router. This section sets the stage for a smooth installation that supports modern Wi‑Fi and wired devices found in most homes.
Compatibility and provisioning basics
Your Cox service relies on a DOCSIS modem that is approved for your region and plan. Modem compatibility means your device will be recognized by Cox’s provisioning system during activation, and the right firmware will be loaded. If you rent from Cox, the activation typically happens automatically with minimal user input. If you own a modem, you’ll need to verify it is Cox-approved (DOCSIS 3.0 or 3.1 is common) and prepared for activation. In some areas, Cox uses channel bonding and advanced QoS features that require a modern modem. By understanding these basics, you reduce the risk of activation delays and ensure your equipment will support your current internet speeds and future upgrades. Modem Answers analysis shows that using a modern, approved modem tends to produce more stable connections and consistent performance. Keep your Cox account credentials handy for activation and troubleshooting.
Tools and materials you’ll need
Before you begin the Cox install new modem process, assemble the essentials so you won’t interrupt the setup. A Cox-approved DOCSIS modem (3.0 or 3.1), a reliable coaxial cable (RG6 recommended), an Ethernet cable, and access to a computer or mobile device for activation are the core items. If you’re using your own router, have it nearby and ready to connect after the modem is online. A pen and notepad help you record MAC addresses, account numbers, and any error messages. Finally, ensure you have a clean, dry workspace away from heat sources and moisture and enough space to place the modem with good airflow. A checklist can prevent last-minute trips to the hardware shelf.
Physical connection and initial power-on
Connect the coaxial cable to the wall outlet and the modem’s coax input, then plug the modem into power. Allow the device to boot fully; indicator lights should stabilize within a few minutes. If you have a router, connect it to the modem via an Ethernet cable, and leave the router’s wireless active if you’re using it as your main Wi‑Fi. Avoid fussing with the interior jacks or forceful bends in the cable, as poor connections can degrade signal quality and slow activation. After power-up, you’ll be ready to begin activation through Cox.
Activation and provisioning steps
Activation can be done online through your Cox account or via Cox’s activation portal, depending on your region. You’ll typically be prompted to confirm your modem’s MAC address and confirm service terms. If you rent from Cox, activation may complete automatically after the device is recognized. If you own a modem, you may need to press a reset on the device or use the admin page to confirm settings. During activation, Cox provisions the modem with the correct service profile, assigns an IP address, and enables your internet connection. If activation fails, retry steps or contact Cox support for remote provisioning.
Bridge mode and using your own router
If you plan to use your own router, bridge mode on the modem disables its built-in routing and Wi‑Fi functions so the router can manage the network. Access the modem’s admin interface via a web browser (the address is typically provided in the manual or on a sticker on the device). Locate the bridge mode setting under network or advanced options, enable it, save changes, and restart the modem. Then configure your router’s WAN/Internet connection to obtain an IP automatically (via DHCP). This setup often yields improved performance and easier network management, especially for homes with several devices or a mesh Wi‑Fi system. If you prefer simpler setups, you can keep the modem’s router enabled and use a separate access point.
Performance testing and optimization after install
Once activation completes, test your speeds to verify the service is delivering as expected. Use wired tests first for baseline measurements, then test Wi‑Fi performance in areas where devices are used most. If speeds are lower than expected, check coax connections, reboot devices, and ensure your router firmware is up to date. Place the modem and router in an open, central location away from obstructions and interference sources like microwaves. Consider tuning Wi‑Fi channels to reduce congestion and enabling features like QoS for bandwidth prioritization on active devices. Consistent testing helps you identify issues before they become problems and confirms you’re getting the plan you pay for. The Modem Answers team notes that regular checks after installation help maintain stable performance over time.
Troubleshooting common issues and when to contact Cox
If activation stalls or devices fail to connect, verify all physical connections, reboot, and retry activation. Check the service status page for outages in your area before calling. If you still can’t activate, Cox support can provision the modem remotely or offer a replacement. For ongoing issues, verify that you’re using a Cox-approved modem and confirm the device supports your plan’s speeds. If you’re seeing inconsistent speeds, inspect signal levels on the admin page, check for interference from other networks, and consider upgrading to a newer DOCSIS standard supported by Cox. The goal is to avoid dead zones and ensure reliable coverage across your space. The Modem Answers team would emphasize patience and precise data collection when contacting support to speed up resolution.
Security, maintenance, and best practices after install
Secure your home network by changing default admin passwords and enabling WPA3 if available. Keep firmware up to date and review connected devices periodically. Disable remote management if you don’t need it, and consider enabling firewall features on your router. Regularly reboot Internet devices during extended outages or when performance drops. If you host guest networks, isolate them from your primary network to protect devices and data. Maintaining a clean, secure setup helps prevent intrusions and ensures your home network remains fast and reliable. The Modem Answers team recommends documenting the setup, including the dates of updates and any changes to bridge mode or router settings.
Tools & Materials
- Compatible DOCSIS modem(Cox-approved, DOCSIS 3.0 or 3.1 depending on plan)
- Coaxial cable(Quality RG6 recommended for stability)
- Ethernet cable(Cat5e or better for reliable wired speed)
- Power adapter(Included with modem; ensure adequate outlet proximity)
- Computer or smartphone(For activation and admin access)
- Cox account login information(Needed for activation and provisioning)
- Notepad and pen(Record MAC addresses, steps, and error codes)
Steps
Estimated time: 45-60 minutes
- 1
Verify compatibility and gather materials
Confirm your modem is Cox-approved and supports your service tier. Assemble the coaxial cable, Ethernet cable, power adapter, computer or smartphone, and Cox account credentials. Having everything ready prevents mid-setup trips for replacements or alternatives.
Tip: Check the modem’s MAC address and the Cox account to confirm which device is registered for activation. - 2
Disconnect old equipment and plan the layout
Power down and unplug the old modem or gateway. Decide where to place the new modem for best signal distribution, avoiding cramped spaces and heat sources. Ensure the coax wall outlet is accessible and the outlet is in good condition.
Tip: Leave at least 2 feet of clearance around the modem for airflow and cooling. - 3
Connect coax and power, then boot
Attach the coaxial cable to the wall outlet and the modem, then plug the unit into power. Allow the modem to boot fully; wait for the status lights to stabilize before proceeding to activation.
Tip: If lights stay red or flicker, reseat the coax connector and reboot the modem. - 4
Activate with Cox
Open the activation portal on your computer or use the Cox app. Enter the modem’s MAC address and follow the prompts to provision the device to your account. If you rent from Cox, activation may complete automatically once the device is recognized.
Tip: Have your Cox account number handy and be prepared to confirm service terms. - 5
Connect a router (optional) and configure bridge mode
If you’re using a separate router, connect it via Ethernet and log in to the modem’s admin page to enable bridge mode. Disable the modem’s Wi‑Fi to avoid interference with your router’s wireless network.
Tip: Bridge mode often improves performance for multi-device networks and mesh systems. - 6
Test wired and wireless performance
Run speed tests over Ethernet first, then test Wi‑Fi in common living areas. Note any discrepancies and adjust router placement or firmware as needed. Document results for future reference.
Tip: Test at different times of day to identify peak usage impacts. - 7
Fine-tune and secure the network
Update firmware if prompted, set a strong Wi‑Fi password, and enable encryption. Consider guest networks for visitors and disable unused services. Maintain a regular reboot schedule if you notice slowdowns.
Tip: Use a unique, strong password and enable automatic security updates. - 8
Troubleshoot and know when to call support
If activation fails or you see persistent instability, re-check connections, power cycle devices, and verify plan compatibility. When issues persist, contact Cox support and reference your activation logs and error codes.
Tip: Document error codes and dates to speed up the support call.
FAQ
Do I need a Cox-approved modem for activation?
Yes. Using a Cox-approved modem ensures compatibility with their provisioning system and reduces activation delays. If you own a modem, verify it is supported for your service tier.
Yes, a Cox-approved modem helps activation go smoothly.
Can I use my own router with Cox internet?
Yes, you can, but you may want to enable bridge mode on the modem so the router handles all routing functions. This often provides better performance for multiple devices.
Yes—bridge mode lets your router manage the network.
What should I do if activation fails?
Retry the activation steps, check connections, and verify that your modem is registered to the correct Cox account. If issues persist, contact Cox support for remote provisioning.
Retry activation and contact support if needed.
How long does activation typically take?
Activation usually completes within minutes after you submit the modem information, but delays can occur if the line is busy or there is a regional provisioning issue.
Activation is usually quick, but can vary by region.
Should I place the modem near the router?
Place the modem in a central, elevated location with clear airflow. If you’re using a separate router, place it high and away from walls that block signals to optimize coverage.
Place both devices in open spaces for best signal.
Watch Video
Key Takeaways
- Verify modem compatibility before activation
- Use Cox-approved modem to ensure provisioning
- Bridge mode improves router-based networks
- Test speeds after activation to confirm plan performance
- Secure and maintain your home network for reliability