How to Install Cox Modem: A Step-by-Step Guide
Learn how to install a Cox modem with a clear, step-by-step approach. This guide covers prep, activation, Wi‑Fi setup, and troubleshooting for homeowners and renters.

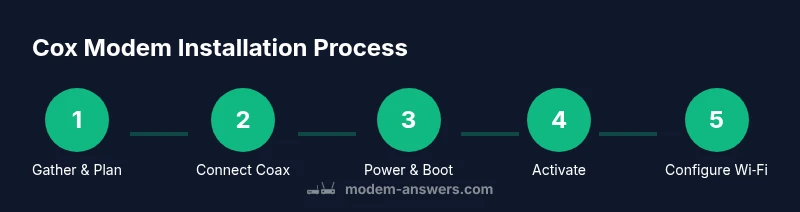
Install Cox modem in six simple steps: disconnect, connect the coax, power up, activate, configure Wi‑Fi, and test. This concise version gives you the essential actions; for nuance and troubleshooting, read the full guide.
What Cox Modem Does and Why This Setup Matters
A Cox modem is the gateway between your home network and the Cox service. Depending on your model, it may be a traditional modem or a combined modem‑router device. Understanding what the device does helps you decide whether to use Cox’s gateway or your own router behind it. According to Modem Answers, a clear installation plan reduces setup errors and speeds up getting online. When you follow a structured process, activation tends to be smoother, and your home network gains immediate reliability. In this guide, you’ll learn how to identify the equipment you need, choose the right configuration, and verify that your internet is working correctly from the first test. The goal is a stable connection, a secure Wi‑Fi network, and a simple way to troubleshoot if something goes wrong. By following these steps, homeowners and renters can confidently install Cox internet without guesswork.
Pre-Install Checklist and Safety Considerations
Before you touch any cables, take a moment to plan and verify a couple of basics. Confirm that your Cox service is active on your account and that you have the activation code or login credentials ready. Inspect the wall coax outlet for visible damage and ensure the line is not loose or damaged. If you notice any issues, contact Cox support before starting. Safety comes first: keep power outlets dry, avoid overloading outlets with multiple power adapters, and place the modem on a stable surface away from heat sources or water. Lastly, gather your tools and materials so you don’t have to pause mid‑setup. This preparation helps prevent delays and missteps later in the installation.
Understanding Modem and Gateway Options for Cox
Most Cox installations use either a modem alone or a gateway combo device that includes a router. A standalone modem gives you the option to pair with your own router, which can be preferable if you want advanced features or a particular Wi‑Fi setup. If you choose Cox's gateway, you’ll benefit from integrated Wi‑Fi but may face limits on custom configurations. The decision often comes down to whether you prefer simplicity or control. Modem Answers notes that choosing the right device from the start helps reduce compatibility issues and firmware updates. If you already own a router, you can place it behind the Cox device and disable NAT on the Cox unit if you want to keep your own network management. This helps prevent double NAT issues that can complicate gaming or video calls.
Physical Installation: Coax, Power, and Placement Best Practices
Begin by locating the main coax outlet near your service entry. If you’re replacing an old device, unplug and remove it carefully. Connect the coax cable firmly to the modem’s coax port, ensuring it is snug but not overtightened. Connect the modem’s power adapter to a live outlet and plug it in, then switch on the device. Allow the modem to boot fully—this can take a few minutes and is indicated by steady lights on the front panel. Place the modem in a well-ventilated area, away from direct sunlight and heat sources, with at least a few inches of clearance on all sides for airflow. Avoid placing the unit on the floor or behind furniture where signals could be blocked. If you’re using a separate router, position it for optimal coverage and plan where the two devices will sit for best performance.
Activation and Initial Configuration: Getting Online
Once the hardware is connected, it’s time to activate your Cox service. Open a web browser on a device connected to the modem (via Ethernet or Wi‑Fi) and follow Cox’s activation prompts, either on the Cox website or in the Cox app. You’ll typically sign in with your Cox account credentials, confirm your service address, and link the modem’s MAC address to your account. If you’re using your own router behind the Cox gateway, you may need to enable bridge mode or connect the router in a specific configuration to avoid double NAT. After activation, update the default admin password and note your new Wi‑Fi network name (SSID) and password for future use. If activation stalls, contact Cox support for assistance.
Optimizing Wi‑Fi: SSID, Password, Security, and Guest Networks
With online service established, configure your Wi‑Fi to be secure and easy to manage. Change the default SSID to something memorable but not revealing personal information. Use WPA2 or WPA3 security with a long, unique password. Consider setting up a guest network to keep your main network more secure when visitors connect with devices like phones and tablets. If you have smart home devices, assign them to a separate network or VLAN as a safety precaution. Place the router in a central location away from thick walls or metal objects to maximize signal strength and speed. Regularly check for firmware updates from Cox or your modem’s manufacturer to keep performance optimized.
Common Pitfalls and Pro Tips
Even experienced users stumble on a few recurring issues. Ensure your coax connections are tight and undamaged—loose connectors are a frequent cause of flaky performance. Avoid using old splitters that degrade signal quality; if you must split the signal, use a modern, high‑quality splitter and test both paths. Do not run heavy power cables near the modem, and keep it away from moisture and heat. Pro tip: document your SSID, password, and admin credentials in a safe place. If you run into issues, a quick power cycle (unplug, wait 30 seconds, plug back in) often resolves many problems. Modem firmware and provider activation steps can sometimes require a second attempt; stay patient and follow the prompts closely.
Tools & Materials
- Coaxial cable(RG6 recommended; ensure the wall outlet is live and undamaged.)
- Ethernet cable(Cat5e or better; optional if fully relying on Wi‑Fi.)
- Modem power adapter(Plug into a live outlet near the modem.)
- Activation information(Cox account number or activation code (or login credentials) ready.)
- Device for activation(A computer, tablet, or smartphone with internet access.)
Steps
Estimated time: 30-45 minutes
- 1
Gather and verify equipment
Collect all listed items and confirm your Cox service is active on the account. Having everything ready prevents mid‑install delays and makes activation smoother.
Tip: Double‑check the coax outlet for damage before connecting. - 2
Shutdown and prepare the installation area
Power off nearby devices if instructed by Cox; clear space around the installation area to avoid accidents and to keep cables tidy.
Tip: Place the modem on a stable surface with good ventilation. - 3
Connect the coax cable
Attach the coax cable securely to the wall outlet and the modem. A firm, not overtight, connection ensures a stable signal.
Tip: If the line is loose, tighten gently and test the signal. - 4
Power on and allow boot time
Plug in the modem’s power adapter and wait for the device to boot completely. This may take several minutes as the lights stabilize.
Tip: Do not unplug during boot; wait until the status lights indicate online. - 5
Activate the service and link the device
Use a computer or mobile device to access Cox activation prompts, sign in, and link the modem’s MAC address to your account.
Tip: If you’re using your own router, decide whether to enable bridge mode or place devices in separate networks. - 6
Configure Wi‑Fi and test connectivity
Change the SSID and password, enable strong security, and connect a test device to verify internet access.
Tip: Run a quick speed test to confirm expected performance.
FAQ
Do I need a technician to install Cox modem?
No—most customers can self-install by following Cox activation prompts. If you encounter persistent issues, you can request a technician from Cox.
You can usually install it yourself; Cox support can help if you run into problems.
Can I use my own modem with Cox service?
Yes, Cox supports many third‑party modems that are DOCSIS compliant. Check compatibility on Cox’s site and be prepared to activate the device through your account.
Yes, you can use your own modem if it’s compatible; activation is through your Cox account.
How long does activation take?
Activation is typically quick, but it can take a little time if prompts need verification or updates occur. If activation stalls, contact Cox support.
Activation usually happens quickly; if it stalls, contact Cox for help.
What should I do if I can’t find a coax outlet?
Locate the closest entry point where the service line enters your home. If you can’t locate it, contact Cox to guide installation.
If you can’t find the coax outlet, reach out to Cox for assistance.
How do I change the Wi‑Fi name and password?
Log in to the modem’s admin page or Cox app, then edit the SSID and security settings. Save changes and reconnect devices.
You can change the Wi‑Fi name and password in the app or the modem’s page.
What do the lights on the modem mean?
Power, online, and link/receive lights indicate status. If lights show unusual patterns, consult the manual or contact support.
Check the lights: if anything seems off, refer to the manual or call support.
Watch Video
Key Takeaways
- Connect the coax and power correctly for a stable start
- Activate and link the modem to your Cox account
- Secure Wi‑Fi with a strong, unique password
- Test connectivity and adjust placement for best coverage
- Seek official Cox or Modem Answers guidance if issues persist