Coax Cable to Modem: Setup Guide
Learn how to connect coax cable to modem correctly, secure the signal path, and verify a stable home network with a clear, step-by-step process from Modem Answers.

Goal: securely attach the coax from the wall to the modem, tighten the connectors by hand, avoid unnecessary bends, and power cycle to establish a stable link. According to Modem Answers, a tight, well-terminated coax path reduces signal loss, improves stability, and makes troubleshooting easier for most home networks. Key requirements: a compatible coax cable, a modem with coax input, and a standard Ethernet cable to connect to a router.
What coax cable to modem is and why it matters
In home networks, the coax cable links your Internet service from the wall outlet to your modem. A solid connection reduces signal loss and keeps your service stable for streaming, work calls, and gaming. According to Modem Answers, clear, proper terminations and tight connectors can make a noticeable difference in reliability, especially if you live in an area with older cabling. Modem Answers Analysis, 2026 notes that many support calls arise from loose fittings, corroded connectors, or mismatched cable types, not from faulty modems. Start by checking the wall outlet and the modem's coax port for damage, and confirm you have a compatible cable and connector. The goal is a clean, physical path with minimal bends, no kinks, and connectors seated snugly. This ensures the signal travels with minimal reflection and losses. With the right coax cable to modem setup, you should experience consistent connection quality, fewer dropouts, and easier troubleshooting when service hiccups occur. This section will guide you through selecting the right cable, preparing the workspace, and making secure, standards-compliant connections that work with most major ISPs.
Assessing your current setup and requirements
Before you reach for tools, take stock of what you have and what you need. Confirm your Internet service uses a coaxial delivery path and that your modem has a standard coaxial (F-type) inlet. If your home uses a splitter, note how many runs are active and whether the splitter is rated for your service level; older splitters can introduce loss. Consider the distance from the wall outlet to the modem; longer runs increase potential signal loss and may require higher-quality cable. If you share outlets with a TV or other devices, plan a dedicated coax run to minimize cross-device interference. The Modem Answers team recommends mapping your setup on paper or a simple diagram to avoid retracing steps. Also verify that you have access to a functioning power source and an Ethernet cable to connect the modem to a router or computer. By clarifying these details first, you reduce the chance of mid-work surprises and can choose the correct cable grade and connectors for a reliable result.
Prepare your workspace and gather tools
Clear the area around your modem and wall outlet. Lay out the tools and spare cables in reach, not in the way of foot traffic. A well-organized setup reduces mistakes and makes it easier to inspect connections. Essential items include a coaxial cable (RG6 quad-shield recommended), F-type connectors, a standard Ethernet cable (Cat5e or better), cable clips or ties for management, and a flashlight if the outlet is tight. Optional items include a coax cable tester to check continuity, a small adjustable wrench for compression connectors, and a UPS or surge protector to protect equipment during outages. Keep a photo of the original wiring before changes so you can revert if needed. While gathering cables, inspect each segment for kinks, cracks, or bent connectors—the smallest defect can cause signal degradation. Modem Answers Analysis, 2026 emphasizes treating the coax run as a dedicated path to preserve signal integrity.
Understanding coax connectors and cable quality
Not all coax is created equal. For internet service, RG6 is commonly recommended over RG59, because it supports higher frequencies with less loss. Look for quad-shield construction and solid metal connectors; these resist corrosion and provide a stable connection. The connectors you choose should match your devices: F-type twist-on connectors are standard for most home modems. Avoid using adapters that introduce extra joints, because each joint is a potential point of reflection or signal loss. If you must split the signal, use a high-quality splitter rated for broadband and install it close to the wall outlet to minimize the length of unprotected cable. If you notice discoloration, corrosion, or a loose fitting, replace the segment. A poor-quality cable or a damaged connector can negate the benefits of a modern modem, even if everything else is in good condition.
Step-by-step connection guide: part 1
During the initial connection, begin by powering down your modem and any connected devices. Loosen the wall outlet connector by hand and screw the coax cable’s F-connector onto the wall outlet, ensuring a snug fit without over-tightening. Then, thread the other end of the coax cable into the modem’s coax port, again hand-tightening. This creates the primary signal path and prevents loose connections that cause dropouts. If you must use a splitter, ensure it's properly rated and connect it between the wall outlet and the modem. Avoid coiling excess cable into tight loops, which can induce interference. Finally, lay out the Ethernet cable from the modem to your router or computer in a clean, straight path and keep it away from power cords to minimize crosstalk. The goal in this stage is to establish a stable physical link before powering up.
Step-by-step connection guide: part 2
Power up the modem first and then the router if you have one. Wait for the modem to go through its boot sequence; LED indicators should show steady status (the exact lights vary by model). Once the modem is synced, connect the router and verify that devices on Wi-Fi or via Ethernet obtain IP addresses. Open a web browser to test a basic page or log into the router interface to check network status. If you don’t see the expected lights or you can't obtain an IP address, re-check connectors, re-seat them, and ensure the cable is not damaged. If using a splitter, you may need to test the signal at the modem without the split to confirm where the issue lies. Keep track of any changes you make so you can undo them if needed.
Testing signal quality and stability
With everything connected, run a quick test to confirm the signal path is solid. Use a wired device for a baseline speed check and test on multiple devices to confirm consistency. If your ISP provides a gateway page, verify that the modem reports a stable sync state and that the DOCSIS channel levels align with typical values for your service. If you notice frequent reboots or degraded performance, document the time and conditions when it occurs. Small changes in temperature, cable length, or ambient interference may affect performance, so repeating tests at different times can help isolate issues. The Modem Answers team emphasizes a methodical approach to testing rather than guessing, to avoid misattributing problems to other parts of your home network.
Troubleshooting common issues
When you lose connection, start by checking the physical layer: the wall outlet, the modem port, and the coax connectors. If the lights on the modem indicate no signal, re-seat the coax cable and verify the wall outlet is live with a voltage tester, if available. Damaged cables or connectors are a frequent cause of problems, so replace any components that show wear. If you have a splitter, try bypassing it temporarily to see if the signal path improves. For Wi-Fi issues, ensure the router is receiving the internet signal from the modem and check that you haven’t saturated the network with too many devices. If problems persist, contact your ISP with the exact steps you took, because a remote diagnostic can identify issues at the service level rather than in your home wiring.
Long-term tips for reliability
Treat the coax run as part of your home network infrastructure. Use high-quality, properly terminated cables, organize and label cables, and keep them away from heat sources and moisture. Periodic checks of the connectors and the wall outlet can prevent surprises when weather changes. If you upgrade your modem or switch service providers, test the new configuration with the same careful approach. For households with sensitive equipment, using a surge-protected power strip or a UPS can help maintain stability during outages. Keeping a simple log of tests and results can be valuable if issues occur again in the future. Following these practices helps maintain reliable performance and reduces the need for repeated troubleshooting, saving time and frustration. The Modem Answers team recommends documenting your setup and performing regular integrity checks to sustain a robust home network.
Tools & Materials
- Coaxial cable (RG6 quad shield)(6-10 ft is a good starting length to avoid tight bends)
- F-type connectors/adapters(Match to modem and wall outlet ports)
- Ethernet cable (Cat5e or better)(Connect modem to router or computer)
- Cable clips or ties(Manage runs and prevent strain)
- Coaxial cable tester (optional)(Check continuity if available)
- UPS or surge protector (optional)(Protects equipment during outages)
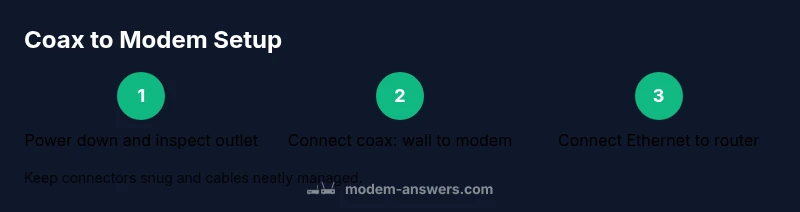
Steps
Estimated time: 20-35 minutes
- 1
Power down and prepare
Power off your modem and any connected devices. Gather tools and clear the workspace so you have a clean area to work in. This reduces the chance of accidental pulls on cables during setup.
Tip: Unplug devices from power before touching coax connectors. - 2
Inspect coax and plan path
Check the wall outlet for damage and inspect the coax cable for cracks or kinks. Plan a straight path with minimal bends from the wall to the modem to avoid signal loss.
Tip: Avoid sharp bends; aim for a gradual bend radius. - 3
Detach old connections if needed
If an old cable or connector is in use, carefully detach it and inspect the ends. Replace any damaged parts before proceeding to ensure a clean signal path.
Tip: Take a quick photo of the existing wiring for reference. - 4
Attach coax wall outlet to modem
Screw the F-connector onto the wall outlet by hand until snug, then connect the other end to the modem's coax port by hand. Do not force; avoid overtightening.
Tip: Finger-tight is usually enough; use a wrench only for compression connectors if needed. - 5
Connect Ethernet to router
Connect one end of the Ethernet cable to the modem and the other end to your router's WAN port (or directly to a computer for testing). Ensure the cable is routed away from power cords.
Tip: Use a straight-through Ethernet cable for best results. - 6
Power up in sequence
Power on the modem first, wait for the boot sequence to complete, then power on the router (if used). Observe the LED indicators for steady activity indicating a successful sync.
Tip: Give the modem a few minutes to fully initialize before testing. - 7
Verify network access
Open a browser and confirm you can reach a basic webpage. If using a router, check the router’s status page to confirm devices obtain IP addresses and DNS is resolving.
Tip: If pages don’t load, re-seat connectors and re-test with a wired device. - 8
Run tests and document results
Run a wired speed test and test multiple devices to verify consistency. Note any anomalies and compare with prior tests so you can track changes over time.
Tip: Keep a simple log of tests to help diagnose future issues.
FAQ
Do I need a splitter for multiple devices?
Only if you must share the coax line with other devices like a TV. If possible, run a dedicated line to the modem. If you must use a splitter, ensure it's rated for broadband and locate it near the wall outlet to minimize signal loss.
You might need a splitter if you share that outlet, but use a broadband-rated model if possible.
Can I use an old coax cable for modem setup?
Old cables can work if there is no visible damage and the connector ends are secure. Upgrading to RG6 quad shield generally improves reliability and reduces potential loss.
Old cables can work, but quality matters more for reliability.
What if the modem lights are blinking or off after setup?
Blinking or no lights usually indicate negotiation or no signal. Re-seat the coax, retry connections, and test from a different wall outlet if possible. If unresolved, contact your provider.
Blinking lights mean the modem is still negotiating or has no signal.
Will this work with fiber or satellite ISPs?
Coax-based modems are used for cable ISPs. Fiber services use a different terminal and equipment. Verify your service type before attempting a coax setup.
Coax setups apply to cable providers, not fiber.
Is professional installation needed?
For typical homes, a DIY coax setup works well when you follow best practices. If issues persist, contact your ISP for a remote or on-site diagnostic.
Usually not needed, but call your provider if problems persist.
How often should I check the coax connections?
Inspect coax connections every few months or after significant weather events. Ensure connectors remain tight and dry and replace worn parts.
Check every few months to maintain reliability.
Watch Video
Key Takeaways
- Secure the coax connections at both ends.
- Use high-quality RG6 quad-shield cable when possible.
- Power cycle devices to establish a fresh sync.
- Document your setup and test regularly for reliability.