Modem Switch: Step-by-Step Replacement Guide
Learn how to safely switch to a new modem with a practical, step-by-step plan. From compatibility checks to activation and Wi-Fi reconfiguration, this Modem Answers guide helps homeowners complete a smooth, downtime-minimized modem switch.

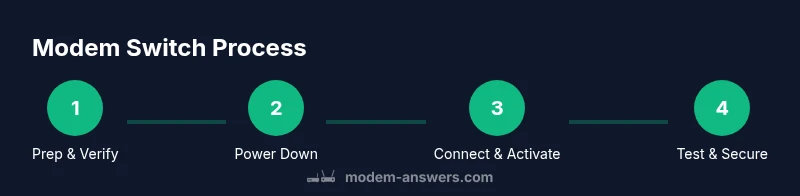
A modem switch means upgrading or replacing your current modem with a compatible model and reconfiguring your network. Follow a provider-friendly sequence: power down, unplug, connect the new device, activate, and reconfigure Wi‑Fi. This guide covers everything from unboxing to full setup.
Why switch your modem now
According to Modem Answers, upgrading to a more modern modem can deliver stronger, more reliable connections, faster download speeds, and better support for smart devices around the home. If your current setup struggles with streaming or video conferencing, a modem switch can reduce buffering and improve overall performance. The decision to switch is not purely about speed; it also reduces the risk of compatibility issues with newer internet plans and helps future-proof your home network. In addition, a newer modem can offer enhanced security features and improved energy efficiency, which is especially valuable for households with multiple connected devices. For homeowners and renters seeking reliable, easy-to-follow modem guidance, this guide provides clear steps to get you from decision to delight with minimal downtime.
Compatibility first: lay the groundwork before buying
A successful modem switch starts with compatibility. Confirm your internet plan details and your provider’s activation process, then verify the modem DOCSIS version (if you have cable internet) and supported upload/download speeds. Check if your service uses a specific username/password or a device provisioning method. If you use fiber or some fiber-backed gateways, you may need to keep a separate gateway/router combo rather than a standalone modem. Keep a record of your current MAC address and coaxial or fiber connector type; these details help you avoid surprises when activating the new device. As you plan, consider whether you want built‑in Wi‑Fi or a separate router for better coverage in larger homes. In all cases, choose a modem from a reputable manufacturer with good firmware support and a clear return policy.
How to choose the right modem for your provider
Not all modems work with every provider. Start by visiting your provider’s site to see a list of approved devices and DOCSIS versions. If you’re on a cable plan, ensure the modem is DOCSIS 3.1 capable for best throughput and future-proofing. For fiber users, many providers require a specific gateway or an approved third‑party device; confirm activation steps and whether fees apply. Consider future needs as well: newer models may handle higher plan speeds, better energy efficiency, and improved security features. Read product reviews that discuss real-world reliability, especially in homes with many devices. Finally, check the warranty and vendor support levels; a longer warranty and easy returns reduce risk when you upgrade.
Prepare your network for the switch: a quick preflight
Before you swap devices, map out your home network. Note which devices rely on a wired Ethernet connection versus Wi‑Fi, and decide how you’ll reconfigure your network after the switch. If you use a separate router, determine whether you’ll replace it or keep using it behind the new modem. Gather essentials: a fresh Ethernet cable, a power adapter, and the user manuals. Have the modem’s activation steps handy from your provider’s site. Consider downloading or printing the setup guide so you don’t lose critical information during the transition. This prep work minimizes downtime and helps ensure you don’t miss any steps during activation.
Step-by-step modem switch: at a glance
This is the practical overview you’ll perform in the STEP-BY-STEP section. You’ll power down and unplug, disconnect the old modem, connect the new device, power it up, activate with your provider, and test your connection. If you have a separate router, reconnect it and update your Wi‑Fi credentials. After activation, verify that all wired devices reconnect properly and that your wireless network coverage meets your needs. Keep a copy of your current IP settings in case you need to restore them, and consider labeling cables for future maintenance. The following steps fill in the details with precise actions.
Post-switch verification and optimization
After activation, run a quick speed test to confirm you’re receiving expected throughput and latency. Reconnect all devices and check whether your Wi‑Fi network covers the main living areas; if not, consider adjusting router placement or enabling features like beamforming and band steering on your router. Update router firmware if you’re using a separate device, and re-secure your network with a strong admin password. If issues arise, power cycling both the modem and router often resolves common connectivity hiccups. Finally, review your network map and document any changes for future reference.
Common issues and quick fixes after a modem switch
Some users report no internet after activation. Ensure the modem is properly provisioned by your provider and that the cable or fiber connections are firmly seated. If you only see a limited number of LEDs or no link, inspect the coaxial or fiber connectors for damage and re-seat them carefully. If you still can’t connect, reboot in a controlled sequence: unplug the power from the modem, wait 30 seconds, plug it back in, and wait for full synchronization. If problems persist, contact your provider’s support line with the device’s model number and MAC address for faster service.
Security and privacy considerations after a switch
A new modem is a good time to refresh security settings: change the default admin password, enable automatic firmware updates, and disable universal plug-and-play unless you need it for a specific reason. Review remote management options and disable them if you don’t require remote access. Consider enabling firewall features on your router, if applicable, and ensure guest networks are isolated from your main network to protect devices like cameras and thermostats. Finally, document the new network name (SSID) and password in a secure place.
Summary: why a well-planned modem switch matters
A planned modem switch minimizes downtime, preserves network performance, and improves security. By validating compatibility, choosing a future-proof model, and methodically activating the device, you’ll maximize reliability and ensure your home network remains robust as your digital needs grow.
Tools & Materials
- New modem(Ensure compatibility with your plan and provider activation method)
- Power adapter(Matches the new modem’s power requirements)
- Coaxial cable (if applicable)(Should be in good condition; replace if kinks present)
- Ethernet cable (Cat5e or better)(For wired devices and diagnostic tests)
- Paper or digital activation details(Provider account, activation steps, and credentials)
- Notepad or device to record settings(Useful for documenting current IPs, SSID, and password)
Steps
Estimated time: 30-60 minutes
- 1
Power down and unplug
Shut down all connected devices and unplug the existing modem from power and coax/fiber. This reduces the risk of electric shock and ensures a clean reset of the network stack before disassembly.
Tip: If you have a surge protector, unplug the entire power strip to ensure a full power-off and avoid ghost activity. - 2
Disconnect and remove old modem
Unplug the coax/fiber line and Ethernet connection. Take note of how cables are arranged so you can reconnect the new modem in the same configuration. Keep the old modem handy in case you need to compare signal levels or return it.
Tip: Take a photo of the rear panel before disconnecting to ensure correct reassembly. - 3
Connect the new modem
Attach the coax/fiber line to the new modem, connect the power adapter, and plug the device in. If you’re using a separate router, connect it to the modem with an Ethernet cable and position it for best coverage.
Tip: Use a direct Ethernet connection for initial activation to avoid Wi-Fi interference during provisioning. - 4
Activate with your provider
Follow the provider’s activation steps, which may involve visiting a portal or calling support. Have your account number, device serial, and MAC address handy. Activation may take several minutes of downtime while the modem registers.
Tip: If activation stalls, reboot the modem by unplugging for 30 seconds and reconnecting. - 5
Test and configure Wi‑Fi
Run a speed test and verify all wired devices reconnect. Update your Wi‑Fi network name (SSID) and password if desired, and enable security features like WPA3 where available. Document the new credentials for future reference.
Tip: Consider splitting bands (2.4 GHz and 5 GHz) or enabling mesh features if you have dead zones.
FAQ
Can I reuse my old modem after switching?
You can usually reuse an old modem if it’s compatible with your current plan and authorization from your provider. Some providers charge a rental or require activation of a specific approved model.
You can often reuse the old modem if it matches your plan and your provider approves it.
Do I need a technician to switch my modem?
Most people can complete a modem switch themselves with the steps in this guide. A technician is rarely required unless you run into unusual fiber or installation complications.
Generally you don’t need a technician; this can be DIY if you follow the steps.
Will my Wi‑Fi settings be reset after the switch?
Wi‑Fi settings may reset, especially if you’re using a new router or gateway. You should reconfigure the SSID, password, and security settings after activation.
Yes, you may need to reconfigure your Wi‑Fi after switching.
How long does activation usually take?
Activation typically takes a few minutes, but some providers require up to 30 minutes for provisioning. If you don’t see service after activation, reboot the modem and router and test again.
Activation usually takes minutes; if needed, reboot and test again.
What should I do if my new modem won’t activate?
Check the coax/fiber connection, confirm the device is provisioned in your account, and verify compatible speeds. If problems persist, contact your provider with the model and MAC address handy.
If activation fails, check cabling and provisioning, and contact support if needed.
Are there security steps I should take after switching?
Yes. Change the default admin password, enable automatic firmware updates, and disable unnecessary remote management. Enable a strong Wi‑Fi password and consider network isolation for smart devices.
Change the admin password, enable updates, and secure your Wi‑Fi.
Watch Video
Key Takeaways
- Prepare by verifying provider compatibility and plan details.
- Keep notes of current network settings for easy restoration.
- Activate and test in a controlled sequence to minimize downtime.
- Secure your new modem and update Wi-Fi credentials.
- Document changes for future maintenance.