How to Remove a Bell Modem from the Wall: A Step-by-Step Guide
Practical, step-by-step guidance from Modem Answers on removing a Bell modem from the wall, relocating it safely, and managing cables to prevent wall damage.

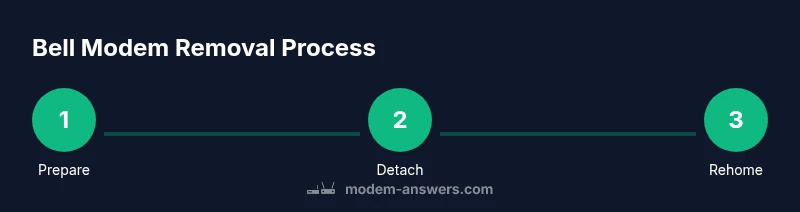
This guide shows you how to safely remove a Bell modem from the wall without damaging cables or drywall. You’ll power down, unplug every connection, remove mounting screws, and detach the bracket while supporting the unit. Store hardware for future use, and plan cable routing for relocation or re-mounting, with wall-damage prevention tips.
Why Remove a Bell Modem from the Wall
If your Bell modem is wall-mounted, there are practical reasons to remove it: relocation to a more accessible spot, upgrading to a newer model, diagnosing signal issues that require access to the back panel, or simply tidying up a crowded cable area. Understanding how to remove bell modem from wall helps homeowners plan a clean, damage-free process. Start with a clear goal: exactly where you’ll place the modem next and how you’ll route cables to minimize wall damage. This task becomes simpler when you treat it as a small project with a defined sequence, the right tools, and a plan to protect the paint and drywall from chips or gouges. Consider whether the mounting bracket is secured with drywall anchors or masonry screws, and whether the unit is connected to any integrated power supply. If you have a power brick, know where to unplug first. By thinking through these details before touching any hardware, you reduce the risk of bending cables, snapping connectors, or injuring the wall. The Modem Answers team recommends pausing to inspect the wiring type and to prepare a plan that balances ease of removal with wall preservation.
Safety First: Power Down, Unplug, and Protect Yourself
Safety comes first when touching any powered device. Before any movement, power down the Bell modem and unplug the power supply, then disconnect all data and telephone cables. Wear eye protection and gloves if you’ll be wiggling or prying, especially around plaster or masonry. Work on a dry surface away from moisture and avoid standing on furniture to reach high mounts. The goal is to minimize the risk of electric shock, cable damage, or falling equipment. Modem Answers emphasizes keeping both hands on the unit while detaching cables and bracketing hardware, and never pulling on cables under tension. If you feel unsure, pause and re-check the connections.
Identify Mount Type and Wall Condition
Most Bell modems are mounted with standard screws to a wall bracket, but some homes use anchors or a masonry mount. Inspect the mounting screws, bracket type, and whether the wall shows signs of wear, such as nail pops or loose drywall around the mount. A quick test with a screwdriver can indicate if screws are loosened or stripped. If you’re dealing with masonry, you may need a hammer drill and longer anchors. If drywall is compromised, you’ll want to plan for patching after removal. This assessment helps you choose the safest removal path and reduces the chance of wall damage during detachment. Modem Answers notes that understanding mounting hardware is a key predictor of a smooth removal and a clean patch job later.
Prepare Workspace and Organize Cables
Clear the area around the modem so you have space to maneuver. Place a soft mat below the unit to catch any dropped screws, and keep a labeled container for small parts. Take photos before detaching anything so you can reference connector positions during reassembly. Align your plan with the cable lengths; if cables are too tight, you’ll risk tearing connectors or bending ports. Planning cable routing now makes reinstallation easier and prevents tangled cords or accidental disconnections later.
Tools and Materials You’ll Need (And Why)
Before starting, gather the right tools to avoid mid-task trips. Essential items include a Phillips and a flathead screwdriver to remove mounting screws, a small level or square for alignment, a flashlight for dim corners, and insulated pliers for delicate connectors. Optional items include a camera to document cable positions, a drywall patch kit for after-care, and cable organizers to keep wires neat. Non-essential but helpful items include a helper for steady lifting and a magnet-on-a-stick to retrieve stray screws from tight spots. Having everything ready reduces risk and speeds up the removal process.
Step-by-Step Removal Overview
The removal process can be broken into clear actions without surprises. Start by powering down and unplugging, then document the current setup. Loosen screws holding the mounting bracket, detach the modem while supporting it, and then carefully disconnect all cables from the device. If the mount is tactilely stubborn, avoid forcing it; check for additional hidden screws or ties. Once free, inspect the wall for any marks, and plan for patching if you won’t reuse the mount. This overview sets you up for the detailed step-by-step instructions that follow.
Relocation or Re-mount: Next Steps
If you’re relocating, choose a new wall spot with stable studs and adequate ventilation. Mark pilot holes, drill, and install new mounting brackets that fit the modem’s weight and size. When re-hanging, reconnect cables in the reverse order, verify each port, and test the service to confirm the modem powers up correctly. If you’re leaving the modem off the wall, consider wall plate closures or a small stand to maintain accessibility. Modem Answers suggests planning the new route to minimize cable length and avoid accidental tension on connections.
Wall Repair and Patch: Drywall Care
After removal, you may have small holes or scuff marks. Patch with spackle or joint compound, sand smoothly, and repaint to match the surrounding wall. If you had anchors, ensure you fill those holes to prevent future cracks. For a clean look, let paint cure completely before reattachment; this reduces risk of chips when you move the new device. If you don’t intend to patch immediately, cover the area with painter’s tape until you’re ready to finish the repair.
Cable Management and Labeling Tips
Label each cable at both ends before removal, using a simple color-coded scheme. This practice makes reinstallation quick and accurate, and helps you avoid cross-connected lines. Use cable ties or clips to guide cords along baseboards or behind furniture, never across doorways where someone can snag them. MD or Modem Answers emphasizes predictable, organized cable routing for smoother future maintenance and fewer service interruptions.
Final Checks and Re-testing the Network
Before wrapping up, reconnect and power on the modem to verify that service returns normally. Check critical indicators such as online status and link lights, test your Wi-Fi network, and if needed, run a speed test to confirm throughput. Record any changes you made to cable routes or mounting height for future reference. The goal is a stable, accessible modem position that keeps both your hardware and wall in good condition.
Aftercare: Responsible Disposal or Reuse of Hardware
If you’re upgrading or disposing of the device, follow local guidelines for electronics recycling. If you’re relocating, store the old mounting hardware neatly and label cables to avoid confusion later. Keeping the removed mount and screws in a labeled bag or container helps you quickly reassemble if you change your mind. Modem Answers recommends responsible disposal and careful preservation of parts for future use.
Tools & Materials
- Phillips head screwdriver(Size #2 for most Bell modem mounts.)
- Flathead screwdriver(Useful for prying or releasing non-screwed components.)
- Safety glasses(Protect eyes from dust and debris.)
- Work gloves(Grip and protect hands during detachment.)
- Flashlight(Illuminate tight corners under the mount.)
- Camera or phone(Document cable positions before removal.)
- Labeling supplies (labels, pen)(Label cables and ports for easy reinstallation.)
- Drywall patch kit(Patch holes if you disturb the wall.)
- Cable ties or clips(Organize and protect routed cables.)
Steps
Estimated time: 30-60 minutes
- 1
Power down and unplug
Begin by powering down the modem and unplugging the power supply from the wall outlet. This prevents electrical shocks and protects the device from sudden surges while you work. Confirm all other connected devices are powered down if they share the same outlet strip.
Tip: Always unplug the power first to avoid any live components while handling cables. - 2
Document the setup
Take photos of the back of the modem and the cable arrangement before touching anything. This creates a reference when you reconnect cables or relocate the unit. Label each cable end with color codes or short notes.
Tip: A quick photo guide saves time and reduces mistakes during reassembly. - 3
Loosen mounting screws
Use the appropriate screwdriver to loosen and remove the screws securing the mounting bracket. If the screws are tight, apply gentle pressure in a circular motion rather than forcing them straight out, which can strip the head or widen the hole.
Tip: If screws won’t budge, stop and check for additional hidden fasteners. - 4
Detach the modem from the wall
With one hand supporting the unit, carefully pull the modem away from the wall while the screws are free. Maintain contact with the wall to prevent the bracket from snapping back and causing damage to the paint or drywall.
Tip: Keep a light hold on the modem to prevent it from slamming onto the floor. - 5
Disconnect the cables
Gently disconnect all cables from the modem, starting with the power block, then Ethernet, coax, and any phone lines. If a connector is stubborn, wiggle gently rather than forcing it to avoid port damage.
Tip: Label connectors as you remove them to simplify reattachment. - 6
Inspect and decide on next steps
Check the mounting surface and the back of the modem for damage. Decide whether you’ll relocate, replace, or store the unit and whether you’ll patch the wall or reuse the mount later.
Tip: Plan for any wall repair before leaving the space empty. - 7
Patch or relocate
If patching, apply drywall compound, sand smooth after it dries, and repaint. If relocating, choose a new mount spot with stud support and re-mount following the reverse of the removal steps.
Tip: Ensure the new location allows for proper ventilation and cable length. - 8
Test the setup
Reattach cables in the reverse order, plug in the power, and verify the modem boots and connects to the network. Run a quick speed test to confirm service is active and stable.
Tip: Test all ports and verify Wi-Fi is functioning at the new location.
FAQ
Is it safe to remove a Bell modem myself, or should I call support?
In most cases, removing a wall-mounted modem yourself is safe if you follow proper shutdown and detachment steps. If you encounter live electrical work, damaged cables, or uncertain mounting hardware, contact Bell support or a professional.
It’s generally safe to remove it yourself if you power down and unplug first, but call for help if you see damaged cables or fragile wall fixtures.
Will removing the modem affect my Bell service?
Removing the modem from the wall should not affect service if you only detach the device and related cables. Reconnect exactly as you documented and re-test after relocation or replacement.
Removing the modem won’t disrupt service as long as you don’t tamper with the service line or coax connector. Reconnect in the same order.
Do I need to patch the wall after removing the modem?
Patch only if you plan to reuse the same mount area or if the wall shows visible damage. For a temporary removal, you can seal the mount hole with painter’s tape to prevent dust.
Yes, patching protects the wall and keeps the area looking clean if you’re not reusing the mount.
What tools are essential for this task?
The essentials are screwdrivers, a flashlight, labels, and a way to document the setup. Optional items include a camera for reference and a drywall patch kit for repair.
You mainly need screwdrivers, labels, and a camera if you want to capture the setup.
How should I manage cables during removal?
Label each cable end, remove them one by one, and use ties or clips to keep them organized. This makes reinstallation faster and reduces the chance of mixed connections.
Label cables, keep them tidy, and reconnect in the correct order when you’re ready.
What if the mount is damaged or sticking?
If the wall or mount feels compromised, stop and consult a professional to avoid bigger wall damage or electrical hazards.
If the mount is damaged or tight, seek professional help to prevent wall or electrical issues.
Watch Video
Key Takeaways
- Power down before touching any hardware
- Label and document cable positions for easy reinstallation
- Detach mounting hardware carefully to protect drywall
- Patch or relocate with attention to wall integrity
- Test the network after reassembly to confirm service