Put Xfinity Modem in Bridge Mode: Step-by-Step Guide
Learn how to put your Xfinity modem in bridge mode to use your own router. This comprehensive guide covers prerequisites, the exact steps, troubleshooting tips, and best practices for homeowners and renters.

Quick answer: To run your own router, enable bridge mode on your Xfinity gateway so the modem passes the public IP to your router. You’ll need admin access to the gateway, a compatible Xfinity device, and an ethernet connection. Note that some services (VoIP, TV) may require additional configuration or a different setup.
What bridge mode does and when to use it
Bridge mode turns your Xfinity gateway from a full featured router into a simple modem, passing public IP addresses to your own router. This setup is ideal if you want to use a high‑performance third‑party router, enable advanced features, or expand your home network with a more capable firewall or Wi‑Fi system. Note that enabling bridge mode deactivates most of the gateway’s router functions, including NAT, firewall, and DHCP services; you’ll rely on your own device for these features. Some Xfinity services like voice or TV may be impacted and require alternative configurations. According to Modem Answers, many homeowners see improved network control after bridging, but it’s not the right choice if you rely on the gateway for essential services. Before starting, confirm that your gateway model supports bridge mode; if not, IP passthrough or adding a separate modem may be a better fit.
Prerequisites and potential service impacts
Before you begin, gather your credentials and equipment, and understand what may change. You’ll need admin access to the gateway, a computer or smartphone, an ethernet cable, and your own router or firewall device. Write down your current Wi‑Fi names, passwords, and any port forwards, so you can restore settings if needed. Be aware bridging can disable Xfinity Voice and, in some cases, affect TV services that rely on the gateway for multicast streams. If your plan includes voice service, contact Xfinity support to discuss options like IP Passthrough or using a separate voice adapter. Modem Answers analysis shows that planning for these potential impacts reduces post‑bridging disruption. Finally, confirm your gateway model supports bridge mode; if it does not, you may need to use a dedicated modem and keep the Xfinity router in Passthrough mode.
High-level bridge-mode flow
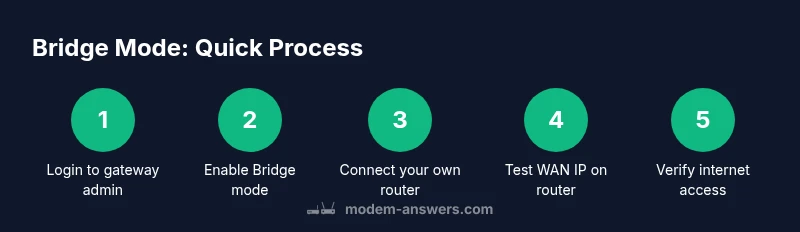
At a high level, bridge mode changes how the gateway handles network services. The gateway still connects to the internet, but it stops acting as a router and firewall. Your own router then handles NAT, firewall rules, DHCP, Wi‑Fi, and port forwarding. The essential steps are to log into the gateway’s admin interface, enable Bridge mode (or IP Passthrough, depending on the model), save the setting, and reboot both devices. After the gateway reboots, connect your second router’s WAN/Internet port to the gateway’s LAN port and configure the router as you normally would. This approach gives you full control over local networking while preserving internet access. Modem Answers emphasizes testing devices and monitoring for any service interruptions after enabling bridge mode.
Verifying bridge mode and troubleshooting tips
Once bridge mode is enabled and devices rebooted, verify that traffic is routing through your own router. Check your router’s WAN status to confirm it has a public IP address, and test basic web access from a connected device. If you don’t see a public IP, revisit the gateway settings to ensure Bridge mode is active and the connection between devices is correct. Common issues include the gateway still providing network address to the LAN, incorrect port used for WAN, or a VPN/VPN client interfering with local routing. If you run into trouble, restore the gateway’s original settings, re‑enable its router, and attempt the process again. In some cases, you may need to contact Xfinity support to confirm that your device supports bridge mode and to verify your account configuration.
Alternatives and best practices
If bridge mode isn’t feasible for your setup, consider IP Passthrough, a similar approach offered by many gateways that forwards a public IP to your router. Another option is to keep the Xfinity gateway in router mode and place your own router in a DMZ or use a mesh Wi‑Fi system behind the gateway. For typical homes, using a dedicated router with strong Wi‑Fi coverage can improve performance and control, but ensure your ISP plan supports it. Always back up settings before making changes, and document your current network layout so you can revert if needed. Modem Answers recommends evaluating your needs—speed, coverage, and security—before deciding which path to take.
Common mistakes to avoid
- Assuming all Xfinity devices support bridge mode; check model compatibility first.
- Forgetting to disable the gateway’s Wi‑Fi, which can cause double NAT and flaky connections.
- Not saving or backing up settings, making reversions painful.
- Ignoring service impacts like Xfinity Voice or TV when bridging.
- Waiting too long for changes to propagate; bridging usually takes a few minutes, but some devices need a reboot.
- Connecting your own router to the wrong port or misconfiguring WAN settings; ensure the WAN interface on your router is set to obtain an IP automatically until you know your network.
Tools & Materials
- Xfinity gateway/modem(Any Comcast-supplied gateway that supports bridge mode)
- Computer or smartphone(Used to log in to the gateway admin page)
- Ethernet cable(For a stable connection to the gateway and between devices)
- Second router or firewall device(Your own router to handle NAT/DHCP/Wi‑Fi after bridging)
- Xfinity account login credentials(Needed to access admin settings)
- Backup of current network settings(Screenshots or notes of SSIDs, passwords, and port forwards)
Steps
Estimated time: 30-60 minutes
- 1
Access the gateway admin page
Connect a computer to the gateway via Ethernet or Wi‑Fi. Open a browser and enter the gateway’s default IP (commonly 192.168.0.1 or 10.0.0.1) or use the label on the device for the address. Sign in with admin credentials from your Xfinity account. If you’re unsure of the address, check the device label or the user manual.
Tip: If you cannot reach the page, disable VPNs and ensure you’re on the same local network as the gateway. - 2
Back up current settings
Copy or screenshot your current Wi‑Fi SSIDs, passwords, and any port forwards. This makes it easier to restore if you need to revert. Note any static IP reservations or device‑specific rules you’ve configured.
Tip: Having a recent backup reduces the risk of losing essential connectivity after changes. - 3
Enable Bridge mode
Find Bridge mode or IP Passthrough in the gateway’s admin interface. Select Bridge mode, save the configuration, and reboot the gateway. The gateway will stop routing, effectively acting as a modem.
Tip: If your model requires you to choose IP Passthrough, select the correct MAC/IP and apply. - 4
Prepare your own router
Connect your own router’s WAN/Internet port to the gateway’s LAN port using an Ethernet cable. Power on the router and wait for it to boot. Ensure the router is set to obtain an IP address automatically from the gateway (DHCP).
Tip: If your router supports custom DNS or firewall rules, configure them now for optimal security. - 5
Power cycle devices
Restart both the gateway and your own router to ensure bridge mode is active and the network path is clean. After power‑up, verify the router shows a public IP on its WAN interface.
Tip: Give each device 2–5 minutes to boot fully. - 6
Verify connectivity
On a connected device, run a quick speed test and load several websites. Check that devices on your network obtain IPs from your router and that there’s no double NAT.
Tip: If you don’t see a public IP, double‑check the bridge mode setting and the WAN connection on your router. - 7
Test services and plan ahead
Test common services (smart home devices, streaming, gaming) and note any service interruptions. If you rely on Xfinity Voice or TV, contact support to discuss the best path (IP Passthrough or alternate configurations) before proceeding.
Tip: Document any ongoing issues and keep a rollback plan ready in case you need to revert.
FAQ
Can I bridge my Xfinity gateway if I still need Xfinity Voice?
Bridging often disables Xfinity Voice. If you rely on VOIP, discuss options like IP Passthrough with Xfinity or use a separate voice adapter before proceeding.
Bridging can disable voice service; you may need to use IP Passthrough or a separate voice solution.
Will bridging disable the gateway's Wi‑Fi?
Yes. Bridge mode typically turns off the gateway’s router and Wi‑Fi. You’ll rely on your own router for wireless coverage.
Bridge mode usually disables the built‑in Wi‑Fi.
Do I need Xfinity to enable bridge mode?
Some gateway models let you enable Bridge mode directly in the admin page; others may require support. Check your model’s documentation or contact Xfinity if you’re unsure.
You may be able to enable it yourself, or you may need to contact Xfinity.
How long does bridge mode take to take effect?
Bridging can take a few minutes for changes to propagate. Reboot both devices after enabling Bridge mode.
Usually a few minutes; reboot helps ensure changes take effect.
How do I revert from bridge mode?
Return to the gateway’s admin page, disable Bridge mode, save changes, and reboot both devices to restore normal routing.
Turn off bridge mode and reboot to restore normal routing.
Is bridge mode the same as IP Passthrough?
Bridge mode and IP Passthrough both pass control to your own router, but model behavior varies. Check your gateway’s documentation for exact differences.
They’re similar but differ by model; verify your device specifics.
What if I can’t access the gateway admin page?
Ensure you’re on the same local network, try a different browser, and disable VPNs. If access remains blocked, contact your ISP for guidance.
Make sure you’re on the same network and try again; contact support if needed.
Watch Video
Key Takeaways
- Confirm bridge-mode support for your gateway before starting.
- Back up current settings and note Wi‑Fi details.
- Connect your own router and boot both devices.
- Verify your router shows a public IP and test connectivity.
- Be aware of service impacts (voice, TV) and plan accordingly.