How to Connect Modem with Ethernet Cable: A Step-by-Step Guide
Learn how to connect your modem to a device using an Ethernet cable for a stable, high-performance connection. This educational guide covers cables, ports, setup steps, and troubleshooting from Modem Answers.

According to Modem Answers, learning how to connect your modem with Ethernet cable will immediately improve your home network’s stability and reduce interference from wireless signals. This straightforward wiring task creates a reliable backbone for internet access, whether you’re streaming, gaming, or working from home. In minutes, you’ll have a wired link from the modem to your chosen device, laying a foundation for consistent speeds and easier troubleshooting.
Why a wired Ethernet connection matters
A wired Ethernet connection provides the most reliable path for your home network. Unlike Wi‑Fi, Ethernet is far less susceptible to interference from walls, furniture, and competing wireless networks, which translates into steadier throughput and lower latency. For households with multiple devices streaming, gaming, or working remotely, a wired backbone helps keep critical tasks responsive even when the airwaves are crowded. According to Modem Answers, many common connectivity issues originate from wireless contention rather than the actual speed of your service; a stable wired link to the modem and core devices can dramatically reduce those problems. This article uses a practical, step‑by‑step approach to help you implement a robust Ethernet setup that scales with your needs. If you only take away one rule, make the Ethernet path the backbone of your home network, especially around the home office and living room where most active devices reside.
Understanding Ethernet cables and ports
Ethernet uses RJ-45 connectors and copper twisted-pair conductors. Most modern home networks use Cat5e or Cat6 cables, which support standard home speeds and offer better shielding to minimize interference. The modem and the connected device should each have a dedicated Ethernet port. A straight‑through cable is what you typically need for device-to-device connections, while crossover cables are rarely required for common home setups. When examining ports, look for the familiar rectangular jack with eight little pins; a solid link often shows as a steady LED next to the port. Understanding these basics helps you avoid common mismatches that slow down or disrupt connectivity.
Choosing the right Ethernet cable
For most homes, Cat5e or Cat6 cables are sufficient. Cat6 offers better performance over longer runs and reduces crosstalk in busy environments, while Cat5e remains a solid, budget-friendly choice for typical streaming and browsing. When selecting length, prioritize enough slack to route the cable safely without tension, but avoid excessively long runs that can introduce unnecessary delay or degradation. If you anticipate future upgrades or smart home expansion, a slightly longer Cat6 cable can provide headroom without a noticeable price difference.
Preparing your devices and network layout
Before you begin, identify where the modem sits and where you want the primary wired device to reside—for example, a desktop PC, game console, or a small network switch feeding multiple devices. Ensure there are power outlets nearby and plan a clean cable route that avoids heavy foot traffic, heat sources, or areas with high moisture. If possible, test in a simple two‑device setup first to verify the basic link, then expand to multi‑port configurations. This preparation reduces surprises and makes the actual wiring smoother.
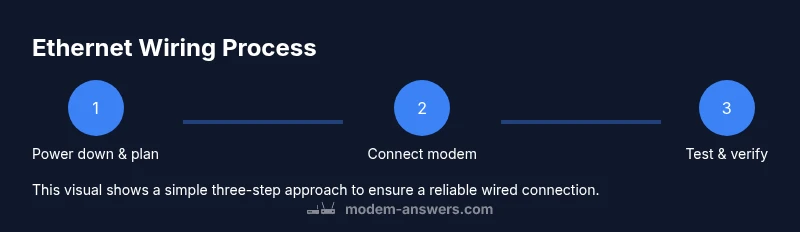
Step 1: Power down the devices and prepare the space
Power down the modem and the device you intend to connect. This helps reset network adapters and avoid any potential short or configuration glitches during the initial connection. Clear a clear path for the cable, and decide whether you will run the cable along walls, under a rug, or through a cable channel. Having a plan for routing reduces the risk of damage or tripping hazards during and after installation.
Step 2: Locate the available ports on the modem
Examine the back of your modem to locate the Ethernet port. It’s typically labeled and positioned near other network ports. If the modem is combined with a router or gateway, you’ll want to identify the correct Ethernet port that leads to your local network, sometimes labeled as LAN. Avoid connecting to a port that is meant for a different purpose, such as a WAN/Internet port on a router device that isn’t intended for the direct connection you’re making.
Step 3: Run and connect the Ethernet cable from the modem to the target device
Plug one end of the Ethernet cable firmly into the modem’s Ethernet port until you hear or feel a click. Connect the other end into the Ethernet port on your chosen device. Ensure the cable runs are tidy and don’t pull on the ports. If you’re connecting to a router or network switch, use an available LAN port. A snug, straight connection helps maintain a stable link and reduces the chance of a loose connection.
Step 4: Verify link status and IP configuration
Power on the devices and observe the port LEDs on both the modem and the connected device. A steady link light usually indicates a valid connection. On a computer, verify the network status in your operating system and ensure it shows an active Ethernet connection. If you don’t see an IP address or you’re not obtaining DHCP, you may need to release/renew the IP or set a manual IP in small, controlled steps.
Step 5: Test connectivity and troubleshoot common issues
Run a quick speed test or load a resource‑intensive site to confirm the wired connection is delivering stable results. If pages load slowly, test with another Ethernet cable or port, as a faulty cable or a bad port can mimic slower speeds. If you see intermittent disconnects, check for cable kinks, ensure the cable isn’t run near high‑power devices, and consider shortening the run if possible. If problems persist, reboot the modem and device and recheck the connection.
Common mistakes and how to avoid them
Avoid using power cables as a route for networking cables or running Ethernet under doors or thresholds where wear can occur. Do not force connectors into ports at odd angles; a straight, clean insertion preserves port health. Resist the urge to mix different cable categories beyond reasonable compatibility; mismatches can lead to reduced performance and reliability. Finally, never assume a single cable will fix all issues—often, configuration or device limitations require a wider approach.
Maintenance and best practices for long-term reliability
Document your network layout and cable routes for future upgrades and troubleshooting. Keep cables organized with ties or clips to prevent tangling and accidental pulls. Periodically test the wired connection after firmware updates or changes to the home network to ensure everything remains stable. Consider labeling each cable and port to simplify future maintenance and reduce the time needed for troubleshooting.
Authority sources
• U.S. National Institute of Standards and Technology (NIST) – Networking basics
• University of California IT Help Desk – Local area networks and Ethernet basics
• Federal Communications Commission (FCC) – Consumer guidance on home networking
Tools & Materials
- Ethernet cable (Cat5e or Cat6)(Choose length to reach from modem to target device with some slack)
- Modem with accessible Ethernet port(Ensure port is not damaged and cable fits snugly)
- Target device with Ethernet port (PC, router, switch, or gaming console)(Verify device has a functioning Ethernet port)
- Power outlets or power strip(Keep devices powered during testing)
- Cable management supplies (ties, clips)(Keeps run neat and safe)
- Pen and paper or digital note tool(Document IP settings or port mappings if needed)
Steps
Estimated time: 30-60 minutes
- 1
Power down and prepare
Power down the modem and the device you’ll connect. Clear a workspace and plan a clean cable route. This reduces the risk of hardware conflicts and makes routing easier.
Tip: Unplug the devices for a few seconds to reset network adapters before reconnecting. - 2
Find the correct ports
Identify the modem’s Ethernet port and the port on the destination device. Use the LAN port on a router if you’re connecting through one. Avoid ports that aren’t meant for general local networking.
Tip: If you’re unsure which port is for LAN, consult the device’s label or manual. - 3
Connect the cable ends
Insert one end of the cable into the modem’s Ethernet port and the other end into the destination device’s Ethernet port. Ensure both ends click into place and the cable isn’t at an angle.
Tip: Use a cable with enough slack to route without tension. - 4
Power on and verify link lights
Power up the devices and check the link LEDs near each Ethernet port. A steady light usually indicates a good connection. If the light is off, re-seat the plug or try a different cable.
Tip: If there’s no light, try a different port or ensure the cable is fully inserted. - 5
Test connectivity
On your computer or connected device, verify network status and run a basic connectivity test. Ensure an IP address is assigned and that you can reach a known site or service.
Tip: If DHCP isn’t providing an address, attempt a renew or set a manual IP in small increments. - 6
Troubleshoot if needed
If the wired link isn’t stable, test another cable or port, check for interference, and verify device settings. Reboot the modem and device as a last resort to reset configurations.
Tip: Document what you changed to avoid repeating steps.
FAQ
Do I need to power off devices before connecting an Ethernet cable?
Powering off devices is a precaution that can help reset adapters and avoid misconfigurations during the initial connection. If you prefer, you can connect while powered on, but be gentle with ports and ensure proper seating.
It's usually safest to power off to reset adapters, then connect and power back on.
Can I use Wi‑Fi while I wire Ethernet?
Yes. You can keep Wi‑Fi enabled for other devices while your wired connection provides a stable link for the target device. Wired connections won’t disable wireless access for other devices.
Absolutely—wire Ethernet for the wired device and keep Wi‑Fi on for others.
What if my modem has no free Ethernet port?
If there’s no spare port, you may need to connect through a router or switch, or use a different device’s port. Check your network layout to ensure the path supports the wired connection.
If there’s no port, use a router or switch to create additional Ethernet paths.
Will Ethernet always be faster than Wi‑Fi?
Ethernet is typically more stable and less affected by interference than Wi‑Fi, which often leads to more consistent speeds and lower latency for the wired device. Actual speeds depend on your service and hardware.
Usually yes, but actual speeds vary by service and hardware.
Is it safe to run Ethernet across walls or under carpets?
Running cables across walls or under carpets is generally safe if the cable is rated for in‑wall use and is not exposed to heat or sharp edges. Keep it out of walkways to prevent damage.
Yes, as long as you use the right rated cable and keep it out of the way of foot traffic.
How can I test if the wired connection is working after setup?
Check the network status on the connected device and run a simple speed test or access a known site. If issues appear, recheck the cable seating and try a different port or cable.
Check status, run a quick test, and re-seat if necessary.
Watch Video
Key Takeaways
- Use a wired Ethernet connection for reliability and stability.
- Choose Cat5e or Cat6 cables based on budget and future needs.
- Verify port compatibility and route cables safely.
- Test connectivity after setup and troubleshoot promptly.
- The Modem Answers team recommends wired Ethernet whenever possible for a stable home network.