How to Configure a Modem for NBN: Step-by-Step Guide
Learn how to configure a modem for NBN with a clear, step-by-step guide—from WAN settings and PPPoE to VLAN and Wi‑Fi security—for reliable Australian broadband.

According to Modem Answers, configuring a modem for NBN begins by logging into the modem's admin interface and selecting the correct connection type. If your ISP requires PPPoE, enter the provided username and password, then apply the correct VPI/VCI and VLAN settings. Finish with basic Wi‑Fi optimization and strong security settings for reliable service.
Understanding what NBN requires from your modem
NBN connections arrive at homes in several forms (fiber-to-the-premises, fixed wireless, or fiber-to-the-curb). Regardless of the delivery method, the final hop to your local network is a modem or modem-router combo. The modem must be configured with the correct WAN type and VLAN tagging to establish a stable path from the NBN network to your devices. The two most common connection modes are PPPoE (for authentication) and Dynamic IP (for most simple broadband plans). The exact values vary by provider, but you’ll typically need a VLAN identifier and, in some cases, a VPI/VCI pair. Understanding these basics reduces the chance of a non-working setup and long troubleshooting sessions. According to Modem Answers, aligning the router with the ISP’s requirements before changing other settings is essential for reliability.
Gather your ISP details before you start
Before touching the modem, collect all the information your ISP will require. You will typically need a username and password if PPPoE is used, a VLAN ID (some providers require it for NBN), and the correct WAN/Internet connection type. Note whether IPv6 should be enabled, and whether you need any specific encapsulation or VLAN priority. Having this information on hand prevents back-and-forth during setup and reduces downtime. MODem Answers recommends creating a single reference note with all credentials and the exact VLAN values so you can copy-paste during configuration.
Access the modem admin interface securely
Connect a computer to the modem via Ethernet for stability, then open a web browser and enter the device's gateway address (commonly 192.168.0.1 or 192.168.1.1). Log in with the admin username and password from the manual or your provider. For security, change the admin password after you login and enable HTTPS if the option exists. If you cannot access the interface, reset the device to factory defaults and try again, ensuring your device isn't blocked by another network. Keep note of the original credentials in case you need to revert changes. Ensure you perform these steps on a trusted network to avoid credential exposure.
Configure WAN/Internet settings and VLAN basics
In the WAN/Internet section, select the appropriate connection type. If your ISP uses PPPoE, enter the username and password given by your provider. If the plan uses Dynamic IP, choose Dynamic IP. Ensure you disable any double NAT if your modem supports it and enable routing features you need. Enter the VLAN ID as specified by your ISP and set the correct VLAN priority if requested. Save the changes and reboot the device to apply the new configuration. This step is critical for a stable internet connection.
VLAN tagging, VPI/VCI basics, and encapsulation
VLAN tagging helps segregate traffic on the network. Your ISP may require a specific VLAN ID and a VPI/VCI pair; encapsulation (e.g., LLC) may also be specified. If you’re unsure, consult your provider’s setup guide or support portal. After applying the VLAN and encapsulation settings, recheck the WAN status to confirm the modem is correctly tagged for NBN. Mis-tagged VLANs are a leading cause of no connectivity.
Wireless network optimization
Once the WAN is configured, switch to the wireless settings. Create a unique SSID, choose a strong passphrase, and select WPA3 (or at least WPA2) encryption if available. Consider enabling a guest network for visitors and separating 2.4 GHz from 5 GHz bands to balance range and speed. Turn off WPS if your device supports it, and ensure firmware updates are enabled if your modem offers automatic updates. These steps improve security and overall network performance.
Verification: test connectivity and adjust as needed
With the modem configured, check if devices can reach the internet. Run a quick speed test on multiple devices, verify IP addresses and DNS responses, and ensure both wired and wireless clients are online. If issues persist, log back into the admin panel, review the WAN and VLAN settings, and verify the credentials. Take notes of any changes you made for future reference. Modem Answers notes that a methodical check often reveals misconfigurations or overlooked credentials.
Troubleshooting common issues and best practices
If you still have no internet after configuration, troubleshoot common culprits: incorrect PPPoE credentials, wrong VLAN ID, or incorrect WAN mode. Resetting to factory defaults can help, but only after you’ve re-collected all ISP details. Make sure the firmware on your modem is current and that you’ve saved all changes before rebooting. The Modem Answers analysis shows that a backed-up configuration makes recovery quick if you need to revert.
Best practices for reliability and future-proofing
Document every setting you apply, keep firmware up to date, and back up your configuration file. Consider creating a separate guest network and a second SSID for IoT devices to reduce risk. Schedule periodic reboots to maintain performance, and monitor your connection with periodic speed tests. The Modem Answers team recommends reviewing your setup every 6–12 months to accommodate ISP changes and firmware updates.
Tools & Materials
- ISP account details (username and password)(Needed for PPPoE authentication if your plan uses PPPoE)
- Modem/router with admin access(Ensure you have admin access via web UI (often 192.168.x.1))
- Ethernet cable(Use a wired connection during setup to avoid drop-outs)
- Smartphone or computer with network access(Used to access admin interface and verify settings)
- Paper and pen or digital notes(Record before/after settings and credentials)
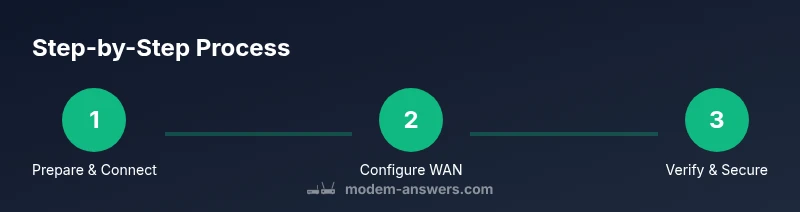
Steps
Estimated time: Total time: 20-40 minutes
- 1
Connect your device to the modem
Attach your computer or phone to the modem using an Ethernet cable for reliability. Ensure you’re on a stable local connection before making changes.
Tip: Use a wired connection whenever possible to avoid setup dropouts. - 2
Open the admin interface
Launch a browser and enter the gateway IP (commonly 192.168.0.1 or 192.168.1.1). Log in with the default credentials or those provided by your ISP.
Tip: If you don’t know the credentials, check the manual or contact your ISP. - 3
Check WAN/Internet mode
Navigate to the WAN/Internet section and confirm whether your plan uses PPPoE or Dynamic IP. This determines the next configuration steps.
Tip: Correct WAN mode is essential; a wrong choice blocks connectivity from the start. - 4
Enter PPPoE credentials and VLAN
If PPPoE is required, input the provided username and password. Enter the VLAN ID and any priority tag as specified by your ISP; select the correct encapsulation if prompted.
Tip: Double-check credentials and VLAN values; a small typo prevents a session from establishing. - 5
Save and reboot
Apply the changes and reboot the modem to ensure the new settings take effect. Wait a few minutes for the device to come back online.
Tip: During reboot, avoid powering off the device multiple times; this can corrupt settings. - 6
Configure Wi‑Fi security
Set a unique SSID, strong password, and choose WPA3 (or WPA2 if not available). Disable WPS if possible and enable a guest network if you have visitors.
Tip: Use different passwords for the modem admin interface and Wi‑Fi network. - 7
Test connectivity on multiple devices
Connect devices to both 2.4 GHz and 5 GHz bands and run speed tests. Check DNS resolution and page loading with representative sites.
Tip: Document results to compare future performance after updates. - 8
Create a backup and monitor
Back up the configuration file if your modem supports it, and note the steps you took. Check performance weekly for the first month.
Tip: Keep a copy of credentials in a secure location and update firmware when prompted.
FAQ
What is PPPoE and do I need it for NBN?
PPPoE is a common authentication method used by some NBN providers. If your ISP requires PPPoE, you must enter the assigned username and password in the WAN settings; otherwise, you may use Dynamic IP. Always follow your provider’s instructions to avoid a failed connection.
PPPoE is a login method for some NBN plans. If your provider asks for it, enter the credentials in WAN settings.
Why do I need a VLAN ID for NBN?
VLAN tagging isolates traffic on the network and ensures your modem communicates with the ISP’s equipment correctly. If your ISP requires a VLAN ID, enter the exact value in the VLAN settings; leaving it blank will often result in no connectivity.
Some ISPs require a VLAN ID to work properly. Enter it in VLAN settings to connect.
I can’t access the modem admin page; what now?
First, verify you’re on the correct local network and using the right gateway IP (usually 192.168.0.1 or 192.168.1.1). If needed, reset the device to factory defaults and try again, ensuring you have the correct credentials ready.
Check the IP address and try a reset if needed, but have your credentials ready.
How long does setup take and what if the speed isn’t right?
Initial setup typically takes 20–40 minutes. If speed is slow after setup, verify cable quality, VLAN, andWAN settings, then run a fresh speed test. Firmware updates can also improve performance.
It usually takes about half an hour; test speed after setup and check these settings if it’s slow.
Should I enable IPv6 on my NBN modem?
IPv6 can be beneficial if your ISP supports it, but it is optional. If your devices and provider support it, enable IPv6; otherwise, you can rely on IPv4 for now.
IPv6 is optional; enable it if your provider supports it, otherwise IPv4 is fine.
What if my provider uses Dynamic IP instead of PPPoE?
If your provider uses Dynamic IP, select Dynamic in WAN settings and skip the PPPoE login. VLAN settings may still be required, so enter the provided VLAN ID exactly as instructed.
Choose Dynamic IP in WAN settings and skip PPPoE login if your provider uses it.
Watch Video
Key Takeaways
- Identify ISP requirements before configuring.
- Always use a wired connection for setup.
- Back up and document settings for quick recovery.
- Test connectivity across devices and bands.
- Keep firmware up to date for security and performance.