Comcast Modem in Bridge Mode: A Practical How-To
Learn how to put a Comcast gateway into bridge mode and use your own router for a cleaner, more controllable home network. This guide covers prerequisites, step-by-step setup, tips, and troubleshooting.

Bridge mode lets your own router handle NAT and firewall, turning the Comcast gateway into a simple modem. This approach reduces double NAT, improves device compatibility, and can boost performance when you control the router. Ensure your plan supports bridge mode and be aware that gateway Wi‑Fi may be disabled during setup.
What comcast modem in bridge mode means for your home network
Bridge mode (also called IP passthrough) disables the gateway's router functions so your own router handles NAT, firewall, and Wi-Fi. This setup is popular for households who want to maximize performance, simplify port forwarding, or improve gaming latency. In practice, enabling bridge mode on a Comcast gateway can eliminate double NAT and give you a cleaner, more predictable network environment when you connect a capable router. According to Modem Answers, understanding bridge mode is the first step to a smoother home network and avoiding common misconfigurations. The Modem Answers team notes that many users see noticeable improvements in device compatibility and network management once they move NAT duties to a dedicated router. Remember that not every Comcast gateway model supports true bridge mode; some devices offer IP passthrough, DMZ, or limited bridge capabilities. Before you begin, verify your plan includes bridge-mode support and confirm you have a compatible router with current firmware. This article walks through the steps, potential caveats, and best practices to ensure a safe, effective transition.
Prerequisites and compatibility considerations
Before attempting to enable comcast modem in bridge mode, check your equipment and plan. Some Xfinity gateways block advanced features or require a service authorization to activate IP Passthrough. You’ll want a secondary router under your control and a computer or mobile device to log in to the gateway. Have your Comcast account credentials, the gateway’s admin address, and knowledge of your DHCP settings ready. If you rely on the gateway for VoIP service or a captive portal, bridging may temporarily disable those features. This is why planning ahead and backing up settings matters. If you’re unsure about your model, consult the official user guide or contact support. The takeaway: bridging is powerful but not universally available, so verify capabilities before proceeding.
Gather your tools and set expectations
Collect the items you will need: a computer or mobile device with a web browser, an Ethernet cable, and your own router with a WAN/LAN port. You should also note the gateway’s MAC address and your router’s MAC for MAC passthrough if required. Expect a short downtime during the switch and plan to test connectivity after the reboot. Having a clear rollback plan—how you’ll revert to stock settings if necessary—reduces stress and speeds recovery. Also, keep a spare patch cable and a stable power source to avoid intermittent disconnects. By preparing in advance, you reduce the risk of losing internet access for critical devices during the transition.
Step 1: Connect your own router and access the gateway admin page
Power down both devices, connect your computer to the Comcast gateway using an Ethernet cable, then power the gateway back up. Open a web browser and enter the gateway’s management address (the most common defaults are 10.0.0.1 or 192.168.100.1); if these don’t work, check the label on the device or the manufacturer’s support site for the exact address. Log in with your admin credentials. If you don’t know these, they may be printed on the gateway or provided by your service plan. This step establishes the bridge interface you will configure next. Do not abandon this page or close the tab, as you’ll need it soon.
Step 2: Enable IP Passthrough or Bridge mode
Navigate to Advanced Settings and look for IP Passthrough, IP Passthrough/Bridge, or a similar option—depending on the model. Select your own router’s MAC address (or pick the device from a list if required) and save the changes. Some gateways require you to disable the gateway’s Wi‑Fi and adjust DHCP to prevent IP conflicts. Let the gateway reboot to apply the settings. If internet does not appear immediately, wait a few minutes and refresh the page. This step transfers the public IP to your router and hands off routing to your device.
Step 3: Configure your own router’s WAN connection
On your router, ensure the WAN interface is set to DHCP (dynamic IP) and that the LAN side is configured for your home network. Connect a LAN port from the gateway to the WAN port of your router using an Ethernet cable. Consider turning off the gateway’s Wi‑Fi to avoid signal interference unless you want to keep both networks. Save the configuration and reboot your router if necessary. In most setups, your router becomes the primary NAT device, while the Comcast gateway acts only as a modem.
Step 4: Verify connectivity and security settings
Test internet access from a wired device connected to your router. Run a quick speed test, verify NAT type, and confirm IP addresses are issued by your router. Re-create essential rules such as port forwarding or firewall rules on your own device. If you still see issues, revisit the IP Passthrough settings, confirm the bridge remains active, and consult the router’s help guide for troubleshooting tips. A brief downtime during the transition is normal; patience helps you avoid mistakes.
Step 5: Optional optimizations for performance and reliability
Disable the gateway’s Wi‑Fi entirely to minimize interference, or run a separate guest network on your own router. Enable your router’s firewall, enable automatic firmware updates, and consider a static DHCP lease for your devices. Document changes with screenshots and save a backup of the router’s configuration. If you rely on specific Comcast features (like Xfinity hotspots or voice services), re-check compatibility after enabling bridge mode, and plan a future rollback if needed.
Step 6: Final checks and long-term maintenance
After bridging, monitor stability across devices and services. Confirm VoIP if used remains operational and that essential smart devices are reachable. Keep a record of all settings and revision history to simplify future updates or troubleshooting. If you encounter persistent problems, revert to a standard gateway setup and contact Modem Answers for guidance. The goal is a reliable, secure, and manageable home network with you in control.
Tools & Materials
- PC or mobile device with a web browser(Up-to-date browser; network access to gateway admin page)
- Ethernet cable(Cat5e or better; at least 6 feet recommended)
- Second router with WAN port(Your own router; ensure firmware is current)
- Comcast gateway login credentials(Admin username/password or default credentials from device label)
- Gateway admin IP address(Typical defaults are 10.0.0.1 or 192.168.100.1; verify model doc)
- Backup plan (optional)(Have a plan to revert to factory/default settings)
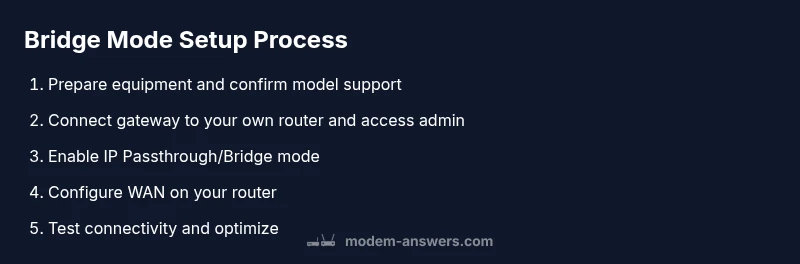
Steps
Estimated time: 30-60 minutes
- 1
Prepare equipment and plan
Assemble your computer, router, and cables. Verify model support and back up current gateway settings if possible. Decide on a minimal downtime window and inform household devices that may reconnect after changes.
Tip: Take a before screenshot of gateway status and note current DHCP settings. - 2
Check bridge-mode support
Consult your gateway model’s documentation to confirm IP Passthrough or Bridge mode availability. If unavailable, consider IP Passthrough or DMZ as alternatives.
Tip: If in doubt, contact support to confirm capabilities before proceeding. - 3
Power down and connect devices
Power off both gateway and your personal router. Connect your PC to the gateway with an Ethernet cable, then reconnect the router.
Tip: Use a stable, surge-protected power source to avoid reboot-related data loss. - 4
Log in to gateway admin page
Power up the gateway, open a browser, and navigate to the gateway IP. Enter admin credentials from the device label or account portal.
Tip: If you cannot reach the login page, verify network settings or reset the device if permitted. - 5
Enable IP Passthrough/Bridge mode
Find IP Passthrough or Bridge mode in Advanced Settings, select your router’s MAC, and apply changes. Disable gateway Wi‑Fi if advised by model docs.
Tip: Record the exact menu path for future reference and backup the current configuration. - 6
Configure the router WAN
Set the router WAN to DHCP, connect gateway to router via Ethernet, and ensure the gateway Wi‑Fi is off if required.
Tip: Verify that your router’s WAN shows a public IP address after bridging. - 7
Test connectivity
From a wired device, test internet access and run speed tests. Confirm devices obtain addresses from your router.
Tip: Re-create port-forwarding rules and QoS settings as needed on the new router. - 8
Tweak for performance
Fine-tune firewall rules, enable firmware auto-update, and optimize Wi‑Fi on your router.
Tip: Consider static DHCP leases for stable device addresses. - 9
Document and maintain
Save configuration backups, log changes, and schedule periodic checks for stability.
Tip: Keep a simple changelog to simplify future upgrades or troubleshooting.
FAQ
What is bridge mode and why would I use it with a Comcast gateway?
Bridge mode disables the gateway’s router functions, letting your own router handle NAT and firewall. It’s useful when you want more control, better gaming performance, or easier port forwarding. Be mindful of features tied to the gateway that may be affected.
Bridge mode turns the gateway into a simple modem, so your own router handles networking. This often improves control and performance, but some gateway features may be affected.
Is bridge mode available on all Comcast gateways?
Not all Comcast gateways support true bridge mode. Some models offer IP Passthrough as an alternative. Check your device model’s documentation or contact support to confirm capabilities.
Not every gateway supports bridge mode. Check your model’s docs or contact support to confirm options like IP Passthrough.
What could go wrong when enabling bridge mode?
You may lose gateway Wi‑Fi and native VoIP services; there can be downtime during switching; you’ll need to configure your own router and firewall rules. Planning and backups reduce risk.
You might lose Wi‑Fi and some services, and there could be a short downtime. Have a rollback plan.
Do I still need the Comcast gateway after enabling bridge mode?
In most setups, the gateway becomes a modem only, and you rely on your own router for routing, Wi‑Fi, and advanced features. Some providers require you to keep IP Passthrough active.
Usually you’ll use the gateway as a modem and your own router handles networking. Sometimes you must keep passthrough on.
How do I test whether bridging is working?
Check that your router obtains a public IP and that devices use your router for NAT. Run speed tests and verify port forwarding rules. If necessary, recheck the IP Passthrough settings.
Make sure your router shows a public IP and NAT is on your router. Test speeds and ports.
What about Wi‑Fi in bridge mode?
Bridge mode usually disables the gateway’s Wi‑Fi; you should rely on your own router for wireless coverage. You can enable guest networks on your router if needed.
Bridge mode often turns off the gateway’s Wi‑Fi; use your router for wireless.
Can I revert bridge mode if something goes wrong?
Yes. Reverting involves disabling IP Passthrough/Bridge mode and restoring the gateway’s router functions. It’s wise to keep a backup of the original settings and follow the provider’s rollback instructions.
Yes, you can revert by turning off bridge mode and restoring router functions. Keep a backup handy.
Is it safe to bridge a Comcast gateway on a rented modem?
Bridging a rented gateway is generally supported when the device allows it with IP Passthrough. Always check your rental terms and contact support if you’re unsure.
Bridging is usually supported, but verify with your terms and provider if unsure.
Watch Video
Key Takeaways
- Verify bridge-mode support before starting.
- Use IP Passthrough and your own router for best results.
- Disable gateway Wi‑Fi to avoid signal conflicts.
- Test thoroughly and back up configuration.