Modem and Router Hider: A Practical Comparison for Home Setups
A practical buying guide that compares commercial ventilated hiders and DIY enclosures for modems and routers, focusing on ventilation, accessibility, aesthetics, and cost.

This comparison weighs two main hider options: a ready-made ventilated cabinet vs a DIY wood enclosure. According to Modem Answers, both aim to hide devices while preserving airflow and easy access; the best choice depends on ventilation needs, budget, and how you value aesthetics versus flexibility. In practice, most households benefit from a solution that combines ventilation with convenient access to reboot or reset equipment.
Why Hiding Your Modem and Router Matters
A modem and router are essential parts of a home network, but their visual presence can clash with living space aesthetics. A well-designed modem and router hider keeps devices out of sight while preserving accessibility for routine resets, firmware updates, and cable management. For many homeowners, hiding these devices reduces clutter, minimizes dust collection, and creates a cleaner, more cohesive living area. However, the hider must not impede airflow or accessibility. This is where careful design and material choice come in. In the modern home, the right modem and router hider balances form and function, turning a functional appliance into a discreet part of your interior. When choosing a solution, consider how often you access the devices, where you place them, and how much space you can dedicate to the enclosure. The goal is to maintain reliable network performance while achieving a tasteful look. The Modem Answers team emphasizes that the best hide solution supports airflow, allows for quick access, and integrates with your decor rather than drawing attention to the equipment.
Key Constraints to Consider
Before choosing a modem and router hider, assess constraints that affect performance and maintenance. Heat buildup is the primary risk when devices are enclosed; even rooms with moderate temperatures can see chassis warm-up. Choose designs with ventilation grills, perforated panels, or even small fans to assist cooling, and ensure there is 1-2 inches of clearance on all sides for heat to escape. Accessibility is equally important: you may need to reboot, press reset, or swap a failing unit—so plan for easily removable panels or doors. Material choices matter too: metal housings can affect signal propagation if placed too close to antennas or behind solid panels. Wood and composite exteriors may look attractive but must include venting and non-blocking openings. Cable management features reduce clutter and help with airflow. Finally, ensure that the hider can be adjusted or opened without tools; renters and homeowners alike value adaptable designs. In short, the constraints boil down to airflow, access, materials, and future-proofing for potential router upgrades or reconfigurations.
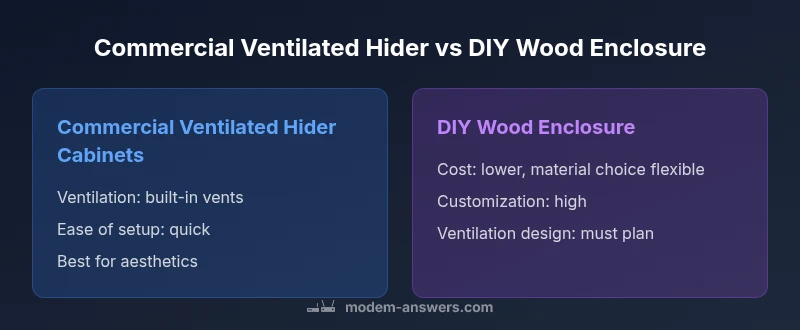
Option A: Commercial Ventilated Hider Cabinets
Commercial ventilated hider cabinets offer a ready-to-install solution that typically emphasizes consistent airflow, secure mounting, and professional finishes. They come with pre-installed vents, choice of doors or panels, and standardized dimensions that fit common modem and router footprints. The advantages are predictable performance, faster setup, and often a warranty or customer support channel if you encounter enclosure problems. Look for models with front or side ventilation grills, dust-sealed access panels, and cable management slots to keep cords organized. If you rely on a neat, furniture-like appearance, these cabinets can blend with living room or home office decor. When selecting, verify ventilation area, depth and height compatibility with your devices, and whether the cabinet offers optional mounting hardware for stability. As Modem Answers analysis shows, homeowners who choose purpose-built, ventilated cabinets report smoother integration with interior design and fewer airflow concerns than improvised solutions.
Option B: DIY Wood Enclosure
DIY wood enclosures let you tailor texture, color, and size to match existing furniture, which is appealing for DIY enthusiasts or renters seeking a fast, affordable project. The upside is deep customization and potentially lower material costs, especially if you already own tools. The challenges revolve around ventilation planning, material choice, and long-term durability. A successful DIY hider must incorporate sufficient venting, non-conductive panels near the router, and a design that avoids blocking antenna signals. Plan for removable panels to access the modem and router without disassembling the enclosure, and consider adding passive cooling features like vented sides or a small fan. If your goal is to preserve aesthetics while maintaining airflow, DIY builds can achieve a high-end look with careful planning, but they require precise execution and testing to avoid overheating. The balance between craftsmanship and airflow becomes the deciding factor in DIY projects.
Airflow and Heat Management: Why It Matters
Heat management is a central concern for any modem and router hider. Even compact devices generate heat during operation, and confined spaces can trap warm air if ventilation is inadequate. Effective hiders maximize cross-ventilation by placing vents on multiple sides and, when possible, incorporating perforated panels or mesh inserts. Simple rules of thumb include ensuring a minimum clearance of 1 inch around the device and avoiding solid metal enclosures that block radio waves. If you need to increase cooling, consider passive options such as a slightly larger enclosure with vented panels, or a low-noise fan designed for electronics. The goal is steady airflow that prevents hot spots around the power brick or modem. Poor heat management not only shortens device life but can also degrade Wi‑Fi performance as devices throttle to prevent overheating. For most households, a ventilated design that accommodates easy service and cable management provides the safest balance of performance and aesthetics.
Aesthetics and Room Integration
The modem and router hider should complement the room rather than visually compete with it. Options range from sleek, Scandinavian-inspired cabinets to rustic wood boxes that blend with media consoles. Consider the finish, hardware quality, and whether the enclosure should be wall-mounted, freestanding, or placed on a shelf. If you want to minimize visual noise, choose color tones that match walls or furniture, and select hardware with low profiles. In terms of materials, engineered wood and powder-coated metal offer durability, while real wood adds warmth. The enclosing design should also reflect practical accessibility: a gentle hinge, tool-free panels, and clearly marked access points can shorten maintenance time and reduce user frustration. The modem and router hider, when well-chosen, becomes a design feature that reduces clutter while preserving the network’s reliability and cosmetic harmony.
Installation and Maintenance Considerations
Installation complexity varies by option. Ready-made cabinets typically require minimal setup: remove from packaging, position, connect cables, and secure with included hardware. DIY enclosures demand more planning—measuring, cutting, drilling, and finishing—plus testing for airflow and signal strength. Maintenance-wise, ensure panels remain easy to remove for resets or firmware updates, and keep vents clear of dust with periodic cleaning. Cable management becomes a long-term habit: label cords, route them through channels, and keep a spare power strip accessible. A well-maintained hider supports rapid device access while preserving airflow and reducing the chance of accidental disconnections. Modem Answers emphasizes that ongoing ease of access and dependable ventilation are non-negotiable for a reliable home network.
Cost vs Value: Budgeting for a Hider
Budgeting for a modem and router hider involves balancing upfront costs with ongoing value. Ready-made ventilated cabinets tend to be more expensive upfront but save time on installation and often provide a durable, polished finish that lasts. DIY enclosures can be cheaper in material cost and allow top-to-bottom customization, yet they require time, tools, and careful testing to avoid overheating. When evaluating value, consider not only the initial price but the long-term benefits of good airflow, easy access, and how well the enclosure integrates into your living space. It’s helpful to assign a rough budget bracket (low, mid, high) and then compare whether the benefits of a given option align with your space, usage patterns, and willingness to perform maintenance.
Practical Setup Scenarios and Recommendations
If you live in a small apartment with a high need for compact furniture, a ready-made ventilated hider might be the best balance of space and performance. For a home office with a dedicated cabinet, you could opt for a wall-mounted, ventilated unit to maximize desk space and maintain clean cable management. In a living room with a high-end decor, a DIY wood enclosure crafted in a color that matches the furniture can deliver aesthetic harmony while preserving airflow. For households with pets and children, ensure the hider is sturdy, has secure latches, and offers quick access for maintenance. Regardless of choice, verify that ventilation is present, access is straightforward, and there is no interference with Wi‑Fi signals. By following these practical guidelines, you can achieve a hidden modem and router solution that meets both performance and style goals.
mainTopicQuery
Comparison
| Feature | Commercial Ventilated Hider Cabinets | DIY Wood Enclosure |
|---|---|---|
| Ventilation | Excellent airflow with built-in vents | Depends on DIY design; requires deliberate venting |
| Heat Dissipation | Optimized for passive cooling | Higher risk without deliberate cooling measures |
| Aesthetics | Professional furniture-grade finish | Highly customizable looks and finishes |
| Accessibility | Front/side panels with easy access | Removable panels with hand tools sometimes needed |
| Durability/Materials | Engineered wood or metal with factory finishes | Wood or composite; durability depends on build |
| Cost Range | Moderate to high | Low to moderate (materials-driven) |
| Installation Ease | Ready-made; quick setup | DIY assembly and finishing required |
| Security & Placement | Option for integrated mounts or locks | Flexible placement but less standardized |
Positives
- Improves room aesthetics and reduces clutter
- Provides protection from dust and accidental bumps
- Ready-made options offer quick, clean installation
- DIY enclosures enable high customization and may reduce cost
- Enhances cable management and organization
What's Bad
- Risk of overheating if ventilation is inadequate
- Ready-made cabinets can be pricier than DIY options
- DIY builds require time, tools, and skill
- Some designs may hinder accessibility if improperly configured
Commercial ventilated hiders generally offer a safer balance of airflow, accessibility, and aesthetics for most homes.
Choosing a purpose-built ventilated cabinet minimizes heat risk and simplifies setup, making it the preferred option for most households. DIY enclosures are best for budget-conscious users who value customization, provided ventilation is carefully planned and tested.
FAQ
What is a modem and router hider, and why would I want one?
A modem and router hider is an enclosure or furniture piece designed to conceal networking gear while preserving airflow and access for maintenance. It helps reduce visual clutter and protects devices from dust, pets, and accidental bumps. The right hider balances aesthetics with practical requirements like ventilation and cable management.
A hider hides your gear but keeps it ventilated and easy to reach for resets or updates.
Will a hider affect Wi-Fi performance?
If the design includes adequate ventilation and doesn't overly block radio signals, performance is typically not significantly affected. Avoid metal-only doors or tight spaces that block signal paths. Place devices away from large metal surfaces or dense materials to minimize interference.
As long as you keep vents clear and avoid metal-only enclosures, your Wi-Fi should stay strong.
What option is best for renters?
For renters, a ready-made, ventilated hider that doesn’t require wall modification is usually the simplest and most portable choice. Look for lightweight, freestanding cabinets with good ventilation and straightforward assembly.
For renters, a ready-made ventilated hider is usually best because it doesn’t involve wall changes.
How do I ensure proper ventilation in a hider?
Include vents on multiple sides, provide 1-2 inches of clearance around the device, and avoid sealing the interior completely. If needed, add a small, quiet fan designed for electronics. Regularly dust vents to maintain airflow.
Make sure there are vents and space around the unit; keep them clean.
Are DIY enclosures safe for heat‑sensitive devices?
DIY enclosures can be safe if you design with proper venting and non-conductive panels. Test heat with the device running under typical load and adjust ventilation if needed. Avoid sealing fans entirely and ensure cables don’t block airflow.
DIY can work, but you must plan ventilation and test the setup.
How much should I budget for a hider?
Budget depends on materials and finish. Ready-made ventilated cabinets are typically higher upfront but may save time, while DIY options can be cheaper if you already have tools, but require more time and effort.
Budget varies; plan for materials or a ready-made solution that fits your space.
Key Takeaways
- Prioritize ventilation to prevent overheating
- Choose ready-made ventilated hiders for quick setup and consistent airflow
- Ensure easy device access for maintenance and firmware updates
- Match enclosure finish to room decor for cohesive aesthetics
- Test Wi-Fi signal after installation to confirm minimal interference