How to Set Up a CenturyLink Modem: Step-by-Step Guide
Learn how to set up a CenturyLink modem from power-on to secure Wi‑Fi. Step-by-step activation, wiring, and troubleshooting—Modem Answers.

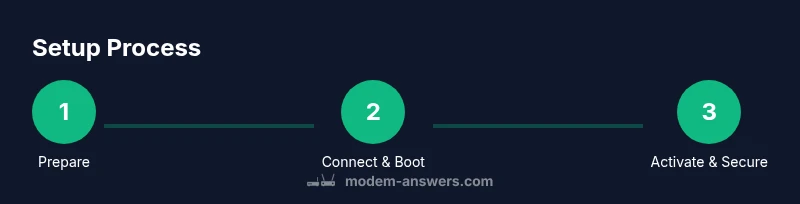
In this guide you will learn how to set up a CenturyLink modem from power-on to Wi‑Fi. You'll need the modem, a power source, an Ethernet cable, and your CenturyLink account details. The steps cover wiring, activation, network configuration, and basic security for a reliable home network. This quick answer gives the essential requirements and the high-level flow, so you know what to expect before you begin.
Before You Start: Understand Your CenturyLink Service Type
CenturyLink offers multiple deployment options, including fiber-to-the-home (FTTH) and DSL. The exact setup you use depends on the service type delivered to your address and the modem you received from CenturyLink. If you have FTTH, you’ll typically connect the modem to a fiber ONT or similar gateway provided by the provider. For DSL, the modem connects to the phone line via a splitters/coaxial arrangement. In all cases, the modem acts as a gateway for both internet access and local networking. Understanding your service type helps you anticipate activation steps and potential limitations, such as whether you’ll also need a separate router for advanced features.
Pro tip: If you’re unsure about your service type, check the welcome guide provided by CenturyLink or log into your account on the official portal. Knowing this upfront reduces back-and-forth between you and support agents and speeds up activation.
What You’ll Need: Tools and Materials
Before starting, gather all required items. A standard setup includes the CenturyLink modem/gateway, its power adapter, a line connection (coax or phone line as provided by CenturyLink), an Ethernet cable, and a computer or smartphone to access the admin interface. You’ll also need your CenturyLink account details (service ID or account number) if activation is not automatic. Optional items include a separate router to handle advanced features, a network switch for wired devices, and a paper clip for any reset procedures. Having everything within arm’s reach minimizes interruptions and helps you stay on schedule.
Optional configurations — if you already own a robust router, you can use the CenturyLink modem in bridge mode to let your own router handle Wi‑Fi and advanced features. For most households, starting with the built‑in Wi‑Fi is simplest and fastest.
Step 1: Prepare and Position the Modem
Place the modem in a central, well-ventilated area away from heat sources and large metal appliances. Keep it near a power outlet and within reach of the line connection (coax or telephone line). Avoid stacking heavy electronics directly on top of the modem to prevent overheating. If you plan to use an external router, position both devices to minimize long cable runs and signal interference.
Why this matters: A stable placement reduces signal dropouts and makes the setup easier to follow. Proper airflow helps prevent thermal throttling that could impact performance over time.
Step 2: Connect the Line and Power
Attach the line cable (coaxial for fiber or DSL/phone line for standard DSL) to the modem’s appropriate port. Then connect the power adapter and plug the modem into a power outlet. If the line requires a splitter or filter, install it according to the included documentation. After connecting both line and power, switch on the modem and wait for the device to boot fully.
Tip: Do not unplug the modem during the boot sequence. A proper boot may take a couple of minutes and lights will sequence to indicate progress.
Step 3: Access the Admin Interface
From a computer or mobile device connected to the modem (via Ethernet or Wi‑Fi), open a web browser and navigate to the modem’s admin page. Common default addresses are http://192.168.0.1 or http://192.168.1.1, though your model’s manual may specify a different address. You’ll be prompted to log in with a default username and password—often printed on the device label or in the manual. For security, plan to change these credentials after the first login.
If you don’t reach the admin page, ensure your device is on the same network as the modem and disable any VPNs temporarily. Some models also support a companion mobile app for setup.
Step 4: Run Activation
Activation is the key step that ties your CenturyLink service to the modem. Depending on your plan and region, activation can occur automatically when the modem connects to CenturyLink’s network, or you may be asked to enter account details (service ID, account number, or the activation PIN found on the package). Follow the on-screen prompts in the admin interface. If activation fails, reboot the modem and retry after a few minutes, or contact CenturyLink support with your service ID handy.
Note: Activation times can vary; plan for a short delay and ensure your line is provisioned for service to avoid repeated attempts.
Step 5: Configure Wi‑Fi and Security
Within the admin interface, locate the Wireless settings. Create a unique network name (SSID) and a strong password. Enable WPA2 or WPA3 security if available. Disable WPS if your model provides it to reduce potential unauthorized access. If you’re using a separate router, disable the modem’s Wi‑Fi or put it into bridge mode so your router handles wireless duties instead of the gateway. Create a guest network if you have visitors, keeping it isolated from your main network.
Best practice: Use a passphrase of at least 12–16 characters, mixing upper and lower case letters, numbers, and symbols. This substantially improves security against common attacks.
Step 6: Update Firmware and Back Up Settings
Check for firmware updates in the admin interface and install any available updates. Firmware updates can improve stability, security, and compatibility with new devices. After updating, save a backup of your current configuration in case you need to restore it later. Keeping firmware current reduces bugs and performance issues over time. If the modem offers an automatic backup option, enable it so you can recover quickly if you reset settings at a later date.
Why updates matter: Security vulnerabilities are routinely addressed in firmware patches. Regular updates help maintain a reliable home network.
Step 7: Fine‑Tune Your Network for Performance
If you’re using the modem’s built‑in Wi‑Fi, adjust channel settings to avoid interference from neighboring networks. For 2.4 GHz bands, set a stable channel (1, 6, or 11) and enable 5 GHz for higher throughput where supported. If you have many wired devices, consider enabling Quality of Service (QoS) rules to prioritize essential applications like video conferencing or gaming. If you experience congestion, you may benefit from placing the modem in a central location and using a wired backhaul for critical devices. If you decide to use your own router, ensure it’s set up correctly in bridge mode to prevent double NAT issues that can complicate port forwarding and services like gaming.
Tip: When testing speeds, perform multiple runs at different times of day to gauge consistency rather than relying on a single measurement.
Step 8: Test Your Internet and Troubleshoot Common Issues
With Wi‑Fi enabled and devices connected, run a quick speed test and confirm both download and upload speeds meet expectations for your plan. If speeds are low, verify cable quality, check that the line is provisioned correctly, and ensure no misconfigurations in the admin interface. Common issues include incorrect login credentials, firmware that hasn’t updated, or a misconfigured DHCP range. If devices cannot obtain an IP address, verify that DHCP is enabled on the modem and that there are available addresses in the pool. If problems persist, reset to factory settings and re‑run activation, or contact support with details about your steps and error messages.
Step 9: Optional: Bridge Mode or Using Your Own Router
If you prefer to run your own router for advanced features (guest networks, advanced parental controls, VPN), you can enable bridge mode on the CenturyLink modem. Bridge mode disables the router functionality of the gateway and passes the public IP address directly to your own router. This avoids double NAT and often provides better performance for multiple devices. If you keep the gateway as your sole router, ensure you disable bridge mode to allow the gateway to manage the network and security features. Review your service agreement and ensure bridge mode is supported in your region.
Warning: Enabling bridge mode can affect CenturyLink’s device management and troubleshooting. If you rely on support or certain features, you may need to revert to standard gateway mode before contacting support.
Authority Sources for Further Reading
- Industry and consumer guidance on home networking from federal sources and major publications can help you understand best practices for routing, security, and device management. See authoritative references at federal and educational sites for safe installation and network hygiene.
Tools & Materials
- CenturyLink modem/gateway(Your model may be labeled as gateway. Do not substitute with third-party devices unless explicitly supported by CenturyLink.)
- Power adapter(Ensure you use the correct power adapter specified for your modem to prevent damage.)
- Coaxial or DSL line(Use the line type provided by CenturyLink for your service (coax for fiber, DSL for phone line).)
- Ethernet cable(Use a standard Cat5e or better. One end connects to the modem, the other to a computer or to your own router if used.)
- Computer or smartphone(Needed to access the admin interface and complete activation.)
- CenturyLink account details(Service ID, account number, or activation PIN as guided by CenturyLink during setup.)
- Optional: separate router(If you plan to use your own router for advanced features or a larger home, configure bridge mode accordingly.)
- Paper clip or pin(Useful for a soft reset on some models if needed.)
Steps
Estimated time: 30-60 minutes
- 1
Prepare and position the modem
Choose a central, ventilated location near a power outlet and line connection. Keep it away from heat and heavy devices to prevent overheating. Maintain short cables for a clean installation and easier troubleshooting.
Tip: Place the modem on a stable surface and avoid stacking devices on top of it. - 2
Connect line and power
Attach the proper line (coaxial or DSL) to the modem, then plug in the power adapter. Ensure all connections are snug and not loose. Turn on the device and wait for the lights to indicate boot progress.
Tip: If you hear a hum or notice unusual heat, power off and re-seat the connections. - 3
Access the admin interface
From a connected computer or mobile device, open a browser and enter the device’s IP address (commonly 192.168.0.1 or 192.168.1.1). Log in using the default credentials and change them after the first login. If you can’t reach the page, verify the device is on the same network and consider a reset if needed.
Tip: Bookmark the admin URL for quick access in the future. - 4
Run activation
Follow on-screen prompts to activate the modem with CenturyLink. You may need your service ID or account number. If automatic activation fails, reboot and retry after a few minutes or contact support with your details.
Tip: Have the activation PIN handy if prompted by the portal. - 5
Configure Wi‑Fi
Create a unique SSID and a strong password. Enable WPA2 or WPA3. Consider enabling a guest network and disable WPS if present. If using a separate router, disable the gateway’s Wi‑Fi or switch to bridge mode.
Tip: Use at least 12–16 characters with mixed case, numbers, and symbols. - 6
Update firmware and back up
Check for firmware updates and apply them. Save a backup of your configuration after changes. Firmware updates improve security and stability.
Tip: Enable automatic updates if available. - 7
Fine‑tune for performance
Adjust Wi‑Fi channels to reduce interference and consider enabling QoS for priority devices. If you have many devices, run cables where possible for reliability. If you own a router, test bridge mode to avoid double NAT issues.
Tip: Test performance at different times of day to gauge consistency. - 8
Test and troubleshoot
Run speed tests and verify both download and upload speeds. Check for IP address issues, DHCP configuration, and firewalls. If issues persist, re-run activation or reset and reconfigure.
Tip: Document error messages to speed up support calls. - 9
Bridge mode or using your own router
Bridge mode passes the public IP to your own router, removing gateway features like firewall and NAT from the CenturyLink device. This can improve performance for gaming or advanced networking. If you rely on CenturyLink’s features, keep gateway mode enabled.
Tip: Only enable bridge mode if you understand the implications and have a compatible router.
FAQ
Do I need a CenturyLink account to set up the modem?
Activation typically requires CenturyLink service credentials, such as a service ID or account number. If you already have an active service, activation may occur automatically once the modem connects.
Yes, you’ll usually need your CenturyLink service details to activate the modem.
What if I can’t access the admin page?
Ensure the modem is powered and connected, the device is on the same network, and try the common default admin addresses. If still unavailable, reset the modem once and retry, or contact CenturyLink support with your service details.
Make sure you’re on the same network and try the default IP address. A reset may be needed if the page still won’t load.
Can I use my own router with the CenturyLink modem?
Yes. For most households, you can connect a separate router and either use the modem in bridge mode or keep it as the gateway while your router handles Wi‑Fi. Each choice has implications for features and support.
You can use your own router, often by enabling bridge mode on the modem or using it as your main gateway.
How long does activation take?
Activation times vary by service and region. In many cases, activation can complete within minutes, but some setups may require a short wait or a call to support.
Activation can take a few minutes, sometimes longer if the system needs to provision your service.
How do I reset the modem to factory settings?
Most modems include a reset button that requires a short press with a paperclip. Hold it for about 10-15 seconds until the lights cycle. Note that this will erase custom settings and restore default credentials.
Use a pin to press the reset button for about 10-15 seconds to restore factory defaults.
Should I enable bridge mode?
Bridge mode is useful if you want to use your own router. It disables gateway features on the modem, passing the public IP to your router. If you rely on CenturyLink’s features, keep gateway mode enabled.
Bridge mode is good when you’re using your own router and want to avoid double NAT.
Watch Video
Key Takeaways
- Verify service type and complete activation before configuring Wi‑Fi.
- Choose strong security settings and a unique SSID.
- Decide between using the gateway’s Wi‑Fi or a personal router with bridge mode.
- Regularly update firmware and back up your configuration.
- Test performance and troubleshoot using structured steps.