Upgrade Your CenturyLink Modem: Step-by-Step Guide
Learn how to upgrade centurylink modem with a practical, step-by-step approach. Modem Answers covers compatibility, setup, bridge vs router modes, and troubleshooting.

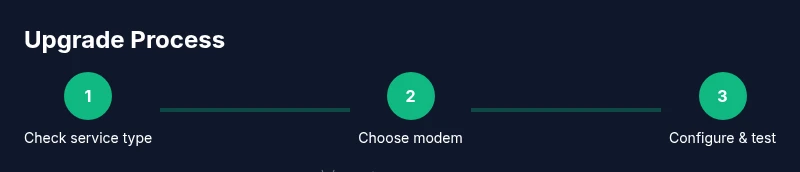
Upgrade your CenturyLink modem by selecting a compatible DSL modem, configuring PPPoE credentials, and, if you’re using your own router, enabling bridge mode. Before you begin, confirm your service type (DSL/VDSL) and have your CenturyLink account details ready. The Modem Answers team notes that compatibility and correct configuration are the biggest drivers of improved reliability.
Why upgrading your CenturyLink modem can improve home networking
Upgrading a CenturyLink modem is not just about speed. A newer, compatible device can deliver more reliable WAN connectivity, stronger Wi‑Fi coverage, and better support for modern home networking standards. For many households, an up-to-date modem that works with CenturyLink’s service type (DSL or fiber where applicable) reduces dropped connections, improves router performance, and expands the number of devices your network can handle simultaneously. According to Modem Answers analysis, users who replace aging legacy equipment with a current DSL modem and pair it with a capable router often notice meaningful gains in stability and throughput. This is especially true in multi‑story homes or spaces with Wi‑Fi dead zones.
Determine service type and requirements before buying
The first step is to confirm whether your service is DSL/VDSL or something else (CenturyLink fiber or a provided gateway). This matters because it dictates which third‑party modem will work and what settings you’ll use. Log in to your CenturyLink account or contact support to verify your service type and eligibility for third‑party equipment. If you’ll be using PPPoE, obtain your username and password from CenturyLink or your account portal. If you plan to use your own router, you’ll likely want a modem that supports bridge mode or that can be configured to pass the connection to your router with minimal double NAT issues. Having these details on hand before you shop saves time and reduces returns.
How to choose a compatible modem for CenturyLink
Look for a modem that explicitly supports your service type (DSL/VDSL) and PPPoE authentication. The modem should offer an RJ-11 line port for the telephone/DSL line, at least one Gigabit Ethernet port, and robust wireless capabilities if you want Wi‑Fi from the gateway itself. Ensure the device can operate in bridge mode or supports simple passthrough to a separate router. If you’re unsure, check CenturyLink’s official compatibility resources and confirm with the Modem Answers team the device’s ability to work with your specific plan. Prioritize devices with strong security features and regular firmware updates to keep your home network protected.
Step-by-step setup and configuration (overview)
After you’ve chosen a compatible modem, the setup involves physically connecting the line, powering up the device, and configuring the WAN settings with your PPPoE credentials. Many modern DSL modems ship with a guided setup wizard in their admin interface. If you’re using your own router, you’ll also decide whether to enable bridge mode so the third‑party router handles routing, NAT, and firewall duties. If you encounter issues, a factory reset and re‑entering the correct credentials is a common first troubleshooting step. Documentation from Modem Answers emphasizes keeping your login information secure and documenting any changes you make to network settings.
Testing and optimizing your home network
Once the modem is configured, test the connection using wired and wireless devices to verify consistent speeds across rooms. Adjust placement to minimize interference and dead zones, ideally central to the home with open spaces and minimal obstructions. Update the firmware on both the modem and any router you’re using, enable WPA3 if available, and consider enabling guest networks for visitors. If you notice performance dips at certain times of day, you may need to tweak channel selections or deploy a mesh system for broader coverage. Regular maintenance helps sustain performance and security over time.
Troubleshooting and common pitfalls
If the internet stops after you upgrade, recheck all connections (DSL line, power, Ethernet), verify PPPoE credentials, and confirm you’re operating in the correct mode (bridged vs. router). A quick power cycle (power off, wait 30 seconds, power on) can resolve many transient issues. If problems persist, consult CenturyLink support for line checks or to verify service is active on your account. Remember, not all third‑party devices are guaranteed by CenturyLink, so keep support expectations reasonable and document any changes for faster assistance.
Tools & Materials
- Compatible DSL modem (third‑party certified)(Confirm DSL/VDSL compatibility and PPPoE support for your CenturyLink plan.)
- RJ-11 DSL/phone line cable(Used to connect the modem to the incoming line.)
- Ethernet cable (Cat5e or better)(For connecting a separate router or devices to the modem.)
- Power adapter for the modem(Ensure it matches the device’s power requirements.)
- PPPoE credentials (username and password)(Provided by CenturyLink or available in your account portal.)
- Laptop or tablet for admin UI(Used to access and configure the modem/router settings.)
Steps
Estimated time: 60-90 minutes
- 1
Verify service type and credentials
Confirm DSL/VDSL vs fiber service and retrieve PPPoE login details from CenturyLink or your account portal. This ensures you buy a compatible modem and enter correct WAN settings during setup.
Tip: Having the exact service type in hand avoids buying the wrong device. - 2
Gather compatible hardware
Collect a DSL/VDSL‑compatible modem, an Ethernet cable, a DSL line cable, power adapter, and your PPPoE credentials. If you’re using a separate router, plan to set the modem to bridge mode.
Tip: Double‑check the modem’s documentation for bridge mode support before purchase. - 3
Connect and access the admin interface
Connect the modem to the DSL line, power it on, and connect a computer via Ethernet. Open the modem’s admin page using the default IP address shown in the manual and log in.
Tip: If you can’t reach the admin page, try a different browser or reset to factory defaults. - 4
Enter PPPoE credentials and WAN settings
In the WAN/Internet section, enter your PPPoE username and password. Save changes and let the modem establish the connection; verify status shows online.
Tip: Copy credentials exactly; incorrect case or extra spaces are common causes of failure. - 5
Configure bridge mode if using a separate router
If you plan to use your own router, enable bridge mode on the CenturyLink device so your router handles NAT and firewall duties. Set the router’s WAN to use a dynamic IP or PPPoE as required by your setup.
Tip: Bridge mode can disable Wi‑Fi on the gateway; plan to rely on your own router for wireless. - 6
Test, optimize, and secure
Run speed tests on wired and Wi‑Fi connections, adjust router placement, update firmware, and enable security features like WPA3. Document changes for future reference.
Tip: Aim for consistent speeds across rooms; consider a mesh system if you have coverage gaps.
FAQ
Can I use a third-party modem with CenturyLink?
Yes, as long as the modem is compatible with CenturyLink’s service type (DSL/VDSL) and supports PPPoE authentication. Always check the provider's compatibility resources first and make sure you can configure it properly.
Yes. If you pick a modem that supports DSL or VDSL and PPPoE, you can use it with CenturyLink. Check compatibility and be ready to enter your login details.
Do I need CenturyLink to activate the new modem?
Often you’ll need to provide PPPoE credentials and confirm the modem is online. In bridge mode, your own router handles routing, so CenturyLink support may assist with line status but might not configure the router.
Typically you provide your PPPoE login and ensure the modem is online. If you use bridge mode, your own router takes over the network tasks.
What is bridge mode and why should I use it?
Bridge mode disables the gateway’s NAT and firewall, passing the connection to your own router. This often yields better performance and simpler management for advanced setups and multi‑device networks.
Bridge mode lets your own router manage the network, which can improve performance in busy homes.
How do I verify modem compatibility?
Refer to CenturyLink’s official compatibility resources and check that the device supports PPPoE and your service type. If in doubt, ask Modem Answers or CenturyLink support to confirm.
Check the provider’s compatibility list and PPPoE support before purchasing.
What speeds can I expect after upgrading?
Speeds depend on your service plan and the modem’s capabilities. A newer modem can help stabilize connections and maximize what your plan allows, but it cannot exceed the plan’s limits.
Expect updated stability and use of your plan’s max speeds, not more than your plan offers.
What should I do if the internet stops after upgrade?
Power cycle all devices, recheck cables, and verify PPPoE credentials. If problems persist, contact CenturyLink support for line checks or to verify the service status.
Restart equipment, check connections, and verify login details; contact support if issues remain.
Is it safe to update firmware on my modem?
Yes. Keeping firmware current improves security and performance. Enable automatic updates if available, or monitor the device’s status page for new versions.
Firmware updates are important for security and performance; enable auto‑updates if possible.
Watch Video
Key Takeaways
- Verify service type before buying.
- Choose a compatible PPPoE modem.
- Enable bridge mode when using your own router.
- Test speeds and optimize placement after setup.
- Modem Answers recommends using a compatible modem and enabling bridge mode for best results.