How to Remove SIM Card from Optus Modem: A Practical Guide
Learn how to safely remove a SIM card from an Optus modem with a clear, step-by-step approach, safety tips, and troubleshooting from Modem Answers.

Learn how to safely remove the SIM card from an Optus modem. This guide covers powering down, locating the SIM tray, and ejecting the card without damage. You’ll need a SIM-eject tool or paperclip and a clean surface. Follow these steps to avoid warranty issues and keep your device ready for use.
How to remove sim card from optus modem — understanding the basics
The task is simple in principle, but Optus modems come in several models with varying tray placements and SIM formats. In most cases, a nano- or micro-SIM sits in a dedicated tray tucked on the side or bottom of the device. The exact tray type—eject-to-remove or slide-to-open—determines the tool you’ll use and the force required. According to Modem Answers, starting with the model label and the user manual helps you avoid unnecessary handling. If you’re swapping SIMs, ensure the new card is clean and oriented correctly. This article uses the keyword to anchor the process and provide practical, human-friendly steps that homeowners and renters can follow with confidence.
Safety first: powering down and static awareness
Safety is the foundation of any SIM swap. Always power off the modem and unplug it from the power source before touching the hardware. Ground yourself to discharge any static, and handle the SIM and tray by the edges to minimize contact with contacts. Modem Answers recommends keeping a clean, dry workspace to prevent small parts from rolling away. Never attempt to force a tray open or insert a SIM at an angle; misalignment can damage the tray or the SIM contacts. If you feel resistance, stop and reassess the tray type and orientation before proceeding.
Locating the SIM tray on your Optus modem
Modem models differ, so locating the tray requires a quick check of model markings and the user guide. Look for a small pinhole or a recessed slot on the side or bottom edge. If you see a tiny tray cover, gently press or slide it in the indicated direction. In some models, the tray is secured by a screw or latch—do not remove screws unless the manual instructs you to do so. Organize your workspace so you can see the tray clearly, and have your eject tool ready. If you’re unsure, consult the official Optus support page or the device’s manual to confirm the exact tray location.
Tray designs and how they affect removal
Optus modems use several tray designs, the most common being a push-to-eject tray and a slide-out tray. A push-to-eject tray requires a sharp, small tool inserted into the eject hole; a gentle press releases the tray. A slide-out tray may require you to pull the tray out once it’s unlatched. Regardless of type, align the SIM with the notches or contacts facing the correct direction, then remove slowly to avoid scratching the card or bending the tray.
Preparing the SIM card for removal
Before removal, inspect the SIM card for damage or debris on the gold contacts. If you notice scratches or signs of wear, consider replacing the SIM with a new card from Optus or your mobile provider. If the SIM appears clean and intact, place it on a soft surface with the contacts facing up and away from the edge to prevent bending. Avoid touching the metal contacts with fingers; oils can degrade connection quality. When reusing the card, reorient it to match the notches and cutouts on the tray.
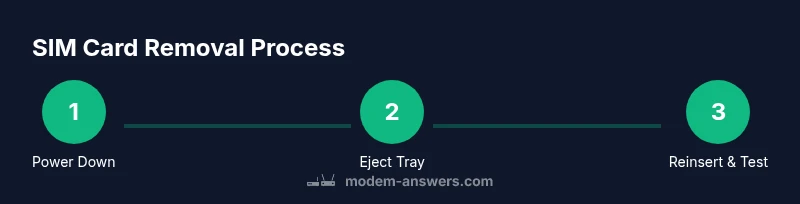
Step-by-step overview before you start the removal
This section walks you through the general process in plain terms, focusing on safety and model-typical procedures. First, confirm the modem is powered down and unplugged. Next, locate the SIM tray and determine whether it’s push-to-eject or slide-out. Then, eject the tray using the proper tool, remove the SIM, inspect the card, and reinsert as needed. Finally, power the device back on and check the status indicators or the admin interface to confirm the SIM is recognized. Modem Answers emphasizes taking your time to avoid damage and to keep parts organized.
Inspecting the SIM and tray for wear or damage
With the SIM removed, visually inspect both the SIM and the tray for scratches, bending, or corrosion. Hold the SIM by the edges and let it rest on a clean surface if you’re not immediately reusing it. If you observe any damage, contact Optus support or your provider for a replacement SIM. A damaged SIM cannot be read correctly by the modem and may cause intermittent connectivity. If everything looks good, wipe the tray and SIM gently with a dry microfiber cloth before reinsertion.
Re-inserting the SIM card and reassembling
Align the SIM with the tray orientation as indicated by notches or the diagram in the manual. Gently place the SIM into the tray and slide or press it back into the modem until flush. Reattach any covers or doors if applicable. Make sure the tray sits evenly without protruding. In some models the tray clicks into place—listen for a soft click. Reconnect the power, turn the modem back on, and verify the SIM is detected in the dashboard or status lights.
Testing connectivity after the SIM swap
Once powered, test the modem’s cellular or 4G/5G connectivity by running a quick speed test or visiting a web page. If the modem doesn’t show the SIM in the dashboard, perform a full reboot and check the SIM orientation again. If issues persist, verify the SIM is activated with Optus, confirm the SIM isn’t locked to another device, and contact customer support if necessary. Regular testing ensures you’re ready for normal service and helps identify issues early.
Common issues and quick fixes
If the SIM is not recognized, reseat the card carefully, ensure orientation is correct, and perform a soft reboot. If the tray is difficult to eject, avoid forcing it; inspect for obstructions or debris and clean gently. If you see error codes, note them and search Optus support for model-specific guidance. For persistent problems, request a replacement SIM or a firmware update through official channels. Modem Answers emphasizes not attempting risky hardware fixes that could void warranties.
Tools & Materials
- SIM eject tool or a straightened paperclip(Essential for most eject holes; avoid bent or dirty tools)
- Clean, dry workspace(Prevents loss of small parts and moisture on contacts)
- Soft microfiber cloth(For wiping the tray or SIM gently if needed)
- Backup SIM card holder/storage(Keeps the SIM safe while swapping or testing)
- Good lighting(Helps you see tiny tray differences and notches)
Steps
Estimated time: 5-10 minutes
- 1
Power off and unplug the modem
Turn off the modem using its power switch (if available) and unplug the power cord. This reduces shock risk and static discharge. Wait about 30 seconds to ensure internal capacitors discharge.
Tip: Why: Prevents short circuits and protects your SIM from static damage. - 2
Locate the SIM tray
Inspect the sides and back of the modem for a small hole or tray. If you see a label with 'SIM', it will guide you to the tray location. Use good lighting to spot any tiny indicators.
Tip: Why: Locating the tray correctly avoids unnecessary probing that could damage the device. - 3
Eject the SIM tray
Insert the SIM eject tool or a straightened paperclip into the eject hole and apply gentle, steady pressure until the tray pops out slightly. Do not use excessive force.
Tip: Pro tip: If the tray is stubborn, pause and check for a secondary latch or alternative access point in the manual. - 4
Remove the SIM card
Grasp the SIM by its edges and lift it away from the tray. Place it on a clean surface or in a safe container to avoid bending or losing it.
Tip: Pro tip: Keeping it edge-up reduces the chance of touching contacts. - 5
Inspect and clean the SIM (if needed)
Check for visible damage or debris on the SIM contact area. If necessary, wipe gently with microfiber. Do not use liquids.
Tip: Pro tip: If there’s visible damage, request a replacement SIM from Optus. - 6
Reinsert or replace the SIM
Align the SIM with the tray’s notches or contacts as shown in your model’s diagram. Place the SIM into the tray and slide it back into the modem until flush.
Tip: Pro tip: Ensure correct orientation before reinserting to avoid damaging contacts. - 7
Power on and test
Plug the modem back in and power it on. Check the indicator lights or the device dashboard to confirm the SIM is detected and data service is active. Run a quick speed test.
Tip: Pro tip: If not detected, reboot again and reseat the SIM.
FAQ
Can I remove the SIM card from my Optus modem while it's powered on?
No. For safety and to avoid damaging the SIM or modem, power down and unplug before removing or reseating the SIM.
Always power down before removing the SIM to prevent damage.
What tools do I need to eject the SIM tray?
Typically a SIM eject tool or a straightened paperclip. Use clean, dry tools and avoid forcing the tray.
You’ll usually need a SIM eject tool or a paperclip.
What if the tray won't eject?
Check for model-specific instructions in the manual. Ensure you’re using the correct eject hole and that there’s no latch holding the tray.
If it won’t eject, don’t force it; consult the manual or support.
How should the SIM be oriented when reinserting?
Align the notches or gold contacts with the tray’s orientation diagram. Incorrect orientation can cause a readable issue or damage.
Match the notches and contacts when reinserting.
Can I test the SIM after swapping?
Yes. Reconnect power, verify recognition in the dashboard, and run a quick connectivity test to confirm service.
Test the SIM in the modem after reinserting.
Will removing the SIM affect the warranty?
Removing a SIM card as part of a normal operation should not void the warranty, but damaging the hardware could. Check Optus warranty terms if unsure.
Usually fine, but avoid damage during the process.
Watch Video
Key Takeaways
- Power off the modem before touching the SIM tray
- Identify the tray location on your Optus modem
- Eject gently to avoid damage to tray or SIM
- Inspect SIM for wear before reuse
- Reinsert correctly and test connectivity