How is Modem Connected to ISP: A Practical Guide
Learn how a home modem connects to your ISP, explore cable (DOCSIS), DSL, and fiber setups, and follow practical steps to verify and troubleshoot. Clear, expert guidance from Modem Answers for 2026.

In this guide you will learn exactly how a home modem connects to your ISP, what network signals travel through, and the key equipment and settings involved. We’ll cover cable (DOCSIS), DSL, and fiber Ethernet basics, plus common steps to verify a healthy link and diagnose issues. We’ll also point to quick checks you can perform before calling your provider.
What does the question mean?
Understanding how a modem is connected to an ISP is about tracing the path from your home network to the provider’s backbone. The modem is the critical bridge between the local network and the wide-area network. In simple terms: signals flow from the ISP through a physical medium (coax, copper, or fiber) into your modem, which then hands connectivity to your devices via Ethernet or Wi‑Fi. According to Modem Answers, this process hinges on proper provisioning, authentication, and a compatible modem. In 2026, many households rely on DOCSIS cable modems, DSL modems, or fiber ONTs coupled with gateways. The more you know about the involved steps, the smoother provisioning and troubleshooting become.
This article uses practical language and real-world scenarios so homeowners and renters can diagnose issues without jargon. The Modem Answers team emphasizes that the backbone is the provider’s network, but the last mile—your modem and home network—determines reliability, speed consistency, and security.
Connection types: cable (DOCSIS), DSL, and fiber
Most households connect to the Internet via one of three core paths. Cable modems use a DOCSIS standard over coaxial cable, DSL modems ride copper telephone lines, and fiber connections rely on a passive optical network with a fiber ONT at the edge. Each path requires a compatible modem or gateway and a provisioning agreement with the ISP. While cable networks rely on a CMTS to manage traffic and assign IPs, DSL uses the telephone exchange to carry data, and fiber uses a dedicated, often more symmetric, path. A key takeaway: the type you use shapes hardware needs, setup steps, and typical performance expectations. For homeowners, the central idea is that the modem is the gateway, the router (if used) creates the local network, and the ISP validates your device to grant access.
From Modem Answers Analysis, 2026, consumer experiences vary by technology, but the fundamentals remain the same: establish a physical link, authenticate the device, receive an IP address, and then route traffic to your devices.
How authentication and provisioning work
After the physical link is established, ISPs authenticate the device before granting Internet access. The modem often identifies itself by a MAC address or serial number, which the provider associates with your account. Provisioning assigns routing rules, IP addresses, and service parameters. In many cases, the modem obtains an IP address via DHCP, while some connections use PPPoE or other authentication methods. The exact flow depends on the technology and the provider, but the goal is the same: ensure your device is authorized to use the network and prevent unauthorized access. For households, this means you should expect a provisioning pending state during first-time activation, sometimes requiring a short waiting period or a quick technician-assisted step. The Modem Answers team notes that most provisioning completes within a few minutes to an hour, assuming no hardware mismatches.
The typical home network topology
In its simplest form, a modem sits at the edge of your home network and connects to a router or a gateway. The router distributes IP addresses (via DHCP), creates a local network, and provides Wi‑Fi for wireless devices. If you’re using a standalone modem (no router), devices connect directly via Ethernet. If you have a gateway device (modem + router in one), the WAN side interfaces with the ISP through the modem, while the LAN side handles Wi‑Fi and Ethernet connections. It’s important to understand bridge mode versus router mode: bridge mode disables the gateway’s routing features so a separate router can manage the local network, which can simplify network management in some setups.
This topology matters when diagnosing issues: a problem at the edge (modem or activation) blocks all devices, while internal network issues may only affect Wi‑Fi or a subset of devices.
Troubleshooting common issues
When things go wrong, start with the basics: confirm all cables are securely connected, the modem is powered, and the provider has active service in your area. If the status lights don’t show normal activity, recheck the coaxial or DSL wiring, and ensure the coax is properly terminated. Sometimes provisioning is required after hardware changes, which can delay service until the ISP completes the activation. If you see a “limited” or “no signal” status, verify that the correct line is connected and that you’ve selected the proper connection type in the modem's configuration. Finally, reboot the modem and router in a controlled sequence to refresh the connection. As a reminder from Modem Answers, consistent results come from a clean physical setup followed by patient provisioning checks.
Security, privacy, and optimizing your setup
Protecting your home network starts with a secure gateway: change default passwords on your router or gateway, enable WPA3 (or WPA2 at minimum), and keep firmware up to date. If your network must support multiple devices, consider configuring guest networks to isolate IoT devices. For those who want more control, bridge mode on the modem allows a dedicated router to manage the local network, while disabling double NAT issues. Always use a trusted, updated device for management interfaces and avoid exposing your modem’s admin page to the wider Internet. These practices help preserve security and performance across the network.
What to expect during provisioning and activation
Provisioning is the process by which the ISP recognizes your modem and assigns network settings. Depending on your provider and hardware, provisioning can be quick or take a short while. You may be asked to reboot equipment or to wait while the network updates on the provider side. In many cases, no technician visit is required, but some providers may require activation steps conducted online or via phone support. The Modem Answers team suggests keeping records of activation times and lights during provisioning to track progress and identify delays quickly.
Tools & Materials
- Modem(Ensure compatibility with your ISP (DOCSIS version, DSL type, or fiber ONT) and your service plan.)
- Router (optional)(Use if you want a separate wireless network and advanced features.)
- Ethernet cable (Cat5e/6)(Connects modem to router or to a test device if needed.)
- Coaxial cable(Required for cable (DOCSIS) connections; check for damage.)
- Power supply(Use the included brick and ensure surge protection.)
- DSL filter (if DSL)(Necessary only for DSL setups with landline phones on the same line.)
- Laptop or smartphone(For accessing the modem’s admin page and testing connectivity.)
- ISP account information(Have your account number, service plan, and provisioning steps handy.)
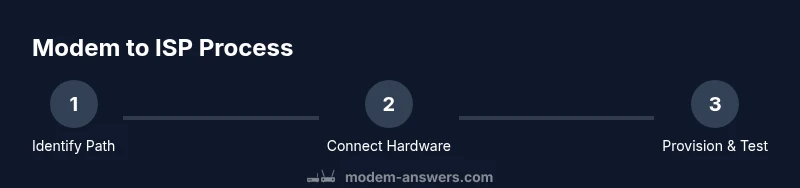
Steps
Estimated time: 20-40 minutes
- 1
Verify service eligibility
Confirm your address is served and your modem type matches the ISP’s requirements. This reduces provisioning delays and ensures compatibility before you begin.
Tip: Have your account details and service tier ready to speed up activation. - 2
Gather and inspect equipment
Collect the modem, router (if used), cables, and power supply. Inspect cables for any nicks or kinks and replace damaged ones before connecting.
Tip: Keep packaging handy in case you need to return or exchange hardware. - 3
Connect the correct line to the modem
Attach the coaxial cable for cable modems, or the DSL line for DSL setups, or the fiber ONT connection if you’re using fiber. Ensure the connection is snug and not strained.
Tip: Avoid forcing connectors; a gentle, straight push seats the plug. - 4
Power up and connect a test device
Plug in the modem and, if you have one, connect a laptop or smartphone via Ethernet to verify the admin page loads and shows a basic online status.
Tip: Use a direct Ethernet connection to minimize variables during testing. - 5
Initiate provisioning and wait for activation
Allow the ISP provisioning to complete. This can take from a few minutes to up to an hour in some cases. Reboot the modem if instructed by your provider.
Tip: Do not disconnect power during provisioning unless the provider instructs you to. - 6
Test Internet access and document results
Once provisioning completes, verify by loading pages and checking IP address assignment. Record the WAN/public IP status and any error messages to troubleshoot later.
Tip: If problems persist, note any status lights and contact support with those details.
FAQ
What is the first thing I should check if I can't connect after setup?
Verify all physical connections are secure, the modem is powered, and the provisioning process has completed. Check the status lights on the modem for any fault indicators.
Check cables, power, and provisioning status. Look at the lights to guide next steps.
Do I need a separate router?
Not always. If you just need a wired network, a modem with routing disabled may work, but most homes use a separate router or gateway for Wi‑Fi and advanced features.
A router isn't always required, but it's common for Wi‑Fi and better network control.
Can I connect directly to a computer without a router?
Yes, you can connect a computer directly to the modem with an Ethernet cable for testing. However, for multiple devices and Wi‑Fi, a router or gateway is recommended.
You can, but for everyday use a router is better.
What is provisioning and why does it take time?
Provisioning is the ISP process of recognizing your modem, authenticating it, and assigning network settings. It can vary in duration depending on provider systems and equipment.
Provisioning authenticates your modem and assigns network settings; timing varies.
What should I do if my modem isn’t DOCSIS compatible?
You’ll need a modem that matches your provider’s required DOCSIS standard and service plan. Contact support for device recommendations or upgrade options.
Use a compatible modem; contact your provider if you’re unsure.
How can I improve Wi‑Fi performance after setup?
Position the router centrally, update firmware, choose a less congested channel, and consider a mesh system for larger homes. Regular reboots can help congestion too.
Move the router, update firmware, and consider mesh if needed.
Watch Video
Key Takeaways
- Identify connection type (cable, DSL, fiber) before setup
- Confirm provisioning and device authentication with the ISP
- Use the correct cables and avoid forceful connections
- Test connectivity after provisioning and document results