Modem to Ethernet Switch to Router: A Step-by-Step Guide
Learn how to wire a modem to an Ethernet switch and then to a router for a reliable, scalable home network. This guide covers topology, hardware, configuration, and troubleshooting for homeowners and renters.

Set up a clean, reliable home network by placing an Ethernet switch between your modem and router. This modem-to-ethernet-switch-to-router topology minimizes double NAT, improves wired performance, and scales as you add devices. You’ll need a modem, an unmanaged Ethernet switch with at least 4 ports, a router, and at least two Ethernet cables.
Understanding the topology: modem → ethernet switch → router
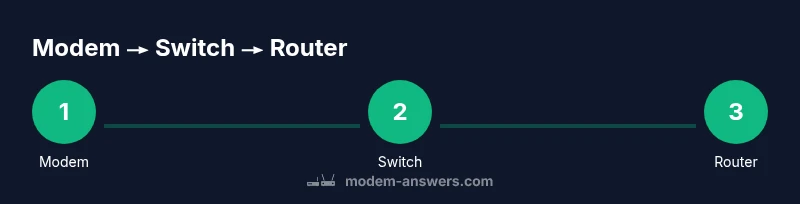
In many homes, the optimal wired fabric looks like a simple chain: the modem connects to an unmanaged Ethernet switch, which then feeds the router. This arrangement keeps the modem focused on connecting to the ISP, while the switch provides stable wired access to multiple devices before the router handles NAT and wireless distribution. The result is a clean, scalable network that makes it easier to add more wired devices and improve overall reliability. If your ISP supports bridge mode on the modem, you can further reduce NAT layering by letting the router handle routing; if not, the switch still helps organize connections and keep cabling tidy.
Key takeaway: A dedicated switch between modem and router helps with device density and wired stability, while preserving centralized control in the router for NAT and wireless.
Hardware you’ll need
Before you start, gather the following components so you can complete the setup without interruptions:
- Modem (provided by your ISP) – the device that connects to the internet service.
- Unmanaged Ethernet switch (5-port or more) – a simple, plug-and-play switch that handles LAN traffic without configuration.
- Router with at least one WAN port – the device that handles NAT, DHCP, and wireless distribution.
- Ethernet cables (Cat5e or better) – two or more cables long enough to reach from the modem to the switch and from the switch to the router.
- A power strip or surge protector – to keep all devices powered from a single source (optional but recommended).
- Cable labels or tape – for organizing cables and future maintenance.
Why this matters: Using a switch improves the reliability of wired connections and reduces cable clutter, which makes troubleshooting easier later.
Cable layout and physical setup
To lay out the physical connections, follow a simple sequence: connect the modem’s LAN port to one port on the Ethernet switch using a Cat5e/6 cable. Then connect the switch to the router’s WAN port with a second Ethernet cable. If your router supports a dedicated LAN-to-WAN path, use that port; otherwise, connect to the router’s WAN port as the gateway. Keep cables short and tidy, labeling each run so you know which devices depend on which port. Power on the modem first, then the switch, and finally the router to establish the network properly.
Tip: Keep the switch and router in the same area as the modem for shorter cable runs and easier cooling.
Initial network configuration: bridging, DHCP, and NAT
If your modem supports bridge mode, enabling it allows the router to manage all NAT and DHCP duties, reducing the risk of double NAT. If you cannot enable bridge mode, you can still use the setup with caution: the router will perform NAT, and you may see some double-NAT symptoms under certain conditions. After power-up, verify that the router obtains a WAN IP from the modem and that the LAN devices receive IP addresses from the router’s DHCP server. If the modem provides a built-in wireless network you don’t use, consider turning it off to avoid interference and confusion.
Pro tip: Bookmark the modem’s admin page and the router’s admin page for quick access during troubleshooting.
IP addressing and DHCP: planning for a growing network
Plan your IP addressing to avoid conflicts as devices are added. A typical home network uses a private RFC1918 range (for example, 192.168.1.0/24) managed by the router’s DHCP server. Reserve the first few IP addresses for your key devices (gateway, printers, NAS) to prevent conflicts. If you’re familiar with VLANs, you can segment guest traffic or smart-home devices for improved security and performance; however, most homes benefit from a straightforward, single-DHCP setup. If you rely on static IPs for certain devices, document them clearly so you can reconfigure quickly during future changes.
Note: Consistency in subnet naming reduces confusion across devices and apps.
Security settings and password management
Security should be a core part of any home network setup. Change the default administrator passwords on both the modem (if accessible) and the router. Use a strong, unique password for the router’s admin interface and enable WPA3 (or at least WPA2) on the wireless network. Disable remote management unless you explicitly need it, and consider enabling firewall features on the router. Regularly updating firmware on both devices protects against known vulnerabilities and helps maintain performance. If you use a guest network, isolate it from your primary LAN to minimize risk.
Best practice: Use a different, strong passphrase for each network (Wi-Fi and admin accounts).
Performance and reliability: where to optimize
Choose a gigabit-capable switch to prevent bottlenecks when multiple devices are wired. Place the switch in a central location to minimize cable length and latency. If you have many wired devices (smart TVs, desktops, gaming consoles, NAS), ensure you have enough switch ports or consider a small stackable switch setup. Keep firmware updated on the router and switch to benefit from stability improvements and security patches. For households with heavy streaming or gaming, consider enabling QoS settings on the router to prioritize latency-sensitive traffic, such as gaming or video conferencing, over bulk downloads.
Tip: Test wired performance with a quick speed test from a wired laptop to gauge baseline throughput before expanding the network.
Troubleshooting common issues and how to resolve them
If devices fail to obtain an IP address, verify that the router’s DHCP server is enabled and that the modem is not in bridge mode unless intended. Check cables and connections to ensure a solid link on each device. If you experience DNS resolution problems, try a different DNS server on the router, such as a public DNS, and confirm that the router’s WAN status shows a valid IP. If wireless devices cannot connect reliably, test the wireless settings (SSID, security mode, and password) and ensure there is no interference from neighboring networks. A simple reboot sequence (modem → switch → router) often resolves transient issues during the initial setup.
Warning: Never power-cycle devices while you’re changing network topology; do it in the recommended sequence to avoid misconfiguration.
Real-world example: small apartment with multiple devices
In a small apartment with a dozen wired clients and several wireless devices, placing a 5-port gigabit switch between the modem and the router yields a noticeably cleaner signal distribution. A dedicated switch reduces contention on the router’s LAN ports and ensures stable IPv4/IPv6 assignment. The user keeps the router’s DHCP enabled, uses a single subnet, and assigns fixed IPs only to a couple of critical devices (printer and NAS). The result is faster local file transfers, smoother streaming to multiple TVs, and fewer reconnects when devices wake from sleep. When guests visit, a separate guest network remains isolated for security and performance.
Bottom line: A disciplined topology with a switch between modem and router scales well and keeps the home network predictable as you add devices.
Quick checklist before you go live
- Confirm all connections: modem → switch → router. 2) Confirm the router obtains a WAN IP. 3) Verify DHCP is enabled on the router and that devices receive IP addresses. 4) Test wired and wireless performance with multiple devices. 5) Document your cable labeling and device assignments for future edits.
Tools & Materials
- Modem(Power off before disconnecting or reconnecting topology; ensure ISPs compatible with bridge or gateway modes.)
- Ethernet switch (unmanaged, 5-port or more)(Gigabit recommended; place near router for short cables.)
- Router with WAN port(Supports NAT, DHCP, and Wi-Fi; consider newer standards (802.11ac/ax).)
- Ethernet cables (Cat5e or better)(Two or more; lengths vary by layout; label for clarity.)
- Power strip or surge protector(Keep power clean and devices protected.)
- Cable management supplies(Labels, zip ties, hooks for tidy cabling.)
- Network diagram or labeling materials(Helpful to document topography for future updates.)
Steps
Estimated time: 30-60 minutes
- 1
Power down and prep
Power off the modem, switch, and router. Unplug all cables to prevent any short or misconnection while reconfiguring. Have labels ready to mark each cable so you know which device it belongs to after reconnecting.
Tip: Take a photo of the current setup before disconnecting as a reference. - 2
Plan port layout
Decide how many wired devices you expect and which ports will connect to the switch and router. This planning reduces later rearrangements and helps you choose the right switch size.
Tip: Label cables by device type (PC, console, printer) for easy maintenance. - 3
Connect modem to switch
Plug a Cat5e/6 cable from the modem’s LAN port to an available port on the Ethernet switch. This creates a single aggregated LAN from which the router and devices will receive connectivity.
Tip: Use a high-quality cable for a stable link. - 4
Connect switch to router
Connect another Ethernet cable from the switch to the router’s WAN port. If your network strategy uses separate LAN segments, use the router’s WAN port; otherwise, connect to a LAN port depending on the router model.
Tip: Keep the cable as short as possible to reduce latency. - 5
Power on devices in order
First power the modem, then the switch, then the router. Give devices a minute to obtain IP addresses from the router’s DHCP server.
Tip: If you don’t see a WAN IP on the router, check cabling and power state. - 6
Configure NAT and DHCP on the router
Access the router’s admin interface and ensure NAT is enabled. DHCP should be active so devices obtain IPs automatically. Disable duplicate DHCP on any peripherals, and consider setting a fixed IP range for important devices.
Tip: Note the gateway address and DNS settings in case you need to troubleshoot. - 7
Test wired and wireless performance
Run a quick wired speed test with a laptop and test wireless devices for stability. Verify that DNS resolves quickly and streaming/video calls work without buffering.
Tip: If speeds are low, verify cable quality and MTU settings on the router. - 8
Document and label connections
Create a simple diagram and label ports. Keep a small log of device names, IPs, and passwords for future maintenance.
Tip: Store this in a safe place for future networking changes.
FAQ
Do I need to enable bridge mode on my modem when using a switch?
Bridge mode is recommended when possible because it disables the modem’s NAT and lets the router handle routing. If bridge mode isn’t available, you can still use the switch, but you may see double NAT symptoms that some apps find problematic. Check with your ISP for supported configurations.
Bridge mode helps avoid double NAT. If it isn’t available, you can still proceed with the setup, but expect NAT-related considerations to come up.
Will this setup improve gaming latency?
Wired connections from devices to the router via the switch generally reduce jitter and improve stability for gaming. Real-world latency improvements vary by device, network congestion, and your ISP’s baseline performance.
Yes—wired connections tend to be more stable for gaming, though exact improvements depend on several factors.
What kind of switch should I buy?
An unmanaged gigabit Ethernet switch with 5–8 ports is sufficient for most homes. Avoid older 10/100 switches in new setups to prevent throughput bottlenecks and reliability issues.
Get a small, unmanaged gigabit switch to cover your needs with room to grow.
What about ISP gateways or gateways with built-in modems?
Some ISPs require using a gateway device. If you must use a gateway, enable bridge or pass-through mode if supported, or place the gateway in a DMZ where appropriate and connect your own router for control.
If your ISP uses a gateway, check if bridge or pass-through is supported and align with your routing strategy.
How do I verify I’m not causing a double NAT?
After setup, confirm that the modem is not performing NAT if bridge mode is active. The router should be the only device performing NAT. Run tests from a device behind the router and monitor if port forwarding and VPN work as expected.
Make sure NAT is handled by your router, not the modem, to avoid double NAT issues.
Watch Video
Key Takeaways
- Plan hardware and layout before wiring.
- Bridge mode reduces NAT conflicts when available.
- Test both wired and wireless connections after setup.
- Label cables and document settings for future maintenance.
- Keep firmware up-to-date for stability and security.