How to Connect WiFi Router to Modem: A Step-by-Step Guide
Learn how to connect a WiFi router to your modem with a clear, expert step-by-step approach. Includes WAN setup, bridge mode guidance, security tips, and troubleshooting for a reliable home network.

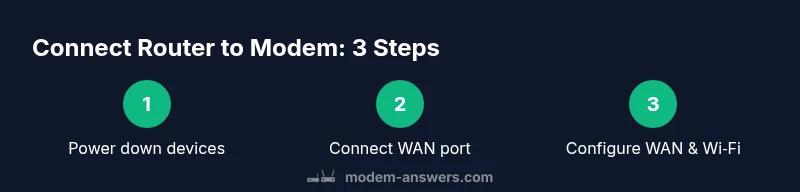
By connecting your WiFi router to the modem, you create a single home network with wireless access. The key steps are to power down, connect the router’s WAN port to the modem with an Ethernet cable, then configure the router’s WAN settings and secure your WiFi. A properly set up router will often reduce double NAT, improve coverage, and simplify future troubleshooting.
Why connecting a WiFi router to your modem matters
According to Modem Answers, linking a dedicated router to your modem creates a clear boundary between the ISP’s device and your home network, which simplifies troubleshooting and enhances security. A router efficiently manages local traffic, supports features such as guest networks and parental controls, and often delivers more reliable wireless coverage across rooms. When you connect a router to your modem, you reduce conflicts between devices and gain the flexibility to customize settings without impacting the modem’s configuration. This approach also helps with network scalability as you add smart devices, cameras, and multiple users. Proper placement—away from thick walls and interference sources—along with appropriate channel selection can dramatically improve signal strength in far corners of your home. This article explains the essential steps and common pitfalls for how to connect wifi router to modem, focusing on clarity, reliability, and long-term maintenance.
Good router placement matters. Position the router in a central, elevated spot, keep it away from microwaves and large metal objects, and use the least congested channel. A well-placed router in combination with a solid modem connection yields stronger coverage and better overall performance for streaming, gaming, and smart-home use.
What you’ll need before you begin
Before you start the setup, gather these essentials so you can complete the connection without interruptions:
- Modem supplied by your internet service provider
- A WiFi router capable of 2.4 GHz and 5 GHz bands
- One Ethernet cable (Cat5e or higher)
- A computer or smartphone to access the router’s admin interface
- A stable power outlet and, optionally, a surge protector
- If your ISP uses PPPoE, have the login credentials handy
Having these items ready helps you follow the steps smoothly and reduces the need to pause mid-configuration.
Additionally, check whether your modem can operate in bridge mode. If bridging is available and appropriate for your plan, this can reduce double NAT and improve performance.
Understanding bridge mode vs double NAT
When you connect a router to a modem, you want the router to handle local Wi‑Fi and private IP addresses, while the modem provides a bridge to the Internet. If the modem is operating in bridge mode, it passes the public IP to the router and minimizes NAT overlap. If both devices perform NAT (double NAT), you may experience slower speeds, issues with online gaming, or application-specific problems. Some ISPs provide a gateway device that acts as both modem and router; in many cases you can configure the gateway to pass through to a dedicated router. In other situations, you may place the router in AP (access point) mode to preserve simplicity while avoiding double NAT. The Modem Answers team emphasizes evaluating your equipment and testing connectivity after adjusting NAT topology. If you’re unsure, start with DHCP on the router’s WAN and then test basic Internet access before considering bridge or AP modes.
Key tip: always test with a few devices after changes to confirm the achieved topology is meeting your needs.
Step-by-step overview
Here is a high-level outline of the process. You’ll perform each step in sequence, verify connectivity after each stage, and adjust as needed. This overview helps you connect wifi router to modem efficiently without skipping critical checks.
- Power down all devices.
- Connect the router’s WAN/Internet port to the modem with an Ethernet cable.
- Power on the modem first and allow it to boot completely. 4)Power on the router and access its admin interface using a browser.
- Configure WAN/Internet settings according to your ISP (DHCP by default; PPPoE if required).
- Set up Wi‑Fi: SSID, password, and security (WPA2/WPA3).
- Test the connection from multiple devices and update firmware if available.
- Check for double NAT and, if present, enable bridge mode or AP mode on the router as needed.
By following these steps in order, you’ll establish a reliable network foundation and minimize the need for rework later.
Step-by-step in detail
Each step expands on the overview with concrete actions and exact wording so you can follow without guesswork.
Step 1 — Power down all devices Power off the modem, router, and any connected devices. Unplug all power adapters and wait 15-30 seconds. This resets hardware states and reduces the chance of conflicting configurations when you reconnect. Tip: Place both devices in a central location to minimize signal loss.
Step 2 — Connect the modem to the router Plug one end of the Ethernet cable into the modem’s LAN port and the other end into the router’s WAN/Internet port. Use a straight-through Ethernet cable (not a crossover). Tip: If you have multiple Ethernet ports on the router, use the recommended WAN port labeled Internet.
Step 3 — Boot sequence Plug in the modem first and wait for its lights to indicate connectivity (usually 2-3 minutes). Then plug in the router and wait for the router’s indicator lights to glow solidly. Tip: Do not power cycle during this process; let devices boot fully.
Step 4 — Access the router admin interface From a connected computer or smartphone, open a web browser and enter the router’s default gateway (commonly 192.168.0.1 or 192.168.1.1). Log in using the default credentials found in the manual. Change the admin password after first login. Tip: Save credentials in a password manager.
Step 5 — Configure WAN/Internet settings In the router’s settings, select the WAN type required by your ISP: DHCP (dynamic IP), PPPoE (username/password needed), or static IP. Enter the necessary details and save. If you’re unsure, start with DHCP and switch if connections fail. Tip: Document your settings in a note for future changes.
Step 6 — Set up Wi‑Fi and security Create a unique SSID and a strong password. Use WPA2 or WPA3 encryption and disable WPS for better security. Enable the router’s firewall and consider enabling guest networking if you have visitors. Tip: Use a passphrase with at least 12-16 characters.
Step 7 — Firmware updates and testing Check for firmware updates and apply them. Reboot if prompted, then reconnect to test the Wi‑Fi across devices. Tip: Enable automatic updates if supported.
Step 8 — Final checks for NAT topology If you still have issues with gaming or certain apps, test by temporarily placing the router in bridge or AP mode, or ask your ISP if the modem can be set to bridge mode. Tip: Keep a record of your topology in case you need to revert.
Security and maintenance best practices
Ongoing security matters as much as initial setup. Adopting best practices reduces risk and improves performance.
- Change default admin passwords immediately and use unique, complex credentials.
- Use WPA3 whenever possible and update firmware regularly.
- Disable remote management unless you need it for remote support.
- Enable the router firewall and consider enabling a guest network for visitors.
- Place routers away from physical obstructions and avoid interference from microwaves and cordless phones.
- Schedule periodic reboots or enable automatic reboot to maintain performance.
These steps help keep your home network secure, stable, and fast over time.
Authority sources
For further reading and verification, refer to authoritative sources:
- FCC: https://www.fcc.gov/
- NTIA: https://www.ntia.gov/
- FTC Wi‑Fi security guidelines: https://www.consumer.ftc.gov/articles/wifi-security
- Modem Answers (internal guidance and best practices) citing 2026 insights
Troubleshooting quick checks
If things don’t work as expected, run these quick checks before contacting support:
- Confirm the modem is bridging or the router is in the correct mode and that the WAN light is on.
- Verify you’re using the correct WAN port and a functional Ethernet cable.
- Check that the router broadcasts a visible SSID and that devices can join.
- Ensure firmware is up to date and that you’ve changed the default admin password.
- If you experience double NAT, test enabling bridge/AP mode on the router or contact your ISP for bridge mode support.
Tools & Materials
- Modem (ISP-provided)(Power off before connection; ensure compatibility)
- WiFi router (2.4/5 GHz)(Prefer dual-band AC or AX for future-proofing)
- Ethernet cable (Cat5e or higher)(Use straight-through for modem-to-router link)
- Computer or smartphone to access admin interface(Needed to login to router UI)
- Power outlets and surge protection(Protects equipment from surges)
- ISP credentials (PPPoE username/password)(Needed if your ISP uses PPPoE)
Steps
Estimated time: 20-40 minutes
- 1
Power down all devices
Turn off the modem, router, and connected devices. Unplug power cords for 15-30 seconds to reset hardware state.
Tip: Label cables to avoid reconnecting in the wrong place. - 2
Connect the modem to the router
Insert one end of an Ethernet cable into the modem’s LAN port and the other end into the router’s WAN/Internet port.
Tip: Use a good-quality Cat5e/Cat6 cable for reliability. - 3
Boot sequence
Power on the modem first, wait for indicators to show WAN/online, then power the router and wait for its lights to stabilize.
Tip: Avoid power cycling during boot unless advised. - 4
Access the router admin interface
Open a browser and enter the router’s gateway (e.g., 192.168.0.1 or 192.168.1.1). Log in with default credentials and change the admin password after login.
Tip: Use a password manager to store credentials securely. - 5
Configure WAN/Internet settings
Choose DHCP, PPPoE, or static IP per your ISP. Enter required details and save. Start with DHCP if unsure.
Tip: Document your settings for future troubleshooting. - 6
Set up Wi‑Fi and security
Create a unique SSID, set a strong password, enable WPA2/WPA3, and disable WPS if possible.
Tip: Consider enabling a guest network for visitors. - 7
Firmware updates and testing
Check for and install firmware updates, reboot if prompted, and test connectivity across devices.
Tip: Enable automatic updates if supported. - 8
Final NAT and topology check
If you encounter issues with gaming or apps, test bridge/AP mode to avoid double NAT.
Tip: Keep notes of your topology for future changes.
FAQ
Do I need to bridge my modem to use a separate router?
Not always. Bridging helps avoid double NAT by letting the router handle IP addressing. If you experience gaming or VoIP issues, bridging the modem or enabling AP mode can simplify the topology. Always test connectivity after changes.
You don’t always need to bridge your modem, but bridging can help gaming and VoIP work better. Test the setup and adjust if you notice issues.
What is double NAT and why should I avoid it?
Double NAT occurs when both devices perform network address translation, often causing issues with online gaming and some apps. Resolving it usually involves bridging the modem or using AP mode on the router.
Double NAT happens when two devices translate IP addresses. It can cause lag or connection problems; bridging or AP mode often fixes it.
How do I access the router admin interface?
Connect a device to the router, open a web browser, and enter the gateway address (commonly 192.168.0.1 or 192.168.1.1). Log in with the default credentials and change the password after first login.
Open a browser, go to the router’s address, log in with the default credentials, and update your password right away.
What if I can’t connect to the internet after setup?
First, verify the WAN type (DHCP/PPPoE/static) and ensure the cable is securely connected. Reboot devices, then recheck connectivity. If problems persist, contact your ISP or reset the router to factory defaults and reconfigure.
If there’s no Internet after setup, check WAN settings, reboot, and retry. If needed, reset the router and reconfigure.
Can I use my old router with a new modem?
Yes, you can reuse an older router as long as it supports current security standards (WPA2/WPA3) and is compatible with your modem. Sometimes updating firmware or enabling AP mode is enough.
You can reuse an older router if it supports current security standards; consider AP mode if you don’t need full routing features.
Should I change the default admin password?
Yes. Changing the default admin password is essential for security. Choose a unique, complex combination and store it securely.
Always change the router’s default login. It protects your network from unauthorized access.
Watch Video
Key Takeaways
- Power down before reconnecting hardware to reset state.
- Use the router’s WAN port for a clean, isolated connection.
- Check NAT topology to avoid double NAT issues.
- Secure Wi‑Fi with WPA2/WPA3 and update firmware regularly.
- Test across multiple devices to verify reliability.