Coaxial Cable for Internet Modem: Step-by-Step Guide
Learn how to choose, install, and test a coaxial cable for internet modems. Practical, step-by-step guidance for homeowners to ensure reliable home networking.

By learning how to select and install a coaxial cable for internet modem, you’ll improve stability and reduce dropouts. This quick answer covers cable type, routing, connectors, and safe installation. For best results, choose RG6 (or RG59 in older systems), avoid sharp bends, use proper F-type connectors, and test the link after wiring.
Understanding coaxial cable for internet modem
A coaxial cable is the backbone delivering your internet service from the provider to your home network. The coaxial cable for internet modem is usually RG6 for modern homes because it reduces signal loss and offers better shielding than older RG59 cables. The best practice is to route the cable away from electrical lines and sources of interference. When planning a run, consider the number of walls it must traverse, the length, and potential outdoor exposure. The Modem Answers team notes that using the correct cable type and connectors is a foundational step for reliable connectivity in a typical home setup. In homes with longer runs, higher-quality shielding and proper termination help maintain signal integrity. Throughout this guide, we’ll refer to coaxial cable for internet modem to emphasize the path your service uses.
Cable types and compatibility for internet modems
Not all coaxial cables are equal when used for internet service. The two most common options are RG6 and RG59. RG6 has lower signal loss at typical residential lengths and is generally recommended for broadband modems, while RG59 may be found in older installations. When selecting a cable, ensure you have the correct connector type—F-type connectors are standard for cable modems. If you see compression or crimp fittings, ensure you have the right tools. For outdoor runs or weather exposure, use a weather-rated jacket and seals. Compatibility with your modem and service provider matters: some providers specify certain cable specifications or maximum run lengths. Modem Answers emphasizes starting with a compatible cable and avoiding mismatched parts, as mismated components can impede performance.
Planning your run: layout, length, and safety
Planning a clean, safe run starts with mapping the route from your network outlet to the modem location. Consider doorways, stairwells, and potential sources of interference such as power cables or metal piping. Measure the total run length with a tape measure, then add extra slack at connection points for easy maintenance. If you must run outdoors or through walls, use weatherproof housings and sealants. Avoid sharp bends and kinks that could degrade signal. A well-planned route minimizes signal loss and makes future changes easier. The goal is a smooth, straight path that preserves signal quality along the entire length.
Choosing connectors and terminations
Connectors are where most beginners stumble. For internet service, F-type connectors are standard, but you must ensure you’re using the correct gender and size for your modem and splitter. If you are terminating cables outdoors, use weatherproof connectors and gaskets to prevent moisture ingress. A clean cut, proper stripping length, and a secure, finger-tight connection are essential for a reliable link. Do not over-tighten connectors, which can damage the connector or the jack. If you’re reusing existing cable, inspect ends for corrosion or wear and replace as needed to maintain performance.
Installation best practices and common mistakes
Best practices include labeling each run, testing incremental sections, and keeping the cable away from heat sources. Common mistakes involve using the wrong cable type for the service, neglecting to secure the line, and skipping a final signal test. Always power down devices before making changes to avoid arcing or static discharge. When routing cables, use cable clips or ties to prevent movement that could loosen connectors. By following best practices, you’ll reduce dropout risk and improve long-term reliability.
Testing and verifying signal quality
Testing begins with a visual inspection, ensuring connectors are clean and snug. Then perform a simple speed test and check modem synchronization status in the admin interface. Look for consistent throughput with minimal packet loss, and verify that the link remains stable across multiple reboots. If you notice degradation, re-check terminations, avoid bends tighter than 90 degrees, and test different run lengths. Regular testing helps confirm your installation preserves performance over time.
Authority sources and quick troubleshooting notes
For further guidance, consult authoritative sources on cable standards and safety. The Modem Answers team recommends reviewing official guidance from industry regulators and testing authorities before changes. If you encounter persistent issues, consider a professional assessment to rule out service problems or external interference. The Modem Answers team emphasizes documenting changes and running a final test after any modification to ensure continued reliability.
Tools & Materials
- RG6 coaxial cable(Choose length based on planned route; RG6 is standard for modern broadband.)
- F-type connectors (male/female as needed)(Ensure compatibility with your modem and any splitters.)
- Coax cable stripper(Used to expose the conductor cleanly without nicking the shielding.)
- Compression tool or crimping tool(Use the proper tool for your connector type.)
- Cable cutter(Clean cuts to ensure good connector seating.)
- Weatherproof weatherproofing (outdoor runs)(Prevent moisture and corrosion on outdoor segments.)
- Cable tester (optional but helpful)(Verify continuity and check for brief losses across the run.)
- Cable ties and cable clips(Secure the run away from heat sources and moving parts.)
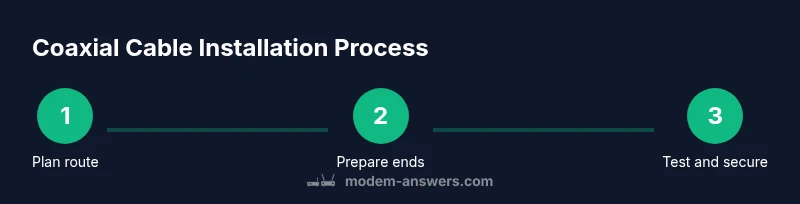
Steps
Estimated time: 45-60 minutes
- 1
Plan the run and measure length
Map the route from the service entrance to your modem location. Use a tape measure to determine total run length and add extra slack for bends and future maintenance. A well-planned run reduces the need for later rerouting and minimizes signal loss due to unnecessary length.
Tip: Plan for a clean, straight path and avoid routing through high-traffic areas to minimize wear. - 2
Prepare the cable ends
Carefully strip the outer jacket, shield, and dielectric to expose the center conductor without nicking it. Clean ends help ensure solid connector seating and reduce insertion loss. Keep cable dry and work in a clean area to prevent debris from entering the connector.
Tip: Use the correct stripping length for your connectors to ensure proper seating. - 3
Attach connectors
Slide on the F-type connectors and tighten by hand, then snug with the appropriate tool. Ensure the center conductor is fully seated and not bent. Improper seating can cause poor impedance matching and signal loss.
Tip: Do not over-tighten; overtightening can crush the connector and degrade performance. - 4
Route and secure the run
Secure the cable along walls or baseboards using clips or ties. Keep the line away from power cables and metal edges to reduce interference. Ensure bends are gradual and not sharper than 90 degrees.
Tip: Leave a little slack at entry points to accommodate future movement or changes. - 5
Connect to modem and splitter
Connect the coaxial cable from the wall outlet or splitter to the modem’s coax input. If using a splitter, ensure it is rated for your service’s bandwidth and signal levels. Re-check all connections for snug fit.
Tip: If you must power down to connect, do so safely and re-test after powering back up. - 6
Test the setup
Power up the modem and verify synchronization with the ISP. Run a speed test and monitor latency and jitter. If performance is weak, inspect connectors, re-seat as needed, and verify the run’s length and routing for potential interference.
Tip: Document results and note any recurring issues for future troubleshooting.
FAQ
Do I need RG6, or is RG59 acceptable for internet modems?
RG6 is generally preferred for modern broadband because it has lower signal loss over typical home lengths. RG59 may be found in older installations but can result in weaker performance on longer runs.
For most homes, RG6 is the safer choice for best performance.
Can I install coaxial cable myself, or should I hire a professional?
DIY installation is feasible if you follow proper stripping, connectorting, and safety steps. If you encounter complex routing or outdoor runs, consider a professional to ensure weatherproofing and compliance with local codes.
You can do it yourself if you follow the steps carefully, but professional help is wise for outdoor or complex runs.
Will a splitter affect my internet speeds?
A splitter can introduce signal loss if it’s not rated for high bandwidth. Use quality splitters and keep the number of splits to a minimum to preserve performance.
Splitters can reduce speed if they aren’t high quality or if there are many splits.
How long can a coax run be before it becomes a problem?
Longer runs tend to experience more signal loss. The practical limit depends on the cable type, splitter use, and ISP provisioned levels; avoid unnecessary length and test the link after installation.
Longer runs can weaken the signal; test after installing to ensure reliability.
What should I do if my modem won’t sync after wiring?
Check all connections, reseat connectors, and verify there are no sharp bends. If the issue persists, re-test with a shorter length or different path, and contact your provider if needed.
If the modem won’t sync, recheck connections and try a shorter run before contacting support.
Watch Video
Key Takeaways
- Plan your run before touching the cable.
- Use RG6 with proper connectors for best results.
- Secure and route the cable away from electrical sources.
- Test the connection after installation to confirm performance.